Meet the Author

Artist | Owner of Squishing Paint | Educator - Sara brings over 40 years of creative experience, a decade of specializing in acrylic painting, and a passion for guiding new artists as they embark on their own artistic journeys


Some of the links in this article are affiliate links which means that if you choose to click on them and make a purchase, I earn a small commission at no extra cost to you.
Also, as an Amazon Associate, I earn from qualifying Amazon purchases.
For more details, please read the full disclosure here.
Thanks so much for your support!
Hey there, painting pals! Are you ready to embark on a colorful journey exploring simple daffodil painting ideas? In this article, I’m excited to guide you through acrylic painting prompts paired with reference photos and matching color palettes, perfect for beginners like you.
Plus, I’ll share some awesome YouTube recommendations, handpicked to make learning fun and easy. I’ll explain why I chose each tutorial, what you’ll gain from it, and sprinkle in some extra tips to make your painting process a breeze.
Oh, and did I mention we’ll also chat about color options and sketching a daffodil onto canvas? Don’t worry if drawing isn’t your forte; knowing how to draw isn’t necessary to start painting. But hey, sometimes I like to sketch things out just to understand how the shapes fit together like puzzle pieces to create an object—kind of like dissecting the anatomy of a daffodil.
So grab your brushes and let’s dive into the wonderful world of daffodil painting! Get ready to unleash your creativity and bring these sunny blooms to life on canvas.
Drawing An Easy Daffodil
If you’re curious about diving into the world of daffodil drawing, I’ve stumbled upon a neat resource you might want to check out. This article titled “How to Draw a Daffodil Step by Step” is a detailed guide that breaks down the process of sketching a daffodil flower into easy-to-follow steps. Imagine clear instructions coupled with helpful images guiding you along the way.
And hey, if drawing isn’t your thing, no worries at all! You can totally skip this step and still create a stunning daffodil painting. But here’s the deal: drawing out the shapes may actually help you make sense of how to create a daffodil with lots of dimension. It’s like having a blueprint to see where shadows need to go in order to give your flower that awesome illusion of depth.
Color Palette Suggestions
So, daffodils, right? They’re like the sunshine of the flower world with their bright, cheerful colors. Typically, you’ll find them rocking various shades of yellow, ranging from soft, buttery tones to bold, sunny hues.
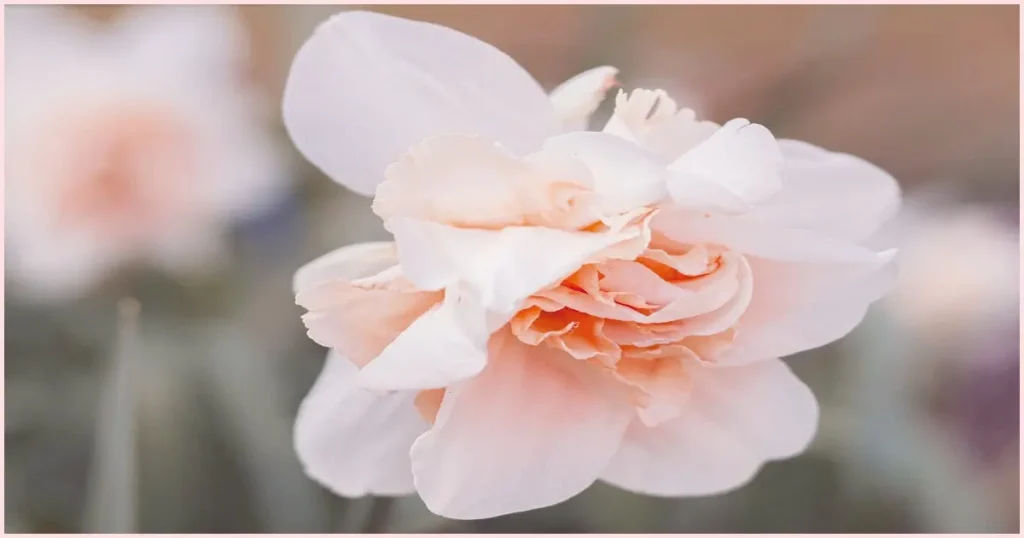
But guess what? Daffodils aren’t just sticking to the yellow scene; some rebel daffodil varieties also show off in white, cream, orange, and even pink or red shades. Yep, they’re quite the colorful bunch! So, whether you’re drawn to classic yellows or itching to explore the wilder side of daffodil hues, there’s a whole palette of options waiting for you to discover.
To get you started choosing paint colors, here are my suggestions:
- Primary Yellow or Cadmium Yellow Medium: I would recommend using a bright, primary yellow paint. This shade closely mimics the vibrant hue of daffodil petals, capturing their cheerful and sunny appearance. Look for a yellow paint that is bold and saturated, allowing you to create lively and expressive brushstrokes in your daffodil paintings. Another idea, Cadmium Yellow would work wonderfully for painting daffodils! Cadmium Yellow is a vibrant, warm yellow pigment that provides excellent coverage and opacity. It’s a popular choice among artists for capturing the bright and cheerful tones of flowers like daffodils.
- Titanium White: Essential for highlights and mixing lighter shades.
- Viridian Green, Hooker’s Green, or Sap Green: For painting the stems and leaves of daffodils, the best green paint color to use would be a bright, natural green. Look for a green pigment that closely resembles the fresh, vibrant greenery of daffodil foliage. One popular choice is Viridian Green, which is a bright, cool green that works well for capturing the verdant hues of plant stems and leaves. Alternatively, Hooker’s Green or Sap Green can also be suitable options, offering a range of warm, natural greens that complement the yellow petals of daffodils nicely.
- Cadmium Orange or Orange Yellow: For painting orange daffodils, the best orange acrylic paint to use would be a vibrant, warm orange hue. One popular choice is Cadmium Orange, which offers a bright, intense orange pigment that closely resembles the rich, warm tones found in certain varieties of daffodils. Cadmium Orange provides excellent coverage and opacity, allowing you to achieve bold and vivid colors in your daffodil paintings. Alternatively, you could also consider Orange Yellow, which is my personal favorite. Orange Yellow by Arteza Premium is a very strong pigment so a little goes a long way. It’s a beautiful rich orange color that reminds me of pumpkins.
- Burnt Umber, Raw Umber, or VanDyke Brown: For deepening the trumpet colors or painting the centers of daffodils, the best brown acrylic paint color to use would be a rich, warm brown. One excellent choice is Burnt Umber, which offers a deep, earthy brown pigment that can add depth and dimension to the centers of daffodils. Burnt Umber has a warm undertone that complements the vibrant yellow and orange hues of the daffodil petals, creating a harmonious color palette. Alternatively, Raw Umber or Van Dyke Brown could also work well for this purpose, providing slightly different shades of brown to suit your artistic preferences.
- Custom Black: If you want to add black to any one of these daffodil painting ideas, try mixing your own. You can use equal parts of Cadmium Red Medium and Viridian Green or you can take a peek at my black color mixing recipes article. I’ve got tons of ideas over there!
- Cadmium Red Medium: The best red to use if you want to play with painting daffodils with red parts, think vibrant and intense. One excellent choice for this purpose is Cadmium Red Medium. Cadmium Red Medium offers a bold, rich red pigment that closely resembles the striking hue of Riot daffodils. This color provides excellent coverage and opacity, allowing you to achieve vivid and expressive petals in your daffodil paintings. Additionally, you can mix Cadmium Red Medium with a touch of Cadmium Yellow Medium to adjust the shade and create variations in the red tones, if desired.
- Permanent Rose: To create a pink daffodil, you’ll want to use a soft, delicate pink acrylic paint. One excellent choice for this purpose is Permanent Rose. Permanent Rose offers a subtle, rosy hue that closely resembles the gentle pink tones of the Replete Daffodil. This color provides excellent coverage and transparency, allowing you to achieve a soft and ethereal appearance for your daffodil petals. Additionally, you can mix Permanent Rose with a touch of Titanium White to adjust the shade and create variations in the pink tones, if desired.
- Other Paint Colors: These paint colors aren’t a must but they do a really great job of creating beautiful daffodils.

Easy Daffodil Painting Ideas
I’ve whipped up some color palette collages using free images to add to our list of easy daffodil painting ideas. Each collage features a range of colors inspired by daffodils, giving you plenty of options to play with in your paintings. Each image in the collage has a link to the reference photo, so you can download it for yourself and use it as a guide for your masterpiece and I’ll even throw in my own recommendations for paint colors you can try for each collage.
1. Single Daffodil
Ever admired the intricate details of a single daffodil? This is a great way to really study the way shapes come together to make a daffodil.

To paint a daffodil close-up:
- Paint the Background: Begin by painting the background with a deep orange color. Start from the right side of the canvas and gradually transition to deep yellow as you move towards the left. Use broad, sweeping brushstrokes to create a softly blended gradient effect.
- Sketch the Daffodil: Lightly sketch the outline of the daffodil on the canvas using a pencil. Focus on capturing the basic shapes of the petals and the center of the flower.
- Paint the Center of the Flower: Using a deep golden yellow paint, fill in the center of the daffodil. Start with the bowl-shaped center and gradually add darker orange tones towards the tip of the center. Use a small brush to create the ruffled rim of the center.
- Paint the Petals: Paint the petals of the daffodil with white paint. Use an oval or tear drop shape for each petal, making sure to leave space in the center for the yellow center to show through. Blend the white petals gently into the yellow center where they meet, with a more sunny yellow to keep the definition between the petals and the center.
- Add Details to the Petals: Once the white paint has dried, add details to the petals to give them texture and dimension. Use a small brush to add subtle shading and highlights, focusing on the curves and edges of each petal. A pale blue or purple would work great for the shadows.
- Paint the Stem: Finally, paint the stem of the daffodil with dark brown paint. Start from the bottom of the flower and paint a slender stem extending downwards towards the bottom of the canvas. Use thin brushstrokes to create a smooth, tapered shape.
For this painting, I would suggest the following colors:
Background:
- Burnt Umber
- Burnt Sienna
- Yellow Ochre/Oxide
Daffodil Stem:
- Burnt Umber
- Mars Black
Daffodil Center:
- Cadmium Yellow Medium
- Cadmium Red Medium
Daffodil Petals:
- Ultramarine Blue
- Titanium White
- Extra: Add a bit of Cadmium Yellow Medium and Cadmium Red Medium to Ultramarine Blue to dull it down a bit, if needed
2. Daffodil Bouquet
Want to paint a bunch of daffodils in a vintage pitcher?

- Paint the Background: Begin by painting the background with a soft white color. You can choose to paint it in a very pale gray or pale cream if desired. Apply the paint evenly across the canvas using broad brushstrokes to create a smooth background.
- Sketch the Bouquet: Lightly sketch the outline of the bouquet and the pitcher on the canvas using a pencil. Focus on capturing the overall shape and arrangement of the daffodils within the vintage pitcher.
- Paint the Pitcher: Start by painting the vintage pitcher with a very pale seafoam blue color. Use a medium-sized brush to apply the paint, covering the entire pitcher evenly. Leave some areas slightly lighter or darker to create subtle variations in color.
- Paint the Centers of the Daffodils: Using a sunny yellow paint, fill in the bowl-shaped centers of the daffodils.Use a small brush to create the ruffled rim around the edge of each center. We’ll do more work on the centers in a little bit.
- Paint the Petals: Paint the petals of the daffodils with pale yellow paint. Start at the base of each flower and work your way outwards towards the tips of the petals. Allow the pale yellow to transition to a slightly more vibrant yellow where they meet the center, but ensure the center remains the brightest part of the flower. Use gentle brushstrokes to create the delicate shape of each petal.
- Add Details to the Centers: Once the centers are dry, add details to enhance their depth and texture. Use a darker yellowy-green paint to accentuate the deepest part of the center, adding small dots of yellow to mimic the sunny yellow of the center.
- Final Touches: Step back and assess your painting. Make any final adjustments or additions to enhance the overall composition.
If this is one of the daffodil painting ideas you’d like to try, here are my recommended colors:
Background (Mixed together):
- Titanium White
- Burnt Umber
- Ultramarine Blue
Pitcher:
- Titanium White
- Ultramarine Blue
- Burnt Umber (as needed to dull the blue mixture down)
Daffodil Stems:
- Hooker’s Green
- Yellow Ochre/Oxide
Daffodil Petals:
- Yellow Ochre/Oxide
- Titanium White
- Burnt Umber (add slowly to create a warm grey)
- Ultramarine Blue (add slowly to create a warm gray)
Daffodil Centers:
- Cadmium Yellow Medium
- Burnt Umber
- Titanium White (as needed)
3. Daffodil Seascape
Imagine a vast seascape with daffodils swaying in the breeze.
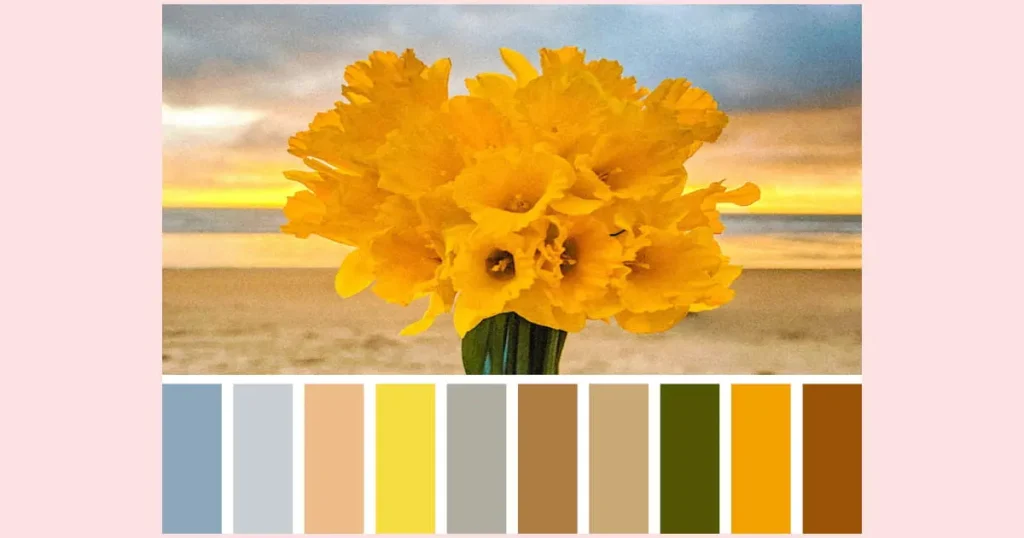
- Paint the Background: Start by painting the background with a sunset sky. Use warm tones such as oranges, pinks, and purples to create the dramatic colors of the sunset. Blend the colors together softly to create a gradient effect, with darker colors towards the top of the canvas and lighter colors towards the horizon.
- Add the Ocean and Beach: Paint the ocean below the sunset sky using shades of blue and purple, with hints of orange and pink reflecting the colors of the sunset. Add texture to the water by painting gentle waves and ripples. Paint the sandy beach with shades of tan and brown, leaving some areas lighter to represent patches of sand. Feel free to add some sea grass, here and there, for added interest.
- Sketch the Bouquet: Lightly sketch the outline of the tightly packed bouquet of daffodils on the canvas. Position the bouquet in the center of the image, with the stems extending downwards towards the sandy beach. Focus on capturing the overall shape and arrangement of the daffodils.
- Paint the Centers of the Daffodils: Using a deep brownish-yellow paint, fill in the few centers of the daffodils that are showing. Add a few dots of the same color as the petals. Use a small brush to create the intricate details of the centers, including the ruffled edges and dots.
- Paint the Petals: Paint the petals of the daffodils with deep yellow paint. Leave a few teardrop-shaped petals showing around the edges of the bouquet. Add highlights of vibrant yellow where the setting sun is hitting them, creating a contrast with the darker areas of the petals. Use gentle brushstrokes to create the ruffled edges of the petals.
- Paint the Stems: Finally, paint the stems of the daffodils with dark green paint. Start from the bottom of the bouquet and paint the stems extending downwards and off the bottom of the canvas. Use thin brushstrokes to create the slender stems, with darker shades of green towards the base of the bouquet.
For this painting idea, I would try using the following colors:
Sky:
- Ultramarine Blue
- Cadmium Red Medium
- Cadmium Yellow Medium
- Titanium White
Ocean:
- Ultramarine Blue
- Cadmium Red Medium + Cadmium Yellow Medium (to dull down the blue)
- Titanium White
Sand:
- Burnt Sienna
- Burnt Umber
- Titanium White
Daffodil Stems:
- Hooker’s Green
- Cadmium Yellow Medium
Daffodil Petals:
- Cadmium Yellow Medium
- Titanium White
Daffodil Centers:
- Burnt Sienna (mixed with a bit of the yellow)
- Titanium White (just a bit)

YouTube Painting Tutorial Recommendations
Explore these tutorials of specially curated daffodil painting ideas for beginners. These step-by-step acrylic painting tutorials were selected for different reasons but all are completely doable. Some are more challenging than others but that doesn’t mean you can do it. Painting is a skill that is learned so all you need is a willingness to try, patience with yourself and the process, and a healthy dose of curiosity.
Daffodil Floral by The Art Sherpa
I think this is a great starting point if you’re interested in learning how to paint daffodils. It’s a fairly short tutorial that focuses on simple shapes and you only need five colors, plus black and white. Cinnamon is a fantastic teacher and just plain ol’ fun to watch!
What You’ll Be Practicing:
- Mixing paint to make a whole different color
- How to sketch a very basic daffodil shape
- Painting reeds on a dark background
- Painting daffodil leaves
- Painting teardrop shaped petals
- How to paint a white daffodil using various mixes of burnt sienna, blue, yellow, and white
- Easily paint a ruffled edge with a round brush
- How to use different lengths of brush strokes to imply directionality of the flower
- A bit of wet-into-wet painting
Extra Tips:
- If you don’t have a Filbert Brush, I would recommend using a round brush
- If you’re not crazy over having a dark background, consider using one of the colors listed in the tutorial, or a mix
- To dry between layers/steps, use a hairdryer on the lowest heat setting and sweep it over the canvas continuously until dry
How to Paint Daffodil Flowers by JM Lisondra
I chose this daffodil step-by-step painting tutorial because he uses a limited palette so you can learn how to mix up whatever color you need. Plus, you only need a few different sizes of flat brushes and either a liner or small round brush.
In addition, this is a fantastic tutorial to learn how to paint shadows. Flower petals are somewhat transparent so you’ll have different colored shadows and different intensities, as well. All you need is a little patience for painting a lot of layers but, I promise, this is sure to give you a better understanding of how shadows work in the painting process.
Although the artist doesn’t go through how to paint the background, check out my “extra tips” section below to get a general idea of how to paint it. And, the link to the reference photo is broken in the description under his video but I found the exact daffodil reference photo on Pixabay. Feel free to download it to use as a traceable. You can check out my article that shows you how to make a traceable from any image, if you aren’t sure how to do that.
What You’ll Be Practicing:
- How to paint all yellow daffodils
- Making a great shadow color for yellow
- Using a shadow color to create separation of petals
- How to place shadows and highlights to create dimension and depth
Extra Tips:
- For the background, start with phthalo blue in the upper left corner and paint it down diagonally a third of the way. Then add a bit of yellow about a third of the way down and just right of the center point (This will turn the phthalo blue into a nice green. To the right of where you added the yellow, add a bit of red. Blend both the yellow and the red areas by using a light hand and a haphazard brush stroke. Continue painting the rest of the canvas using phthalo blue mixed with a bit of black. Feel free to add a bit of yellow in there too to create a super dark green. Remember, the background should be messy looking so it doesn’t take away from the daffodils
- When the artist paints the daffodils white, make sure to leave a small space where your lines are so you don’t lose them
- Don’t be afraid to use your fingers to blend your shadow colors together (I’m a big fan of this!)
Springtime Melody by Michelle the Painter
Lastly, on our list of daffodil painting ideas for beginners, we’ve got one that is so happy and bright. I love how this tutorial incorporates music with the feeling of spring!
I thought you guys might like this one because it’s got a surreal edge to it without distracting from the landscape feeling of the composition.
What You’ll Be Practicing:
- Painting the sky by loading different colors of paint on the brush and blending on the canvas
- Drawing lines to create perspective
- Painting thin lines
- Painting stems and leaves
- How to create color diversity in your daffodils by loading the brush with multiple colors
- Thinking about where to place your brush strokes so the petals follow the direction of the trumpet center
- Creating hard edged shadows on the piano keys
- Creating dimension and depth on the daffodil petals using shadows
Extra Tips:
- If you don’t have Chrome Yellow, try Cadmium Yellow Medium
- If you don’t have Green Oxide, try Hooker’s Green Hue
- When blending the sky, use a firm touch to lay the paint down then switch to a light touch to blend it out
- If you have trouble painting thin lines, try using acrylic paint pens
- Michelle is using the edge of her easel to keep the side of her hand out of the wet paint
- If you find that the color combination used for the shadows on the petals a bit dark, try mixing a bit of red in with your yellow and then add a tiny bit of brown
- I would take the extra time to add highlights to the stems (It just makes for a more finished painting)

Final Thoughts On Painting Daffodil Art
In wrapping up this exploration of daffodil painting ideas, I’ve covered everything from sketching a daffodil (don’t sweat it if drawing’s not your forte!) to playing with vibrant color palettes and diving into some fun painting concepts. Plus, I’ve shared some top-notch YouTube tutorials to guide you along the way, complete with my very best extra tips to make your painting journey smoother.
Remember, the key is to enjoy the process and not get too hung up on perfection. With each brushstroke, you’re not just painting a daffodil—you’re painting your own unique expression of creativity. So, embrace the joy of painting, experiment fearlessly, and watch your skills blossom. The more you paint, the more you learn, and the more your paintings will flourish.
Happy painting, and may your canvas be forever bright with the beauty of daffodils!