
Meet the Author

Artist | Owner of Squishing Paint | Educator - Sara brings over 40 years of creative experience, a decade of specializing in acrylic painting, and a passion for guiding new artists as they embark on their own artistic journeys


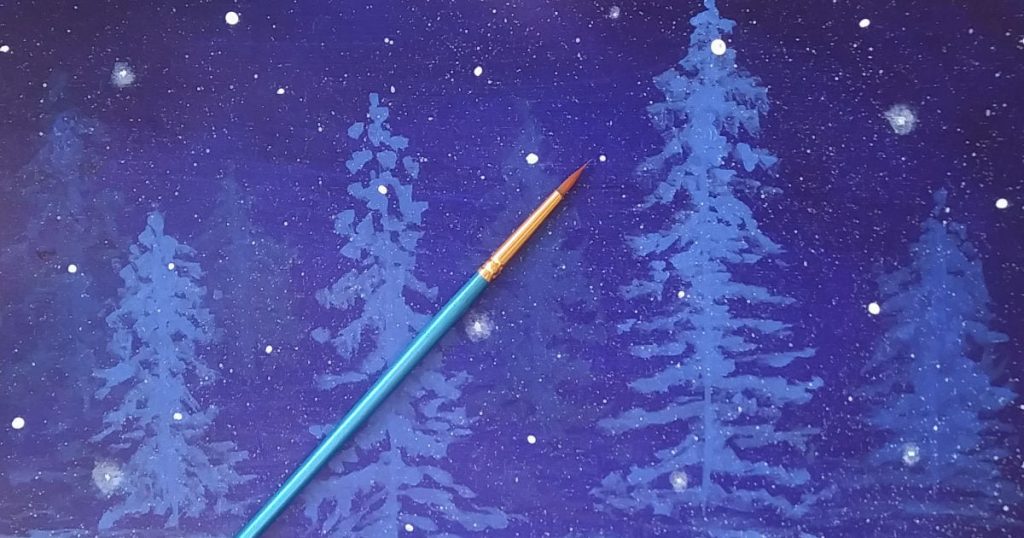
Painting Snowflakes is Super Fun and Totally Beginner-Friendly!
Hi there, friends! Today, I want to share with you my favorite way to paint a snowflake in detail and I’m also going to show you two additional methods to paint those pretty flakes.
By the end of this article, you’ll have three techniques to add to your painting skill arsenal and you’ll also know how to paint a snowflake depending on how close you want the snowflake to appear. Let’s get painting!
The #1 Way To Paint Distant Snowflakes
To paint distant snowflakes or a snowstorm, you’ll make fast work of it if you use the splatter method.
This is the most popular technique for painting snowflakes that you’ll see in painting tutorials because it’s super easy and fast.
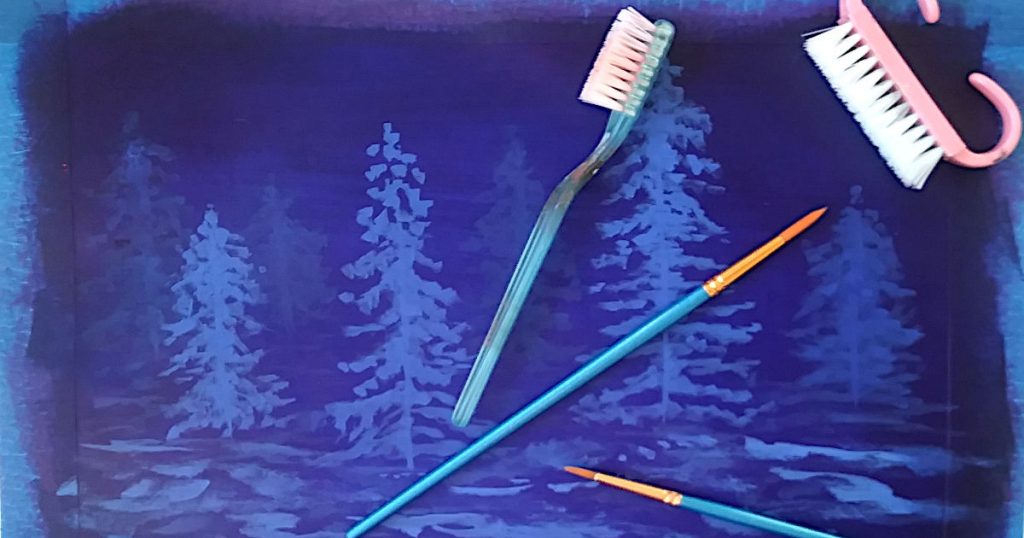
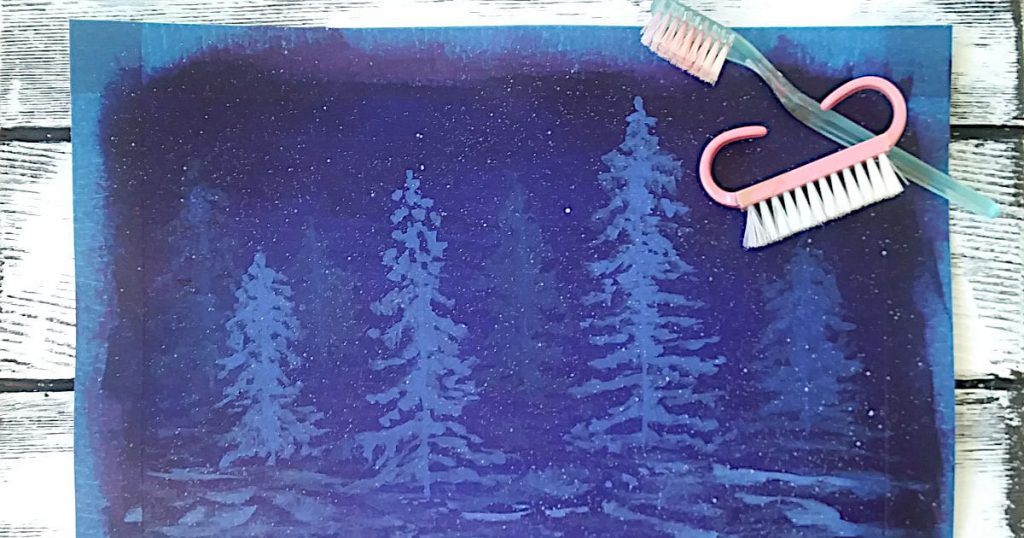
To make lots of quick snowflakes, you’ll need either an old toothbrush (I don’t recommend using your partner’s toothbrush….they may not be very impressed…) or even a nail brush.
Guys, this is so easy! Just dip your toothbrush or nail brush in some clean water, tap off the access, and mix the water into a very small amount of white paint.
Next, run either your thumb or your index finger along the bristles while you angle it toward your painting. Most people suggest using your thumb but I find using my index finger feels less awkward.
As you can imagine, this technique can get very messy so make sure to wear old clothes and use something to protect your surroundings.
Also, I highly suggest that you practice on a piece of scrap paper first so that you can see what angle you need to hold the brush so that the splatters don’t end up on the ceiling instead of your painting.
Using a piece of scrap paper will also help you to determine if your paint is too thinned out or not thinned out enough.
If your paint is too thick, you’ll have a hard time getting it to splatter. If it’s too thinned down with water, you run the risk of getting weirdly shaped snowflakes. That said, if you do end up with a few mutant snowflakes, don’t worry! The next way to paint a snowflake will completely disguise those alien white orbs.
Extra Tip: This technique is fantastic for painting distant stars so it’s a great skill to have for painting galaxies and starry night skies.
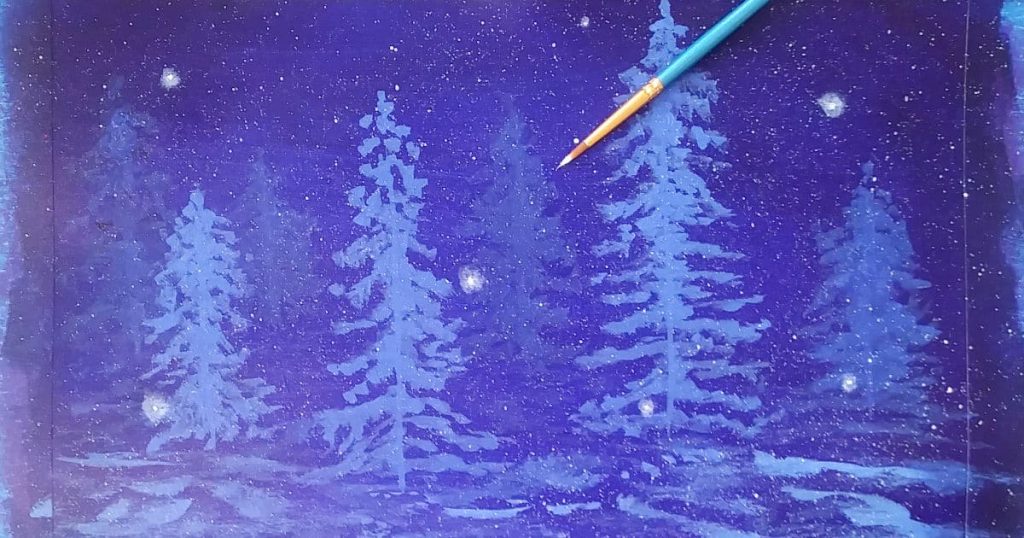
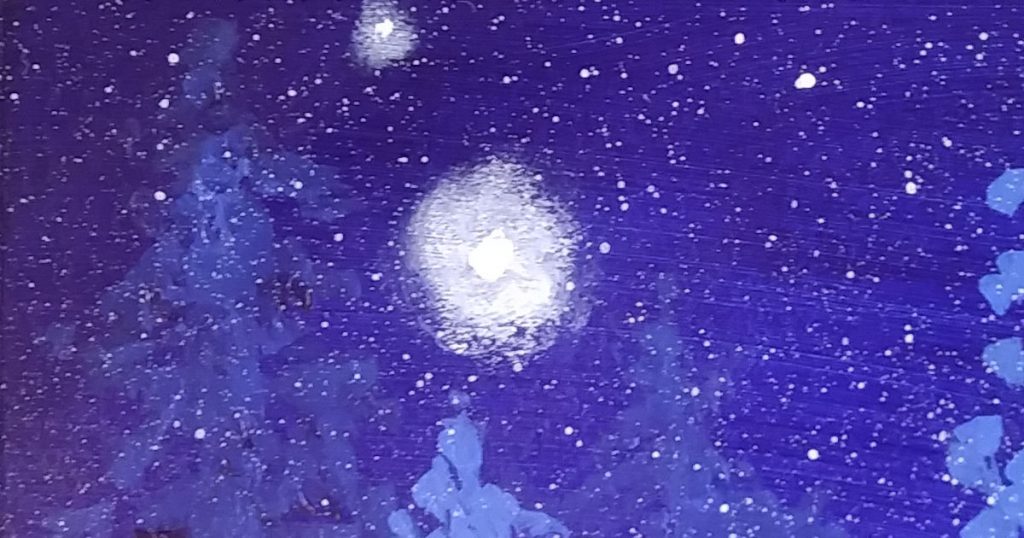
Simple Smudge and Dot Painted Snowflakes
Let’s say you end up with a few wonky looking snowflakes and you’re starting to think that the splatter way to paint a snowflake is not for you. Wait! I’ve got a fix for that!
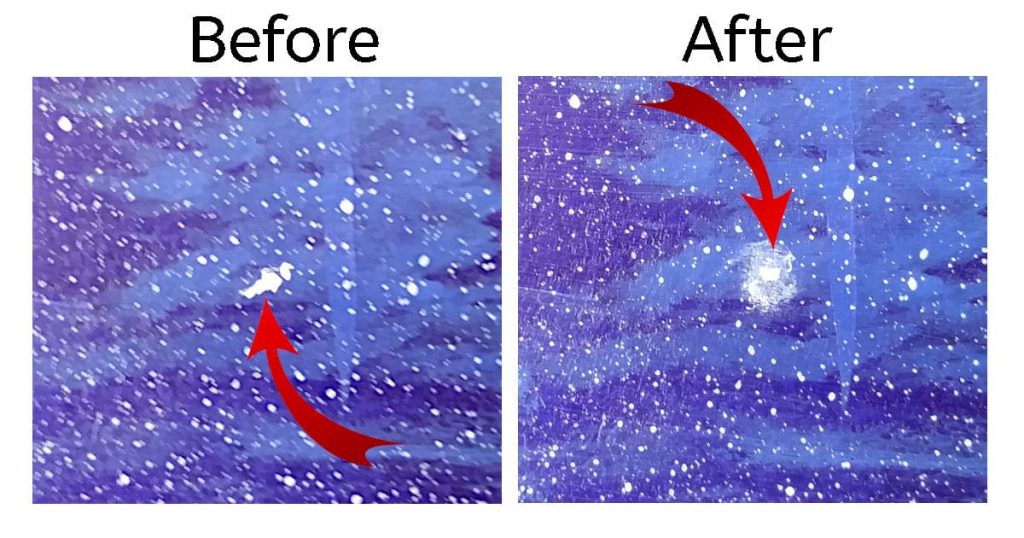
All you have to do is use your finger to smear the paint in a circular motion and then add a dot of white paint to the center of the misty looking orb. It will make these snowflakes look like they’ve got a bit of a glow.
You can also go ahead and use the handle end of a paintbrush to make larger snowflakes. Just dip the handle of your brush in a bit of white paint, dab it once on a piece of paper towel, and dot it onto your painting.
This is a great way to paint a snowflake that looks closer to you than the smaller splatter flakes. It will help push those tiny snowflakes back and give a nice depth to your winter painting.
Extra Tip: The misty snowflake technique is also great for painting fireflies in a summer nighttime landscape painting. Just make the misty part more yellow than white.
Painting A Large Detailed Snowflake
This is my favorite way to paint a snowflake because you can make a whole piece of art out of it! You can use different colors, make it more whimsical, and add to the basic shape to create a unique snowflake every time.
Plus, when you add a few large snowflakes to a painting you create a focal point while pushing everything else further into the distance.
This is also great if, after trying the misty way to paint a snowflake, you decide you’re not a fan. You can transform those misty snowflakes into something more detailed.
Let’s take a look at how to make a statement snowflake, step-by-step.
- Using a larger round brush, make the same design as our misty snowflake only, this time, make it larger. This will be the center of your snowflake.
- Switch to a small round brush and paint a cross using paint that’s has a bit more water added to get nice thin lines
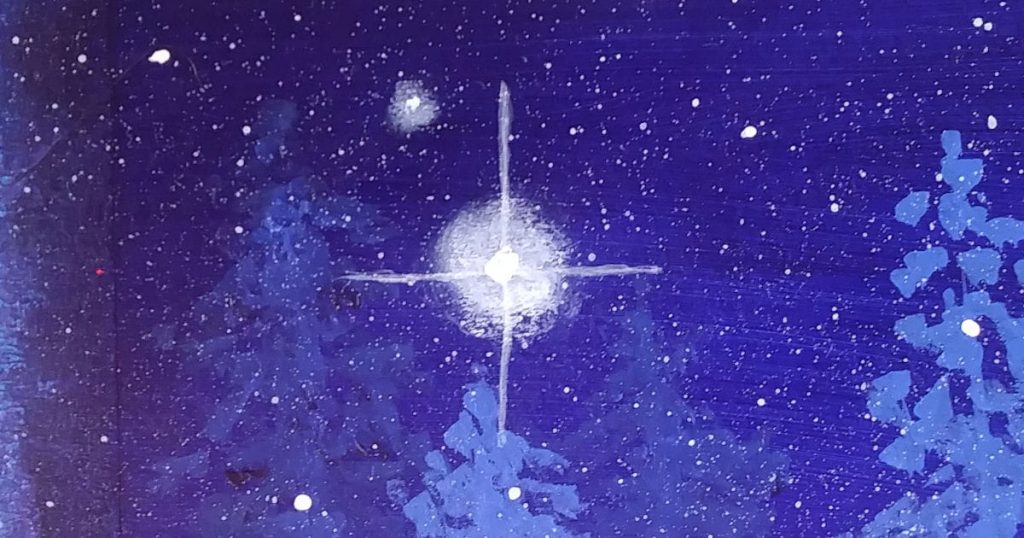
- Next paint an X
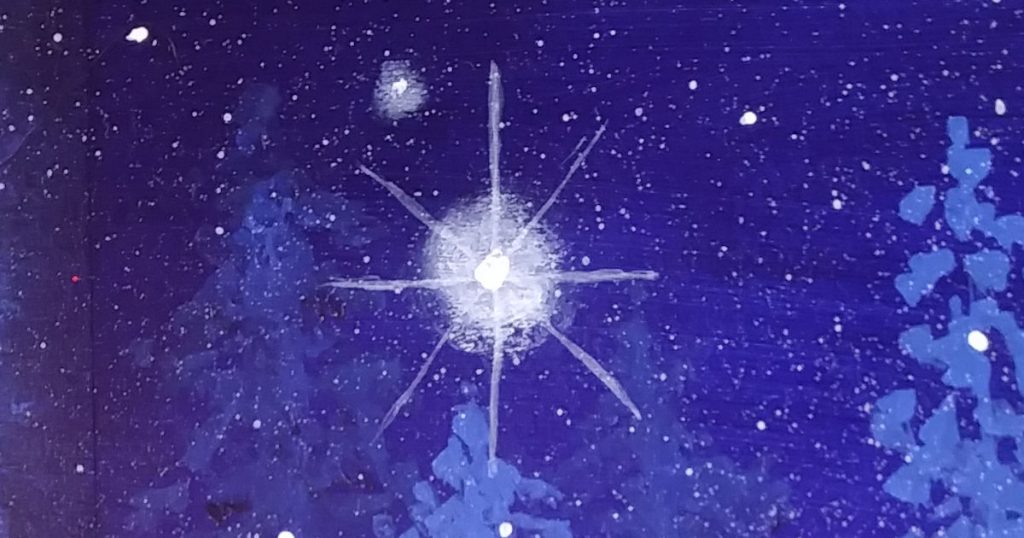
- Dip your small round brush in the white paint and place three small dots on each line (you can decide to put these wherever you like but I started near the outside of the misty part of the snowflake center, then I put a dot near the end of each line, and, finally, I placed a dot evenly spaced between the two)
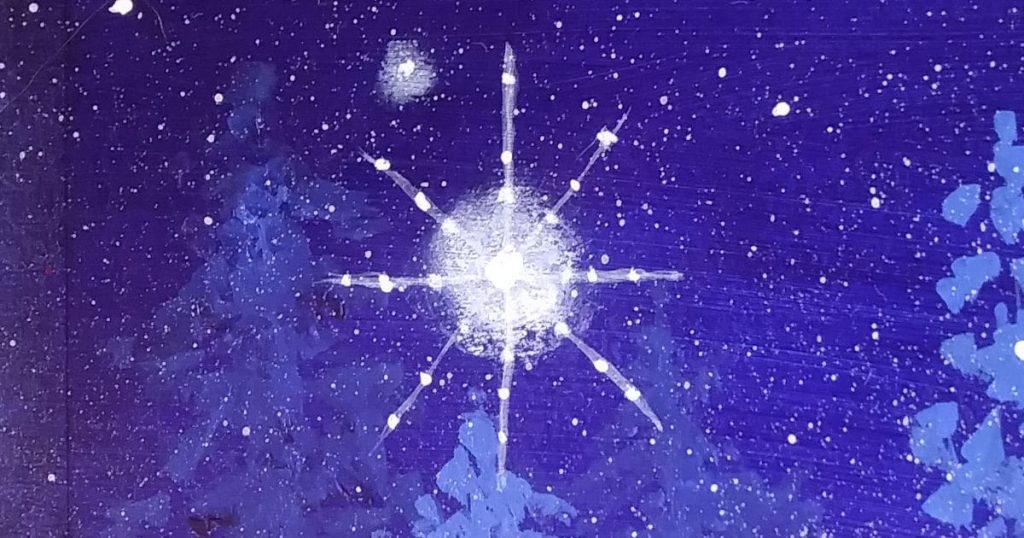
- Lastly, using thinned out paint, hold your brush as close to the bristles as you can (to give you lots of control) and paint small angles lines on either side of every dot (V shapes)
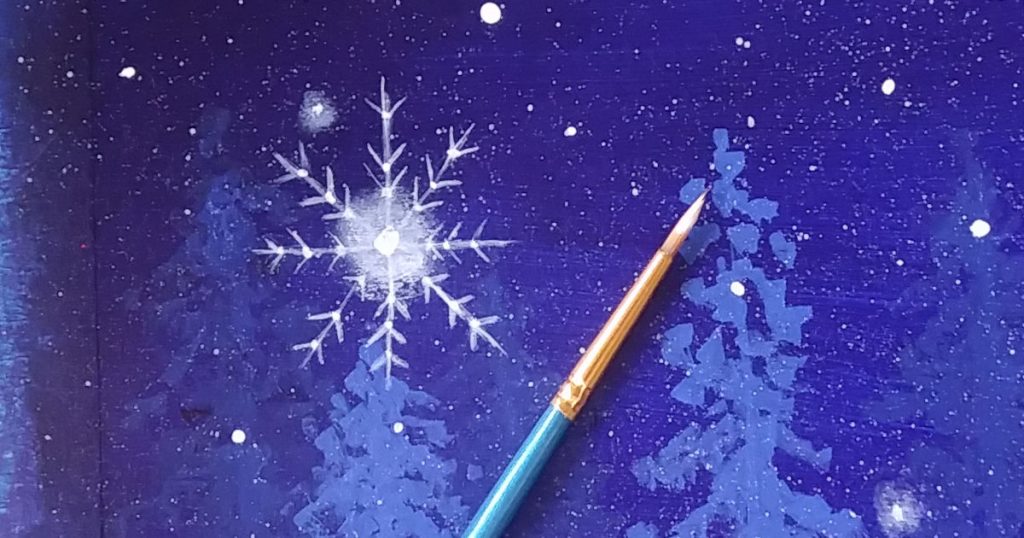
Of course, you could paint small Vs on each line and then place a dot where the line and the V meet. You could also add more or less Vs, more or fewer dots, really, whatever you want! That’s the beauty of this particular way to paint a snowflake.
Extra Tip: These would look amazing with a bit of iridescent glitter sprinkled over the top while the paint is still wet, like I did in my tutorial showing how to paint a vintage holiday card.
Bonus Way to Paint a Snowflake Using a Template
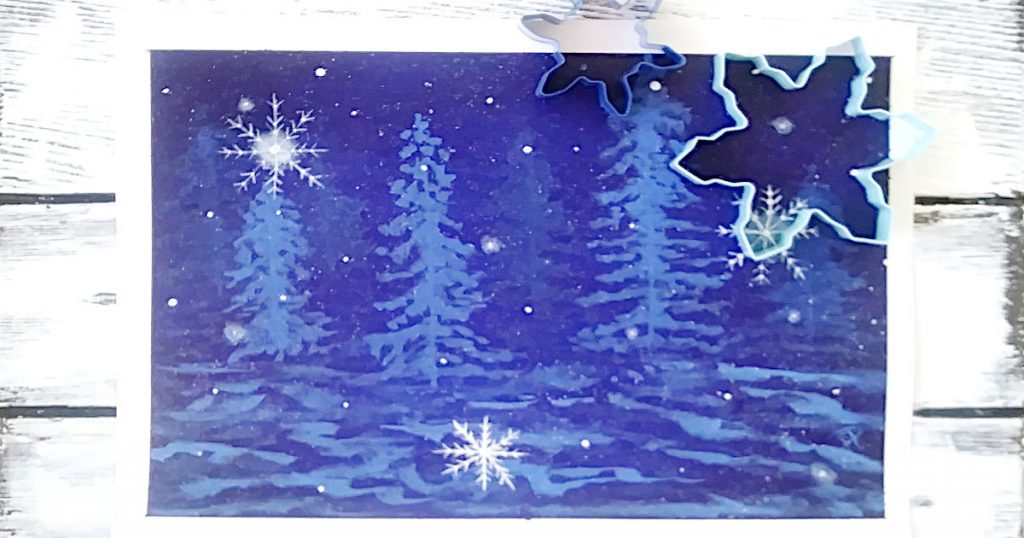
Another very simple way to paint a snowflake is to use a cookie cutter as a template. You can find a variety of snowflake cookie cutters in many different stores, especially during the holiday season.
A couple of ways to use a cookie cutter as a snowflake template:
- You could trace the whole thing, paint it in whatever color you choose, and then create a more intricate design inside the solid colored snowflake using white paint or any paint color you like
- You could lightly trace the snowflake cookie cutter and then use the perimeter to help guide where you want to put your lines, dots, and V shapes
By the way, using a cookie cutter as a template, or any template for that matter, is NOT cheating! Artists use all kinds of different objects to get the job done. There is no need to freehand if you don’t feel comfortable doing so. The goal is to always have fun and positively challenge yourself to learn new skills, m’kay?
YouTube Recommendation For Painting Snowflakes
“How to Paint a Snowflake” by Relay Art is a fantastic video tutorial for painting a very detailed snowflake. There are no vocal instructions to this step-by-step but her visuals are just right for teaching you how to use this technique.
I chose this video for you because it’s short, she uses a lot of dabbing (so perfection is not a must), and the end result makes a beautiful painting all on its own. If you have a snow lover in your life, this would be the perfect gift for them. Make sure to check it out!
Final Thoughts on Painting Snowflakes for Beginners
Each way to paint a snowflake has a specific purpose and all three work very well together in the same painting.
Splatter flakes are great for painting storms or distant snowflakes. They’re also great for painting stars!
Misty snowflakes give the flakes a special little glow and work well as a way to push the smaller snowflakes back into the distance.
Finally, the large detailed snowflakes are an easy way to create a focal point if you don’t want to add too many elements that could distract the viewer from the main purpose of your painting, the beautiful snowflakes!
Remember to keep your paint thinned down with more water than you would normally use, practice on scrap paper first, and have fun using unusual tools to create your snowy winter wonderland!