Meet the Author

Artist | Owner of Squishing Paint | Educator - Sara brings over 40 years of creative experience, a decade of specializing in acrylic painting, and a passion for guiding new artists as they embark on their own artistic journeys


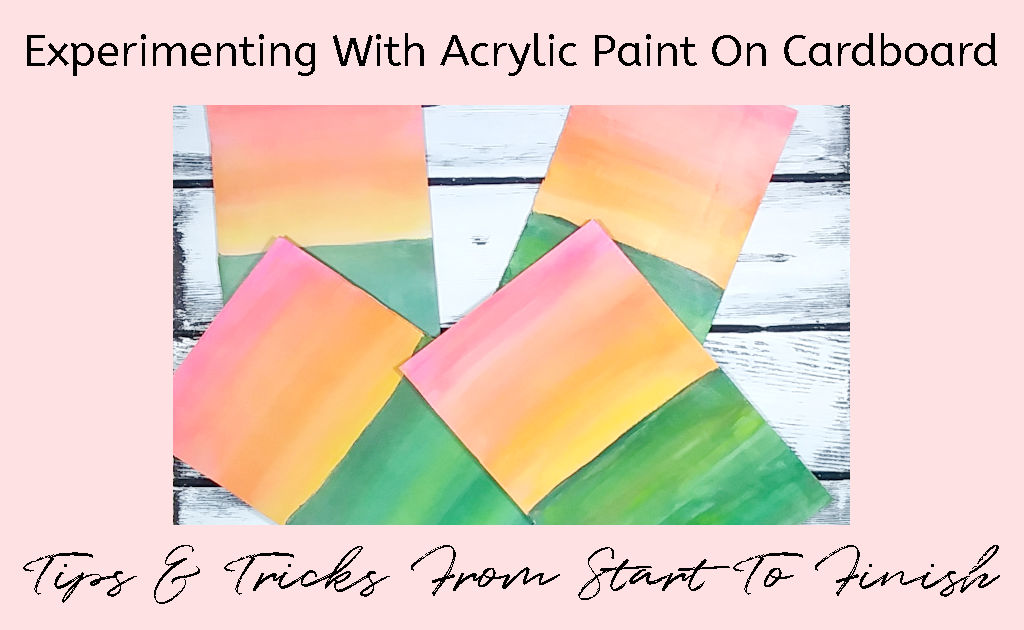
Wondering if you can use acrylic paint on cardboard? Yes, you can, but there are a few things you need to know before getting started.
As an artist who paints almost exclusively on cardboard and paper, I will share with you everything I’ve learned so you can succeed right out of the gate!
Using cardboard as your painting surface is really easy, and it will save you some moolah, so how can you go wrong? Let’s do this!
Why Use Acrylic Paint On Cardboard
So, we’ve already established that painting on cardboard is going to save you money, but here are some other excellent points in favor of a cardboard “canvas”:
- Easy to keep a ready-to-use supply
- Space-saving
- Uses recycled material
- Takes the pressure off because it’s just cardboard and not a more expensive canvas
- Can be cut to size for easy framing
- Easy to send in the mail (and less expensive)
- Great way to practice before committing to canvas
- Excuse to have a yummy snack
- Repeat after me, “saves you money”
Corrugated Cardboard vs. Paperboard Cardboard
There are different types of cardboard that you can use as a painting surface.
During my research, I noticed that most artists talk about how to paint on corrugated cardboard, but they’re totally overlooking the best cardboard ever!
Paperboard is fantastic for using acrylic paint on cardboard. It’s what cracker, cereal, and cookie boxes are made from.
Corrugated cardboard is thick and is the most well-known cardboard. It’s used for moving boxes, cat litter boxes, and houses large products you buy, like TVs.
eHow had a great little article to check out if you’re interested in learning more about the different types of cardboard.
We’re going to do a bit of experimenting with corrugated cardboard going head-to-head with paperboard in just a bit, but first, let’s take a little look at the pros and cons of using either as a surface for artwork.
Paperboard Cardboard:
Pros:
- Thin
- Sturdy
- Smooth surface
- Easy to frame
- Reuses a recyclable material
- Easy to find
- Space saving
Cons:
- Only comes in smaller sizes
- Needs to be prepped before use
- Can warp
Corrugated Cardboard:
Pros:
- Easy to find
- Uses a recyclable material
- Can come in larger sizes
- Space saving (compared to stretched canvas but not as good as paperboard)
Cons:
- Can warp
- Has ridges
- Surface is rougher than paperboard
- Dents easily
- Needs to be prepped before use
- Harder to cut nice clean edges
Experimenting With Acrylic Paint On Cardboard: Paperboard Vs. Corrugated Cardboard
So, everyone is saying “use corrugated cardboard” and “use gesso,” and I’m sure they have great reasons. But, let’s not just take their word for it; let’s get our mad scientist on and see for ourselves. We’re about to leave no stone unturned, friend!
The Experiment Details
The Goal:
- Can you use white paint to prep the cardboard for painting?
- Are you only able to use thin layers of paint on cardboard?
- What happens when you have different thicknesses of paint on the cardboard?
- Does one type of cardboard warp more than another?
- Any other observations?
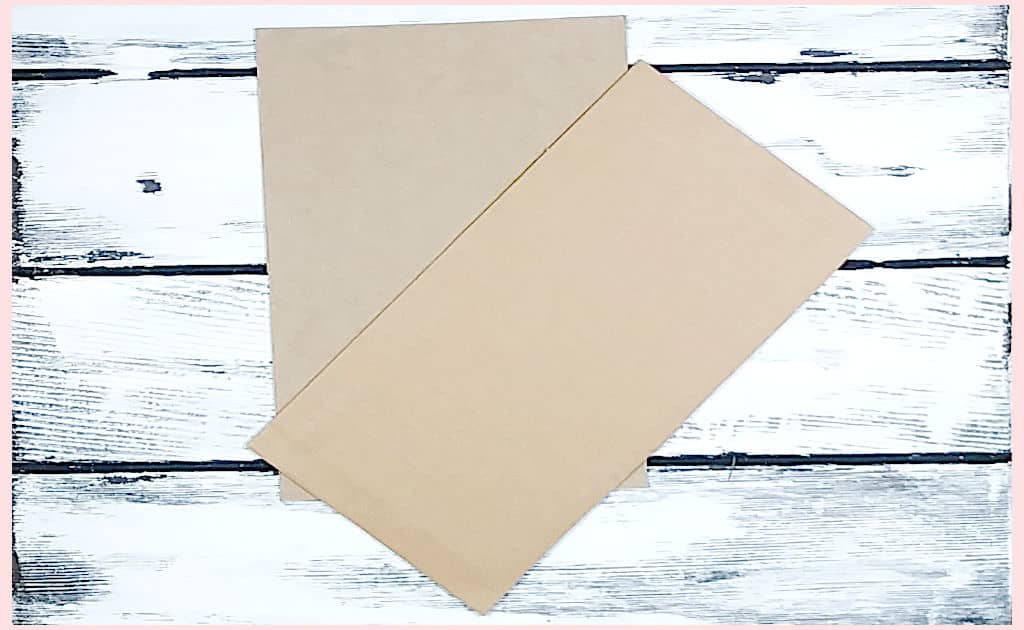
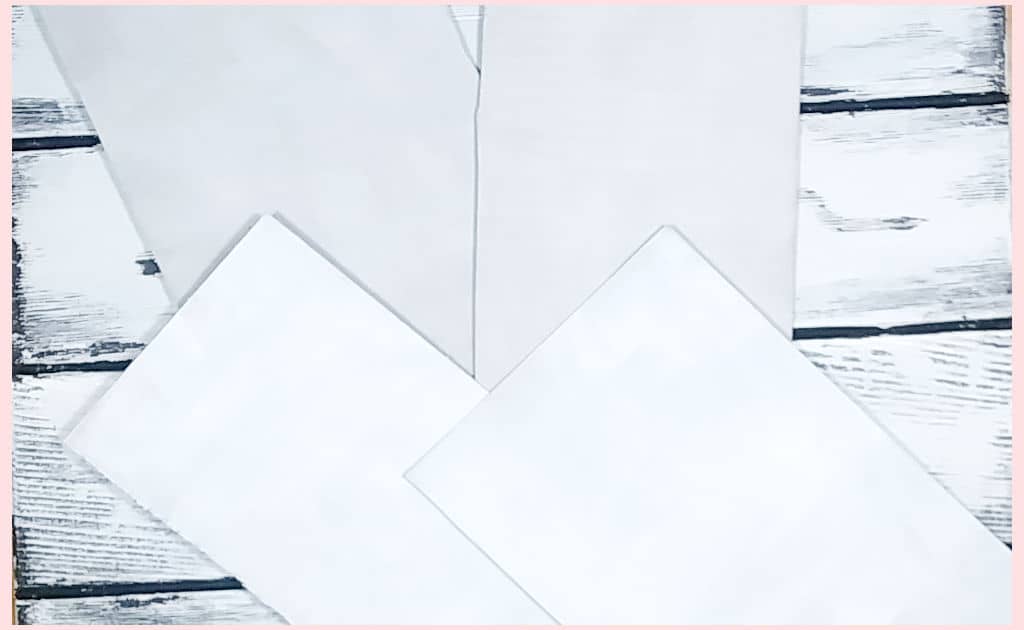
In both stages (prep and painting) of the experiment, we’ll use 4 pieces of cardboard.
Two pieces of cardboard will be corrugated, and the other two will be paperboard.
One of the pieces of corrugated cardboard will be prepped with gesso, and one piece will be prepped with white paint. We’ll do the same thing with the two pieces of paperboard.
Then, we’ll paint all four pieces of cardboard using different thicknesses of paint. Some of the painting will be done as usual (damp brush), but we’ll also use a palette knife to add thick paint to the art experiment.
Prepping the Cardboard for Acrylic Paint
You absolutely should prep your surface when using acrylic paint on cardboard. Not only will it help to make your colors stay vibrant, but it will cut down on the absorption of the paint into the cardboard.
That being said, I’ve seen many artists saying that you NEED to use gesso so the cardboard will last longer….Ummmm, I’ve never used gesso on my cardboard paintings and they’ve turned out just fine.
In fact, I have a cardboard painting that was painted years ago and it’s still going strong. I’ve also got a painting that a friend gave me way back when I was 15 and that one is still just as great as it was when I received it…..decades ago.
Let’s take a closer look at the differences between using white paint and gesso on both corrugated cardboard and paperboard.
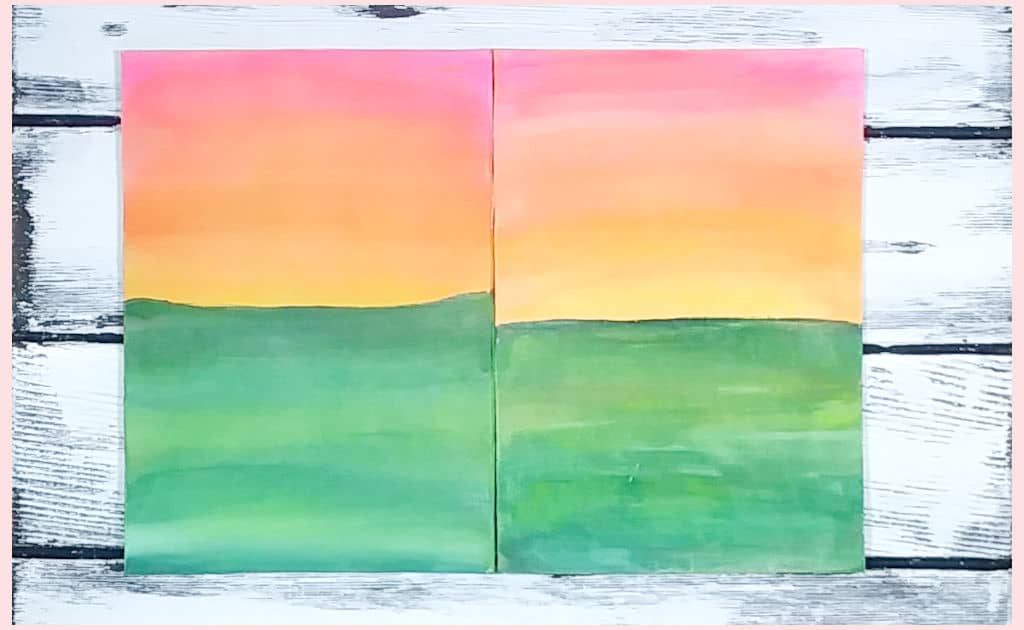
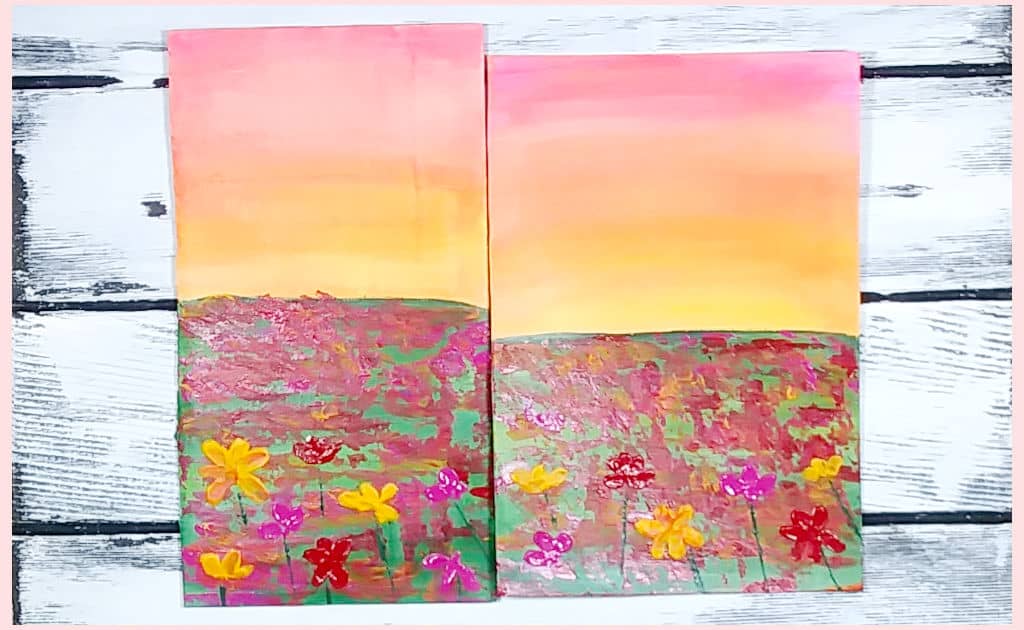
Foreground: Corrugated cardboard and paperboard painted with white acrylic paint
The first thing I noticed was that I could get better coverage with the white acrylic paint on cardboard. This was true for both the corrugated cardboard and the cracker box paperboard.
As for warping, I found that the corrugated cardboard didn’t warp with either gesso or white paint. However, the cracker box cardboard warped with both but worse with the gesso.
That said, the white paint and the gesso-painted cracker box cardboard flattened back out after drying.
Because gesso leaves a gritty feel, I did go ahead and lightly sand it with a fine grit sandpaper so it was more equal to the white painted cardboard.
Painting with Acrylics on Cardboard
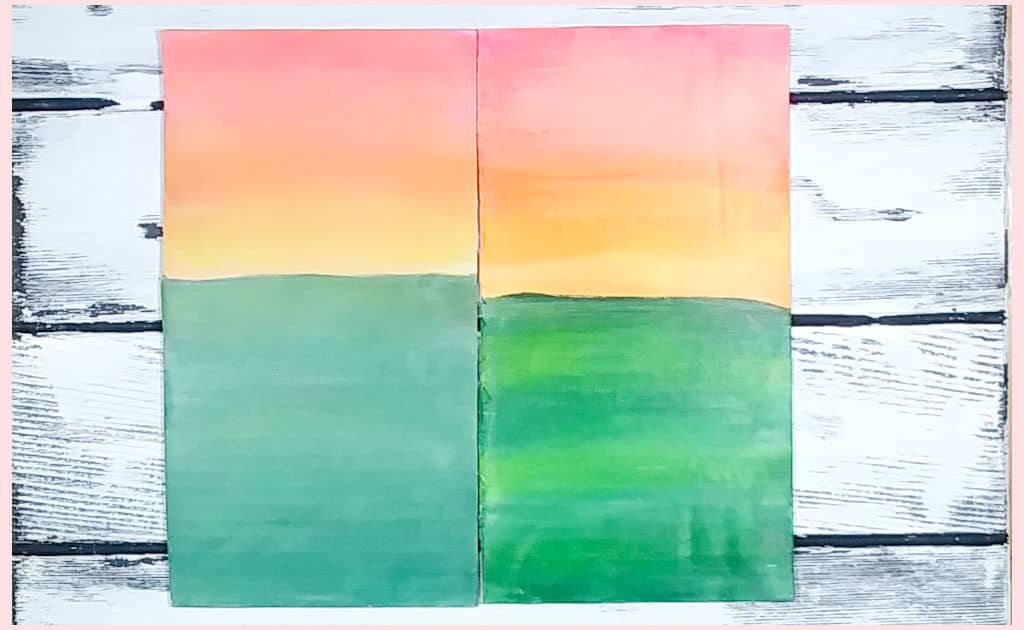
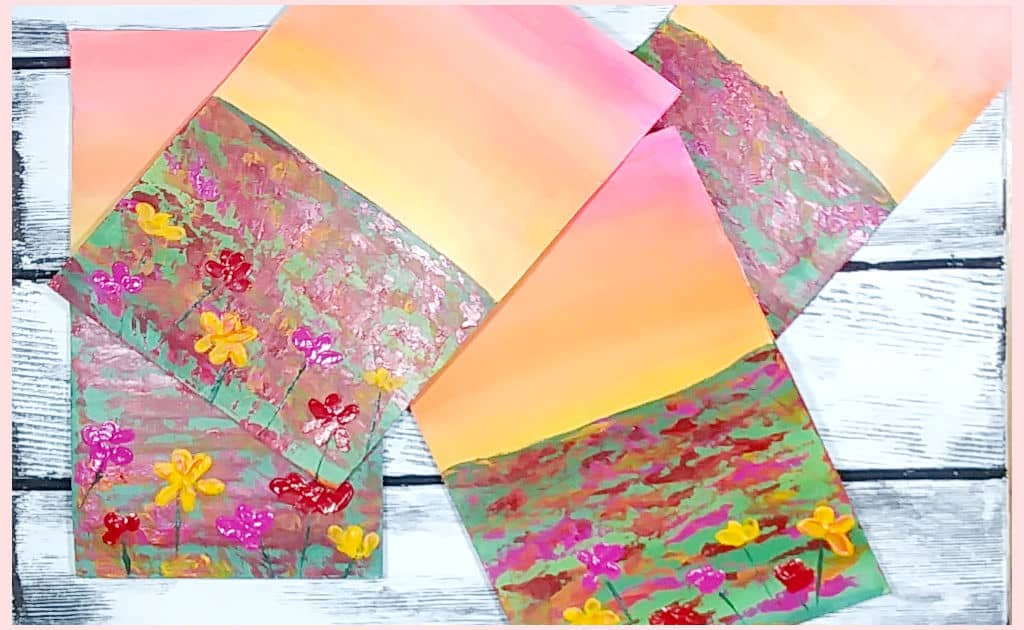
All four pieces of cardboard will be painted the same (or as close as possible) to control the experiment.
I’ll be painting the sky and green field as I normally would, just using a damp brush and loading the paint onto my paintbrush from my palette. After the background is dry, I’ll finish by using a palette knife for the flowers.
When all four paintings are dry, we’ll see what differences there are. First, between the gesso and the white paint, and second, we’ll examine the differences between the painted corrugated cardboard and the cracker box paperboard.
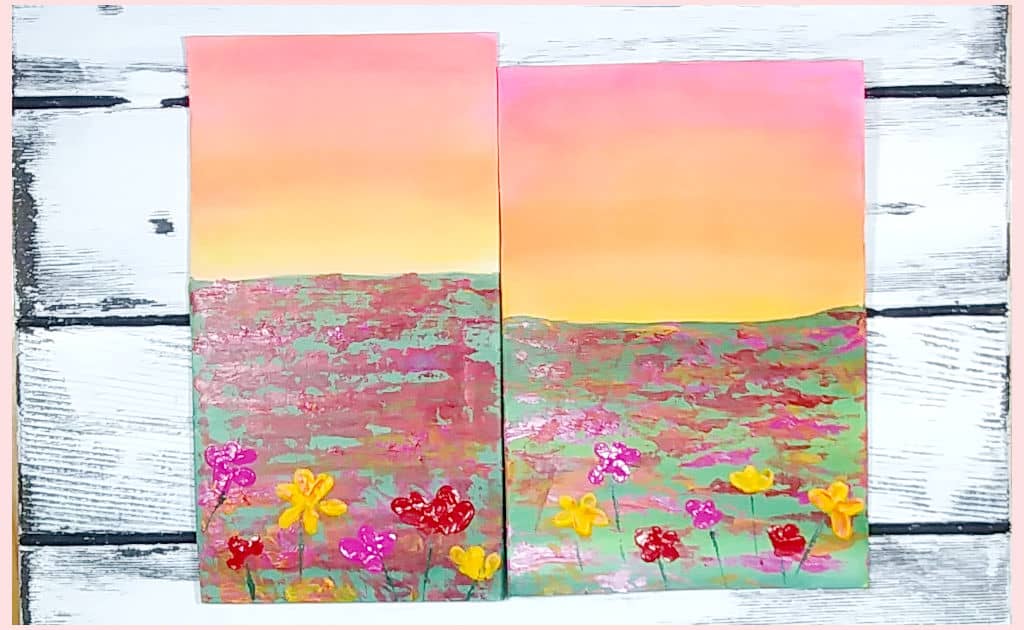
Right: Paperboard primed with white paint
Right: Corrugated cardboard primed with white paint
Front Row: Paperboard paintings (left is primed with gesso and right is white paint)
Left: Primed with gesso
Right: Primed with white acrylic paint
Left: Primed with gesso
Right: Primed with white paint
Q & A: Final Observations
Let’s go back and look at the original questions we were trying to answer by experimenting with acrylic paint on cardboard.
Q: Can you use white paint to prep the cardboard for painting?
A: Absolutely!
Q: Can you only use thin layers of paint on cardboard?
A: Nope! You can do whatever you want.
Q: What happens when you have different thicknesses of paint on the cardboard?
A: Different thicknesses don’t seem to affect the cardboard. If the painting curled or warped, it did so on all corners, not just where the thicker paint was.
Q: Does one type of cardboard warp more than another?
A: Yes. Paperboard warps more than corrugated but I’ll show you an easy fix.
Q: Any other observations?
A: All of the observations are listed below so that you can come to your own conclusions about using acrylic paint on cardboard.
Before Adding The Abstract Flower Field:
- Colors are vibrant on all cardboard except for the corrugated cardboard with gesso
- Much easier to control the outcome of the painting when using paperboard (I was going for a streaky effect)
- Corrugated cardboard shows the ridges and any dents/imperfections
- Both types of cardboard (whether with gesso or white paint) stayed relatively flat
- Corrugated cardboard stayed flatter than paperboard (but not by much)
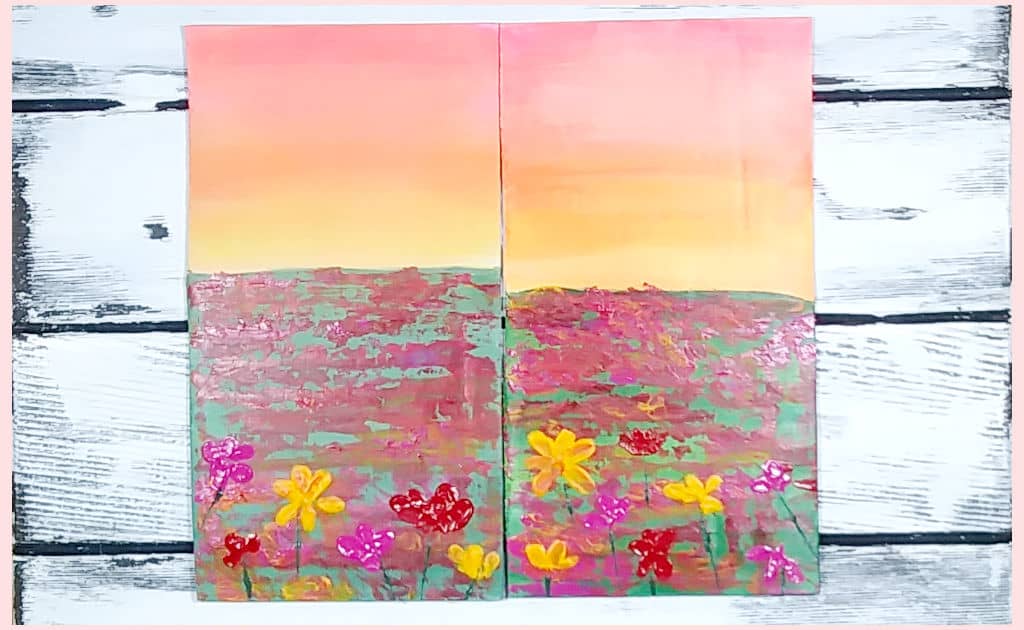
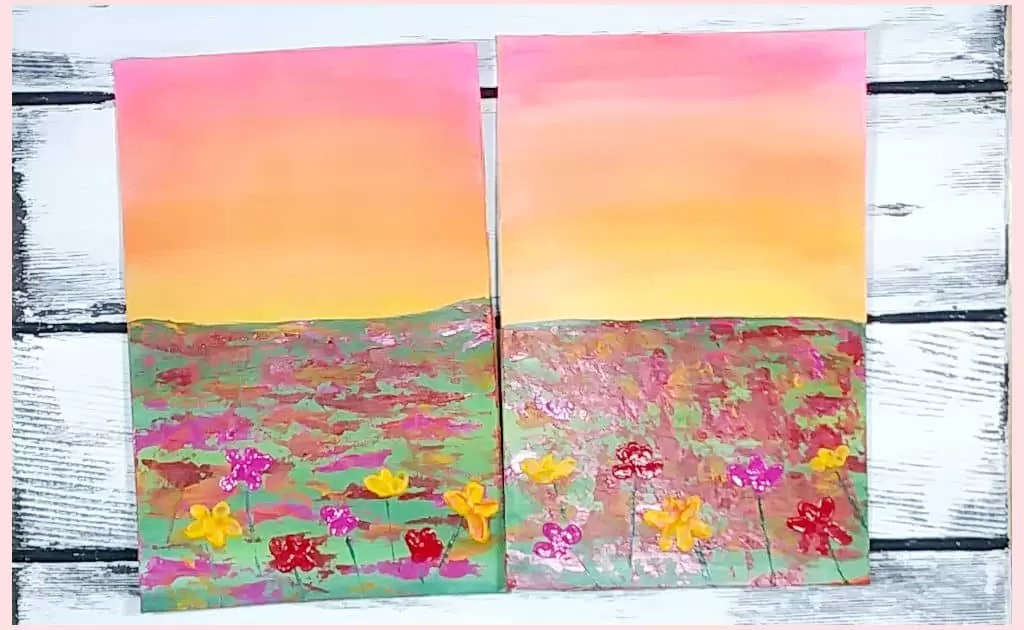
After Adding The Abstract Flower Field:
- Paperboard with gesso had the most curling at the edges
- Corrugated didn’t warp at all
- Paperboard was easier to handle because it doesn’t dent
- Paint colors are slightly more vibrant on paperboard
- They all took roughly the same amount of time to dry
- Paperboard looks better because of the ridges in the corrugated cardboard
Personally, I think I’ll stick with the paperboard. Paperboard gives a nice smooth finished product. It doesn’t seem to soak up as much white paint or gesso, you get the expected amount of vibrancy, and it doesn’t dent if you need to use a firm hand to keep your painting from moving around.
As for using gesso, I think that will come down to personal preference. If you have it on hand, you don’t mind going through the extra step of sanding, you have the budget for it, or you’re just curious, go for it!
That said, in my experience, using white paint instead of gesso will get you a beautiful result, so don’t feel like you have to have it if you can’t afford it.
How To Seal A Cardboard Painting
To varnish acrylic paint on cardboard, you have the same options as any other type of acrylic painting. You can use a spray varnish or a brush-on varnish. It’s entirely up to you.
You can also go without varnish and, instead, mat and frame your cardboard painting. Just make sure to use a framing mat between your artwork and the glass so that the acrylic paint doesn’t stick to the glass.
Why Your Cardboard Painting Is Warped And How To Fix It
Warping is an issue when you use acrylic paint on cardboard. It happens when the cardboard paper gets wet and then dries at different times due to how uneven the layers of paint are on the surface.
However, fixing a warped painting isn’t a complicated process at all, and I’m going to share my method of flattening cardboard with you.
Keep in mind, I’ve only used this method on paperboard. That said, I can’t say for sure how well this technique would work on corrugated cardboard. I suspect that it may dent the corrugated cardboard so try it at your own risk.
To flatten a warped piece of painted cracker box cardboard:
- Make sure your painting is dry
- Lay the painting, face down, on a piece of parchment paper on a flat surface
- Lightly mist the back of your cardboard painting with water
- Put some sheets of paper towel over it
- Place something heavy (stacked books) on top of your painted cardboard sandwich
- After 24 hours, check your cardboard painting and see if it has flattened
- If you need to, repeat the whole process with clean parchment and paper towel and, again, check after 24 hours
If you’re planning on framing your cardboard art, don’t worry if it’s not 100% flat. You’re good to go as long as it is flattened enough to fit in a picture frame!
Extra Tips:
- Recycle those food boxes! It’s kind of nice knowing that you’re upcycling a plain ol’ box
- There should be no writing on the surface you plan on painting
- make sure the surface is free of dust
- gesso (or paint with white paint) for the brightest colors
- If you’re worried about the longevity of your artwork, you could apply an acrylic medium before using your acrylic paint on the cardboard surface
- If you decide to use gesso, lightly sand it for a smooth work surface
Putting It Altogether
And, there you have it! You now have an excellent idea of what can happen when slapping acrylic paint on cardboard.
We’ve talked about why it’s a great idea to paint on cardboard, whether or not you need to use gesso, the differences between paperboard and corrugated cardboard, and how to fix any warping.
It’s pretty awesome that your nearest supply of painting surfaces is as close as your kitchen!
So what do you think? Would you prefer painting on paperboard or corrugated cardboard?
Make sure to share this article with your artist friends trying to stay creative on a budget!
When you have a bend in the box for the cardboard bends down to make sides for a lid is there anyway you came make those disappear so there is no crease in the picture?
Hi, there. I typically only use the back and front of the boxes where there aren’t any serious bends. That said, you may be able to smooth out the bend marks by using an acrylic heavy gel medium to level the surface. I’ve never personally tried this but that’s what I would do. Thanks for visiting!