Meet the Author

Artist | Owner of Squishing Paint | Educator - Sara brings over 40 years of creative experience, a decade of specializing in acrylic painting, and a passion for guiding new artists as they embark on their own artistic journeys


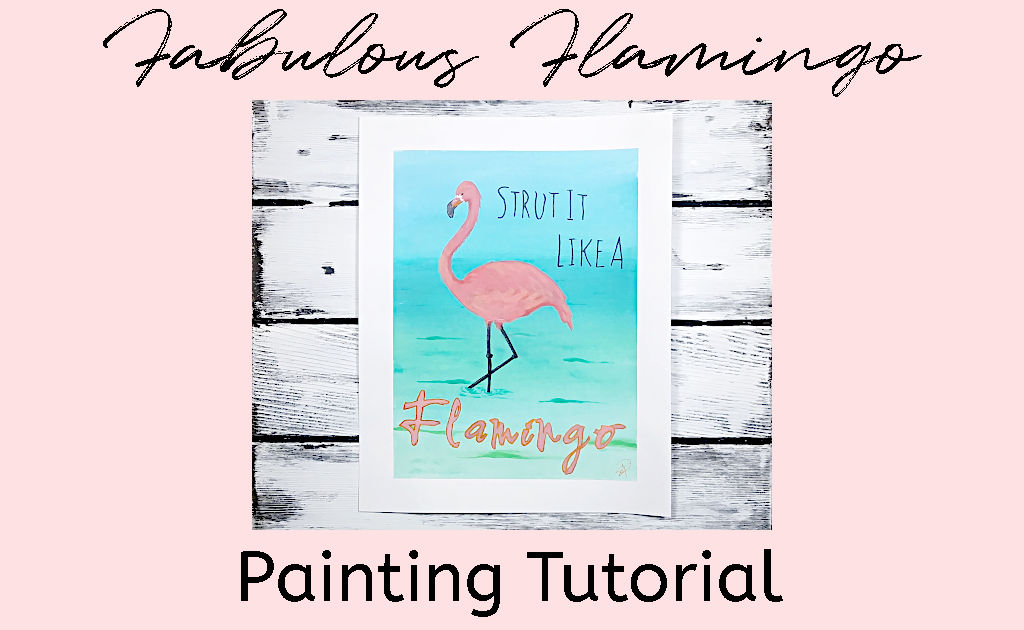
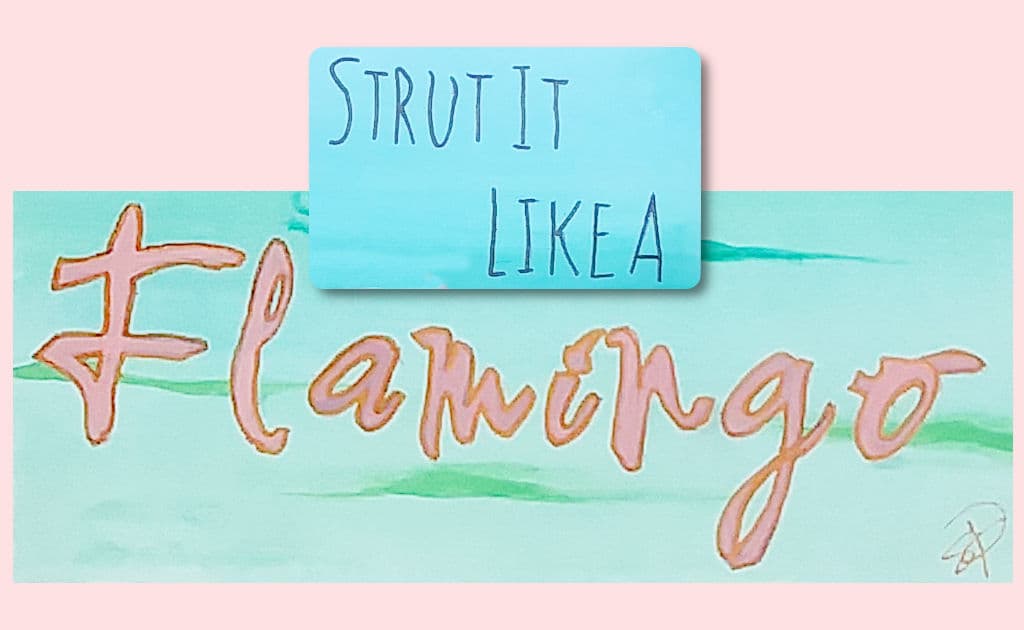
I’m really excited to share this easy flamingo painting tutorial for beginners! Flamingos symbolize summer fun, stand out in a crowd, and are wonderfully awkward with their gangly legs.
Personally, I love them and have named them my official animal spirit guide. I mean, they do awkward with some major style, am I right?!
Without further ado, let’s channel our inner flamingo and get painting!
Fun & Fabulous Flamingo Acrylic Painting Roadmap

This flamingo painting tutorial is super easy, and you’ll learn some really cool skills! Besides blending, you’ll practice handwriting with paint, how to paint thin lines, and do some paint mixing.
Feel free to use different colors, add things to the background, add more details, whatever you want!
Materials List:
- Canvas
- Free Flamingo Printable
- Cadmium Yellow Medium
- Phthalo Blue
- Phthalo Green
- Quinacridone Magenta
- Titanium White
- Mars Black
- Small Round Detail Paintbrush
- Small Round Brush (slightly larger than the detail round)
- Flat, Angle, or Bright Paintbrush (somewhat smaller than the width of your flamingo’s neck)
- Tracing Paper (or parchment paper)
- Tape
- Watercolor Pencil, Chalk, Graphite Pencil, or Charcoal Pencil
- Ballpoint Pen
- Jar of Clean Water
- Paper Towel (or old rag)
Step One: Paint the Background
This flamingo painting tutorial is fully customizable, so don’t feel you have to do exactly what I’ve done.
If you find the turquoise combination that I’ve used a bit too vibrant for you, I’ve got an article that shows you how to mix a custom turquoise color to get the right shade.
If you don’t want to go the turquoise route, you might consider grey, beige, yellow, or just keep it plain white.
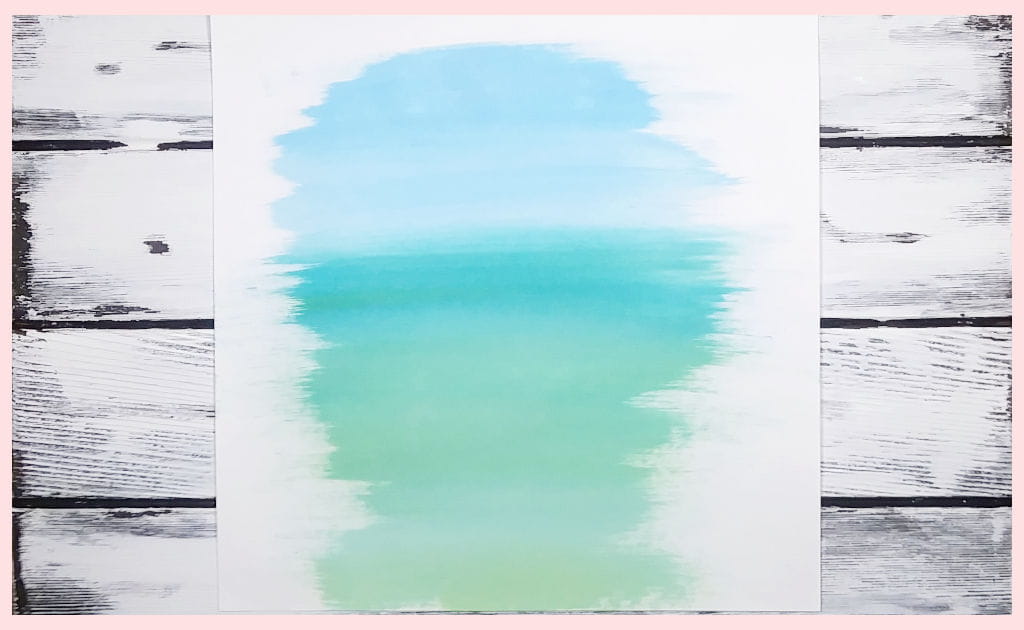
To paint the background:
- Add a bit of phthalo green to phthalo blue and lots of white (you want this first color to be more blue than green and also darker than the other colors you’ll add in a bit)
- Don’t overload your brush with paint (you want it to cover the bristles but not so much that you have blobs of paint on it)
- Gently mist your canvas so your paint will blend easily
- Starting at the top, brush the blue paint on horizontally
- Add a bit more green and white to the mix you just used and start painting just below where you ended with the first paint color (spray a tiny amount of water on your canvas as you go to keep the paint moving easily)
- Paint up into the blue section you just painted, lightening your touch as you go (I like to think of this step as “sweeping” the paint on
- Next, add more green, white, and a tiny bit of cad yellow medium and repeat step 5
- Mist a bit more water on your canvas if you find that your brush feels like it’s pulling or skipping
- As you make your way to the bottom of the canvas, keep adding more white and yellow to the previous mix
Extra Tips:
- If you find that the transition between each color is a bit too obvious, let it dry and repeat the whole process but make sure that you aren’t using great big gobs of paint, your canvas is misted with water, and you’re using light pressure
- To blend acrylics, you need to work quickly so make sure to use a brush that’s large enough to get the job done
- If you are having a hard time with this blending method, take a look at my article that teaches you a few different ways to blend acrylic paint
Step Two: Paint A Few Waves
Next, let’s add some interest and motion to our background with just a bit of wave action. Our flamingo painting will cover most of this, so don’t get fussy about it. A wave here and there will be sufficient.
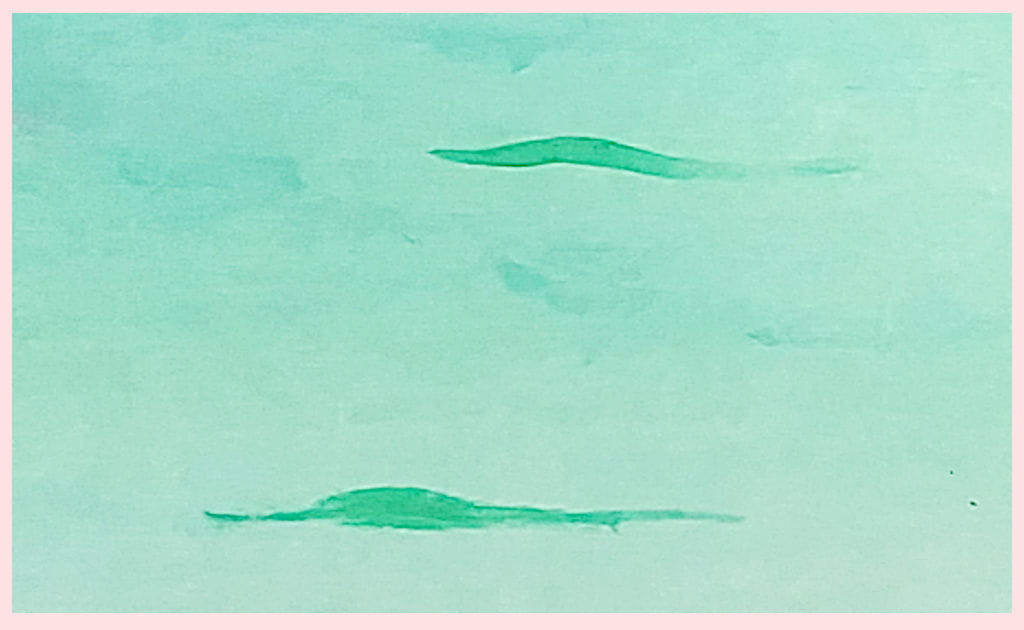
How to paint the waves:
- Mix up a tiny bit of paint color that’s just slightly darker than the color that’s about a third down from the top of your canvas
- Dip a small round detail brush into your water jar and shake off any access (we want the paint to be pretty fluid so that it’s easy to make skinny and tiny lines
- With a feather-light touch (your brush should just barely be touching the surface), paint a few short lines here and there
- Continue to work your way down the canvas with this technique, slightly building up the pressure you’re using on your brush until you reach a spot where the color lightens
- Repeat the process using a paint color that’s slightly darker than the color you’ll be painting over
- As you make your way to the bottom of the canvas, you’re going to start with a feather-light touch on each wave, then add some pressure (so your line gets thicker), and then lighten the pressure again until your brush lifts off the canvas (so it goes thin, thick, thin for each wave
- When you get near the bottom of the canvas, switch to a slightly larger round brush, so it’s easier and faster to make your waves
Extra Tips:
- If you make a wave that’s too big or just looks funky to you, rub it out with a finger (this will blend it into the background and just give the water a bit of depth))
- Keep your waves as horizontal as possible, or your background won’t look much like the ocean
- Feel free to skip this part altogether if you’re nervous about doing it (Our main goal is to have fun, right?!)
Step Three: Transfer the Flamingo Printable
To make this flamingo painting tutorial as easy as possible, I’ve created a printable for you to download and print. You can get the flamingo printable here.
Now, this printable is sized for a regular piece of paper, but if you were hoping to paint this DIY flamingo on a larger canvas, it’s totally doable. I wrote an article that shows you step-by-step how to enlarge an image for tracing, so check that out.
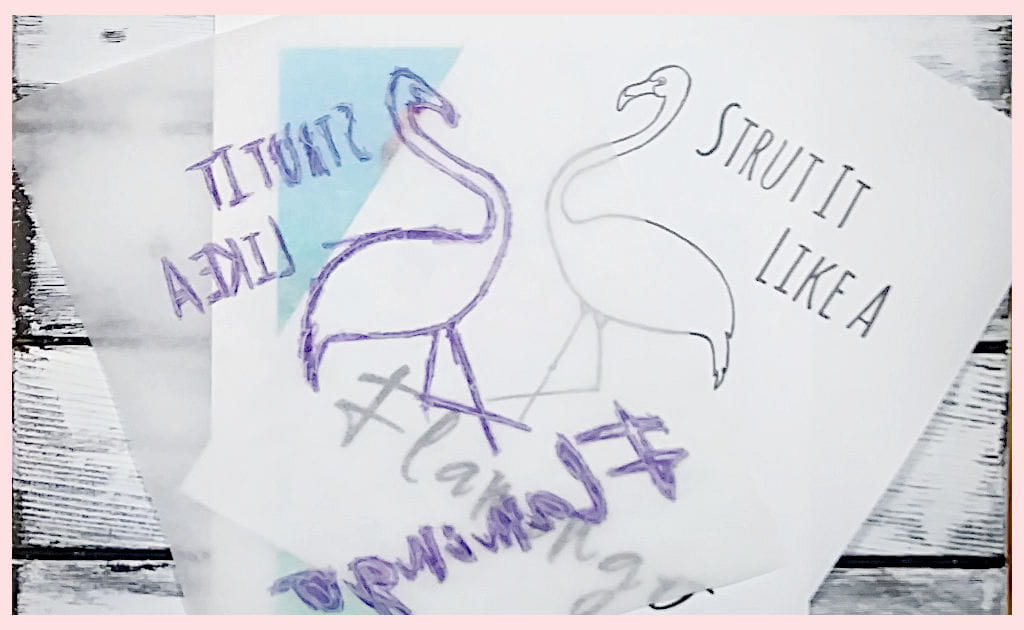
To transfer the flamingo printable onto canvas:
- Follow the link above to download the image
- If you want to enlarge, do that now
- Print off the flamingo image
- Using tracing paper (or even parchment paper/baking paper), trace the printed image
- Flip the tracing paper over and, using a watercolor pencil, chalk, regular pencil, or charcoal pencil, scribble/color over all of the lines
- Flip the tracing paper over again (so that it’s right side up) and secure it to your canvas using tape
- Grab a ballpoint pen and, again, trace the image using firm pressure but not so firm that you break through the paper
- Remove the tracing paper; now you should have a nicely transferred flamingo just waiting to be painted!
Extra Tips:
- I’ve got an article if you need a step-by-step guide (photos included) on how to transfer any image to canvas
- If you decide to use chalk or a watercolor pencil, make sure to use a color that you can easily see
- Yes, you could just scribble all over the back of the original printable without using tracing paper, but I like to do the extra step to keep the original clean for future projects (I never throw out my traceables!)
- If you just want to transfer the flamingo but not the lettering, just scribble over the bird and continue from there
Step Four: Mix Your Pink Flamingo Acrylic Paint Colors
Let’s get to squishing paint and mix up the perfect coral for our fabulous flamingo.
How much paint you’ll have to mix depends on whether you want to leave your flamingo a solid pink color or you want to add some definition with highlights.
For the purposes of this flamingo painting tutorial, we’ll be mixing up a base color (which will be the darkest color). Then we’ll add white as needed to paint in a few highlights.
At the very least, we want to see the spread of the tail feathers a bit better, a few wisps where his legs meet his body, so they don’t look like triangles anymore, and it would be nice to give our feathered friend a wing.
To mix a coral color for the flamingo:
- Mix together one part Quinacridone Magenta with one part Cad Yellow Medium and add just a bit of white
- Remember that acrylic paint will usually darken as it dries (AKA: color shift), so if you want a pale coral continue to add white until it looks a bit lighter than you want on your palette
- If you get the flamingo painted and you’re not happy, just let it dry, adjust your paint mixture, and start again
Extra Tips:
- If you find the coral paint too pink for your liking, take a look at my article on how to mix coral paint with another step-by-step to paint a piece of ocean coral
- Depending on the size of your flamingo, you won’t need to mix up too much paint, so start with a small amount of each color and add more if you need it
Step Five: Block In Your Flamingo
Blocking in means, you’re basically adding a place marker so you can separate the different shapes right from the start so you don’t have to try to remember which shape should be which color.
To paint the body of the flamingo:
- Use a flat, bright, or angle brush that’s large enough to give you good coverage without having to go over sections too often
- Load your brush with paint, and using just the tips of the bristles (so don’t hold it flat against the canvas), trace around the outline of the flamingo, excluding the legs, beak, and face
- Fill in the area and let dry
Extra Tips:
- You may need to add a couple of layers of pink/coral to get good coverage
- Add paint in the same direction as to how the feathers would fall
- When painting the tail feathers, start your brush stroke at the end of each feather “bump” and pull the paint up and toward the body of the flamingo
- Use the flamingo’s neck to choose which size brush to use (the neck and head will be the most challenging part to paint)
Step Six: Paint The Flamingo’s Legs, Beak, and Eye
Now, I know what you’re thinking, and don’t freak out. You can totally paint those skinny, awkward flamingo legs, no problem. All you need are the right tools and a bit of faith. Deep breath in…..aaaand out. Let’s do this!
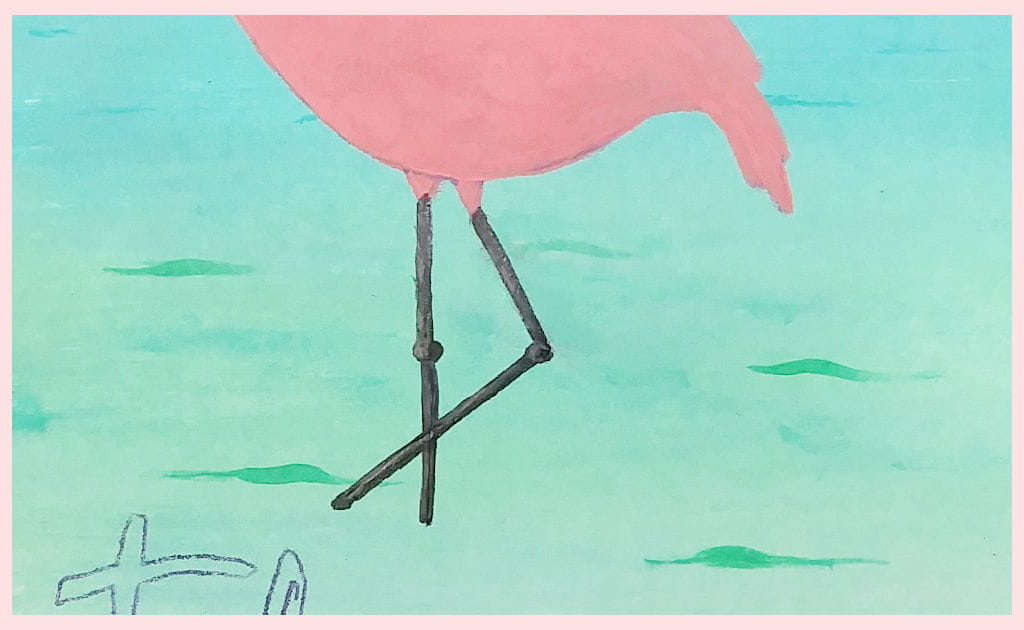
To paint the flamingo’s legs:
- Dip your small round detail brush in your jar of water and shake to get any big drips off
- Load the brush with a small amount of black paint
- Start at the knee joint and lightly paint up toward the body
- Repeat the process but paint from the knee joint down toward the water
- To add a small highlight, mix a bit of black and white together (not too light!) and paint tiny dashes down one side of the flamingo’s leg except for at the knee joint (the knee joint highlight should follow half (or less) of the curve and add a few dashes going from the edge of the knee in toward the center (less is more!)
Extra Tips:
- You can use a ruler to guide your paintbrush (make sure to wipe the ruler off between use)
- If you have paint pens, now would be a great time to put them to use
- You could also use painter’s tape, cut into thin strips, to create a skinny gap for the legs (in between the pieces of tape)
- Wobbly looking legs add charm to your flamingo (Hey, he may be shaking in his boots due to a nearby shark!)
- If you feel like you need to practice painting thin lines, my article about painting skinny tree branches will help
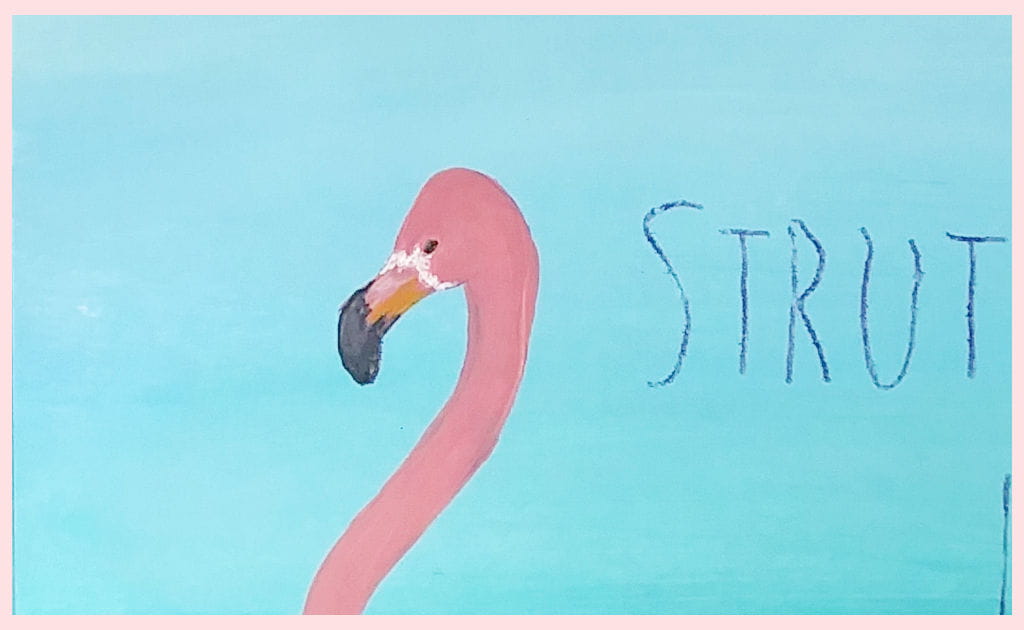
To add the beak and eye:
- Using your smallest brush, add black paint to the tip of the flamingo’s beak and let dry
- With the same small paintbrush, paint the rest of the exposed area the same coral/pink color as the body of the flamingo, and let dry
- Add a second coat of pink if needed
- Using the tip of your smallest round brush and a tiny bit of black paint, dot (poke) in the eye
- Again, use your small detail round brush to add a bit of white where the beak and the head meet (not a lot and this line shouldn’t be overly straight like a stick but a bit wobbly to give it that organic feel), and let dry
- Next, take a minimal amount of yellow paint onto the same brush and add it to the bottom half of the flamingo’s beak (this just gives him a little punch of something in an unexpected place)
- To add highlights, use the same mixture you used for the highlights on the flamingo’s legs and add a few tiny dashes (or dots) to the black part of the beak
- To add highlights to the pink part of the flamingo’s beak, add a small amount of white to the base color you used for the body and, again, make just a few teeny tiny dashes where you think the light would hit
Extra Tips:
- Adding highlights is not a must so don’t worry about it if you don’t feel confident adding them (but I would encourage you to try because it’s a great way to get comfortable painting small details)
- I used the pink highlight on the beak to put a “border” going up from the beak, around the eye, and back down to the beak again (this just helps the eye look more like it has a function and less like a dot just hangin’ out and looking dotty)
- If you don’t have a transparent yellow to use on the underside of the beak, mix the yellow you do have with the base pink color, so it’s more orange
Step Seven: Add Highlights And Shadows To Your Flamingo’s Body
This part of the flamingo painting tutorial is all about layers and wet into wet painting. You can spend as much or as little time on this step as you want. Frankly, you can skip this step altogether if you don’t want your flamingo to be too detailed.
To add the highlights to your flamingo’s body:
- Mix your base color with a bit of yellow and white
- Mix up a bit of Quinacridone Magenta and Cad Yellow Medium (more yellow than magenta) and add just a titch of white (this will be a shadow color)
- Dip your detail round in the water jar and shake off the access water
- Using your small detail round, add a few very tiny dashes of paint to the forehead, top of the head, and where you think the cheek would be
- Using the same process, make your way down the flamingo’s neck, concentrating the highlights on the front of the neck feathers
- Do the same thing with the little triangles where the legs meet the body
- Now, go back in, using the same brush, and paint tiny strokes using your shadow color wherever you want shadows (back of the neck, where the head meets the neck, etc.)
- Next, add some slashes of your base color back in wherever you feel like you may have gotten a little heavy handed with your highlights or shadows
- Continue using this technique, for the head and neck, as many times as you want until you’re happy with it
- For the body, grab your larger round, get it damp, and load it with your highlight color, making sure to keep the tip of the brush nice and sharp
- Start with the top half of the body and stroke your highlight color in a downward arc, here and there
- As you get close to the tail feathers, start to make your brushstrokes less curvy and follow the lines of the tail feathers
- Next, move to the bottom half of the flamingo’s body and arch upward toward the center, making the arc a bit less pronounced as you get closer to the tail (this will represent the wing)
- Use the same method we used on the neck and head to add highlights and shadows (going back and forth between highlights, base color, and shadow color)
- Add shadows in the hollow where the neck and the body meet, underneath the tail and toward the wing, and a few between some of the feathers to give definition
Extra Tips:
- If you find that your different paint colors are all just mixing together, stop, wait for it to dry, and start again
- You want your paintbrush to be wetter than usual, so you have more control over the feather strokes
- Use light pressure when adding in the feathers
- Don’t be afraid to allow some feathers to wisp outside the lines of your flamingo (this helps give the flamingo depth)
- Adding very small wisps of feathers to the triangles that attach the legs to the body really helps to bridge the gap between the two (don’t forget to let a feather or two fall down over the tops of the legs for a nice transition)
- Here’s a flamingo reference photo so you can really see the directionality of the feathers
Step Eight: Add Water Ripples Around The Flamingo’s Legs
Now that we’ve taken the time to add feathers to our flamingo, we’ve got to do something about those legs! Right now, the legs look like they’re just floating there, but we can quickly fix that by adding a few curved lines.
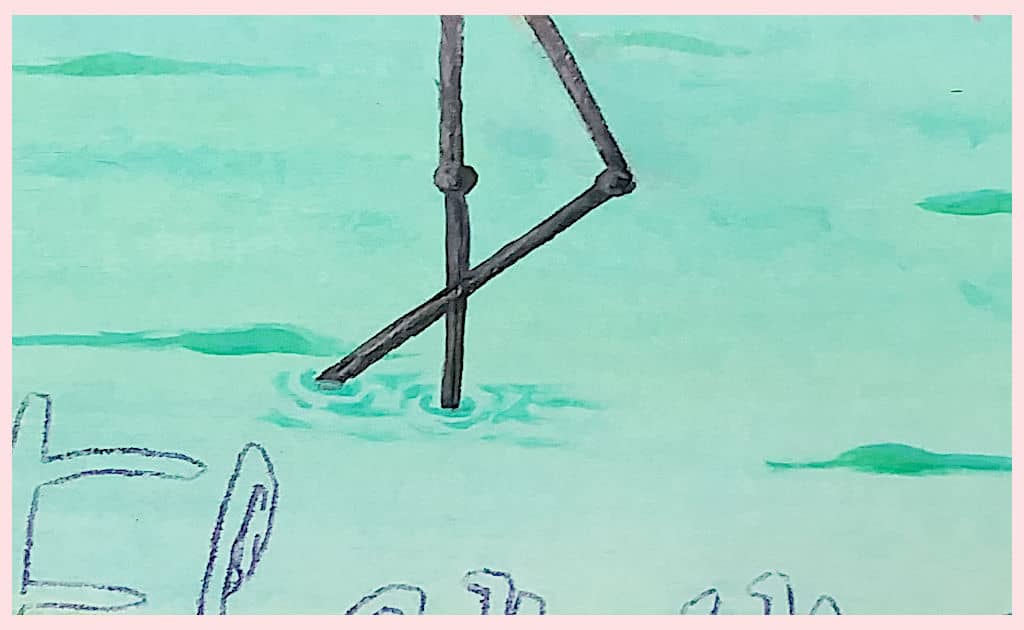
To add water ripples:
- Using the larger of the two round brushes, grab some of the paint that you used for the nearby waves in the background
- Make an ellipse (squished oval) around the bottom of each leg that disappears behind the leg (so it won’t be a full squished oval because part of it is hidden from view behind the leg)
- Paint a few “c” marks around the ellipse using the same color paint
Extra Tips:
- If you ran out of the paint color you used for the nearby waves (or you can’t remember which color it was), just mix up another color that’s close to the original and add a bit of that color to the nearby waves so everything “goes”
- If you add a lot of “c” marks, make sure that they get flatter and more spaced apart as you work your way out from the legs
- To give the illusion that your bird is moving through the water, add very thin trailing lines to the “c” marks that are behind each leg (that will make it look like your flamingo is moving forward)
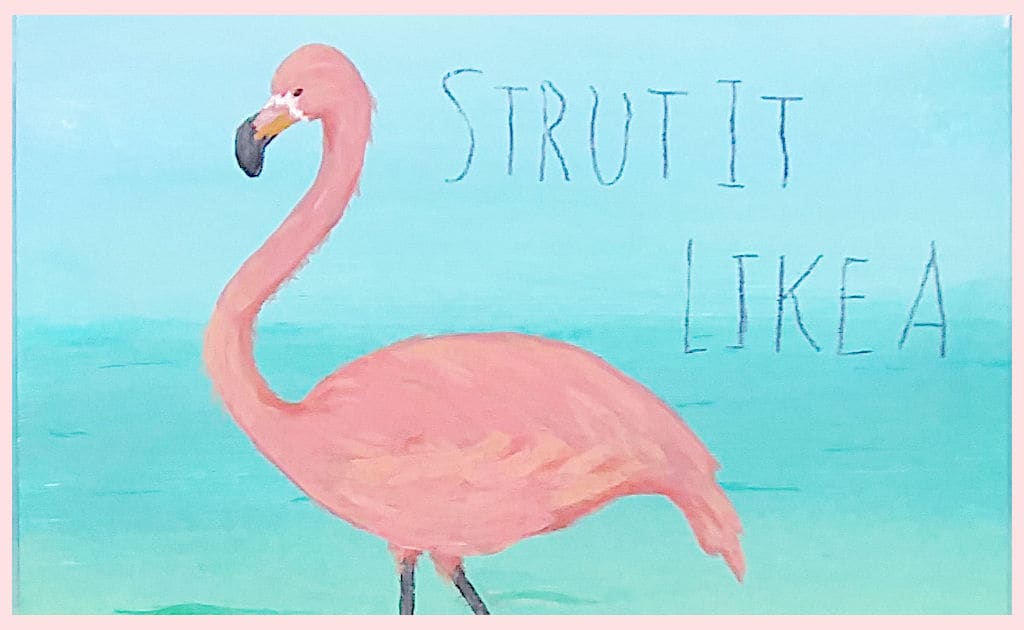
Step Nine: Paint The Handwriting
Our last step in this flamingo painting tutorial is to add the lettering. Again, you can omit this part if you want a more traditional painting.
However, if you want to learn how to make painted signs (great gifts for Christmas!), this is a great way to get comfortable writing and printing with paint.
To paint the letters:
- For the skinny letters, use a black paint pen or your small round detail brush and a bit of watered down black paint
- For the “flamingo” writing, use the larger round brush and some watered down base color mixed with white and a bit of yellow (more pink than peach)
- Let everything dry completely and go in with a second coat if needed
- Don’t forget to sign it!
Extra Tips:
- Make sure that you do this part in a well-lit area
- Use light pressure, so you don’t add too much paint at once
- Feel free to use whatever paint colors you like (I think the “flamingo” writing would also look good with the highlight feather color or even the darkest background color)
- Don’t forget to breathe (I’m not even kidding. When you’re trying to do precise work, you tend to hold your breath!)
Flamingo Painting Tutorial For Adding More Realistic Details
If you want a flamingo painting tutorial that kicks it up a notch with details, take a look at Charlotte Jordan’s YouTube video.
This isn’t a step-by-step video that starts from a blank canvas to a finished art piece. However, she does show you how to add details to different features so you can use the techniques on your own flamingo composition, including the flamingo painting tutorial above.
Skills You’ll Practice:
- How to blend with dry brushing, wet into wet, and fingers
- Adding feathers with a rake brush
- Where to place highlights
- How to paint a flamingo’s eye with detail
- Paint a flamingo’s beak to look shiny
- Glazing
Materials Needed:
- Dark red paint
- Black paint
- White paint
- Yellow paint
- Orange paint (or just mix your red and yellow)
- Rake paintbrush
- Flat or Bright paintbrush
- Detail brush (for the eye)
- Spray bottle with water (to keep the paint wet on the canvas while blending)
- Glazing medium or water
Extra Tips:
- You don’t need a rake brush to do this flamingo painting tutorial (you can use a round brush with a sharp point, an angle brush, or even a flat brush but be aware that it will take you longer)
- When putting in the feathers, use light pressure (think of it as a gentle flick)
- Choose your brush sizes according to the size of your painting surface
- Check your glazing transparency on a scrap piece of paper first (paint a dark line and a light line on the scrap paper first, and then paint over it with your glazing mixture
Final Thoughts On Our Fun Flamingo Step-by-Step Painting
I hope you’ve had a total blast with our simple flamingo painting tutorial, and look how much you’ve learned!
You’ve practiced blending, transferred a printable, played with pretty summer paint colors, and practiced handwriting with paint. Make like a flamingo and strut!
When you relax and allow yourself to focus on the fun of painting, the learning process naturally happens.
Don’t forget to share this tutorial with a painting buddy who needs a little help beating the blues!