Meet the Author

Artist | Owner of Squishing Paint | Educator - Sara brings over 40 years of creative experience, a decade of specializing in acrylic painting, and a passion for guiding new artists as they embark on their own artistic journeys


Learning to resize an image for tracing onto a large canvas is something all beginner artists should know how to do.
I do this in my art practice frequently, and over the years, I’ve found a few different ways to easily enlarge photos to any size. The only equipment you need is a computer, a printer, a pair of scissors, and some tape or glue.
Ready to learn one of the most valuable tricks of the trade? Let’s go!
Enlarge A Photo Without Losing Quality
One of the biggest challenges you’ll face when you want to resize an image for tracing is how to make a photo bigger without losing the crisp quality. There’s nothing worse than taking the time to enlarge a traceable only to find that the lines are blurry and hard to see.
No worries, though! To keep your photo looking its best, you’ll want to understand pixels, resolution, and the difference between dpi and PPI.
Pixels are tiny little squares that make up any image displayed on a computer screen. Letters, numbers, symbols, pictures, everything is made up of pixels. The more pixels you have to play with, the better chance you have of keeping the clarity of your image.
Resolution is the size of each pixel. The smaller the pixel, the better the resolution becomes.
DPI (dots per inch) refers to the amount of ink or toner printed on a piece of paper per inch, whereas PPI (pixels per inch) refers to how many pixels are in an inch of a computer or other digital screen.
When you enlarge a photo for tracing, you want to have plenty of pixels so you can size up, and you want a higher amount of pixels per inch.
Okay, this will be a weird analogy, but let’s say you have two cans of sardines. In one can, there are 6 sardines, and in the other can, there are 10.
When you look at the cans side-by-side, the can with more sardines looks neater because there is less space between each fish, and it’s hard to see where one sardine begins and the other ends.
The same is true for pixels per inch. The more pixels you can smush inside an inch, the crisper everything will look. The hard edges of each square pixel become less distinguishable from its neighbor. I hope that makes sense.
Extra Tips:
- If downloading from Pixabay or another website that has free images go for the highest resolution in the download window
- Photos taken with a phone that has a 10 megapixel camera will work great
- Artifact Uprising has an excellent graphic showing how much you can enlarge an image depending on the pixel dimensions of the original photo
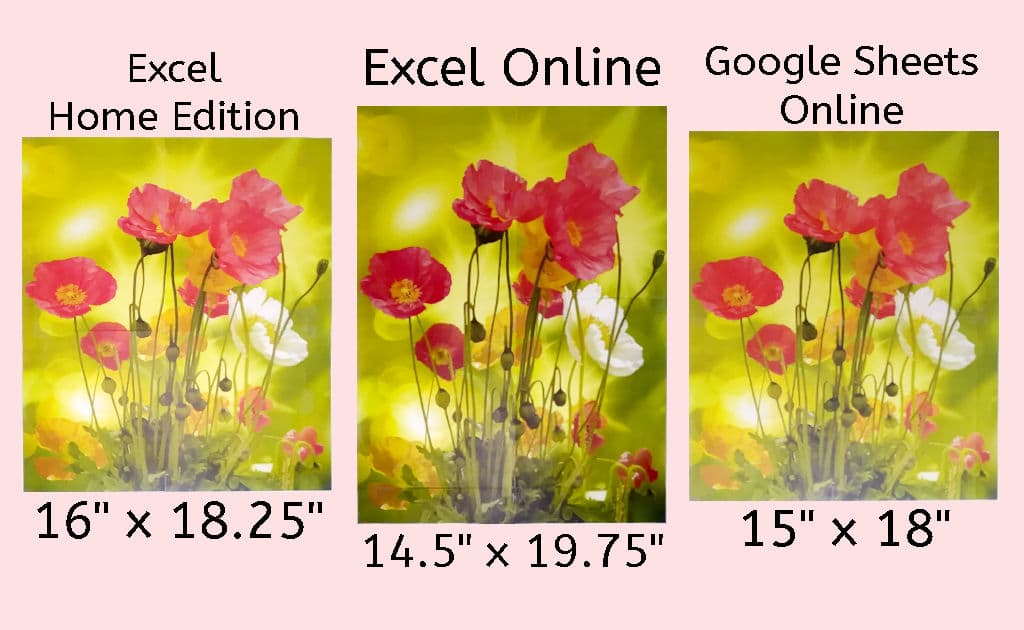
How To Print And Enlarge A Photo Using Microsoft Excel For Desktop
- Open Excel to a new workbook
- Click on Insert
- Click on Pictures (find the photo on your computer and click “OK”
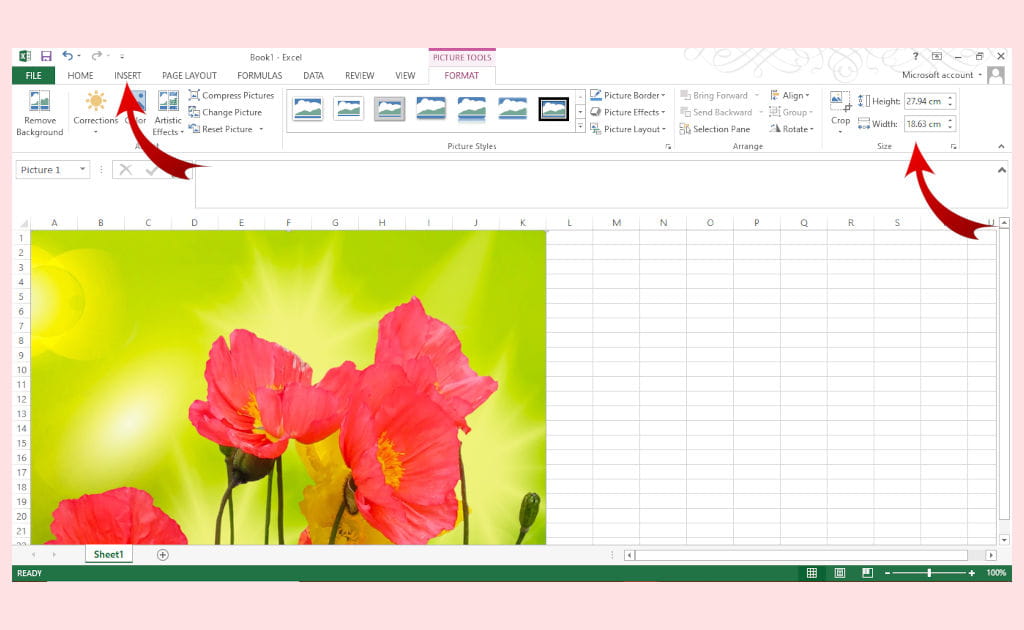
- Once the image is inserted, go to Picture Tools and Format
- At the far right of the ribbon menu, you’ll see the Crop, Height, and Width sections. In the bottom right corner, click on the little arrow to open the Size Dialog Box.
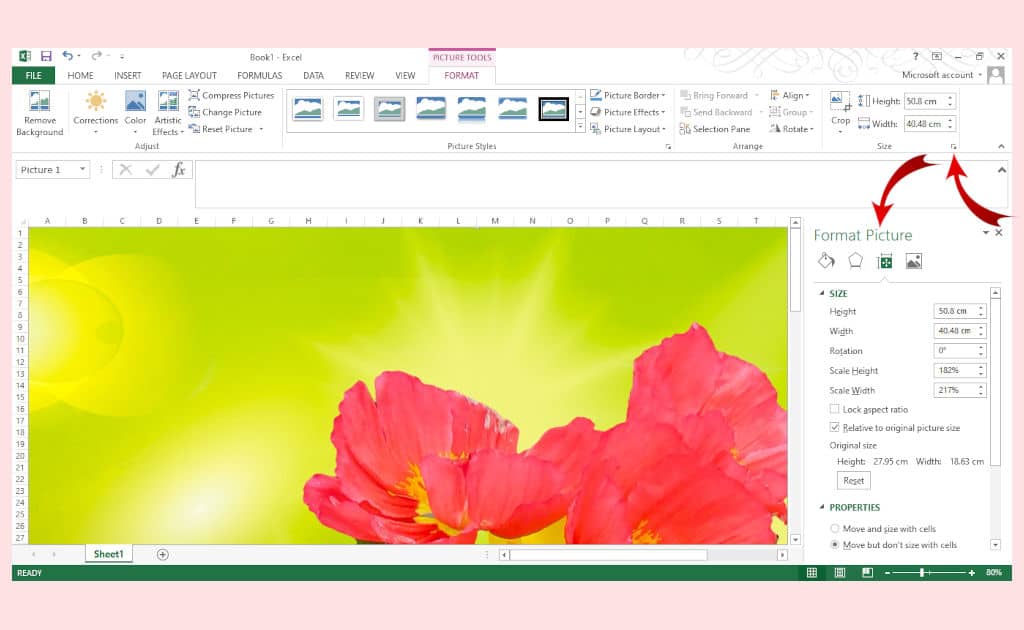
- Click on the box next to “Lock Aspect Ratio” to get rid of the checkmark
- Go ahead and enter the height and width (if your measurements are in centimeters like mine, you can easily convert to inches using google)
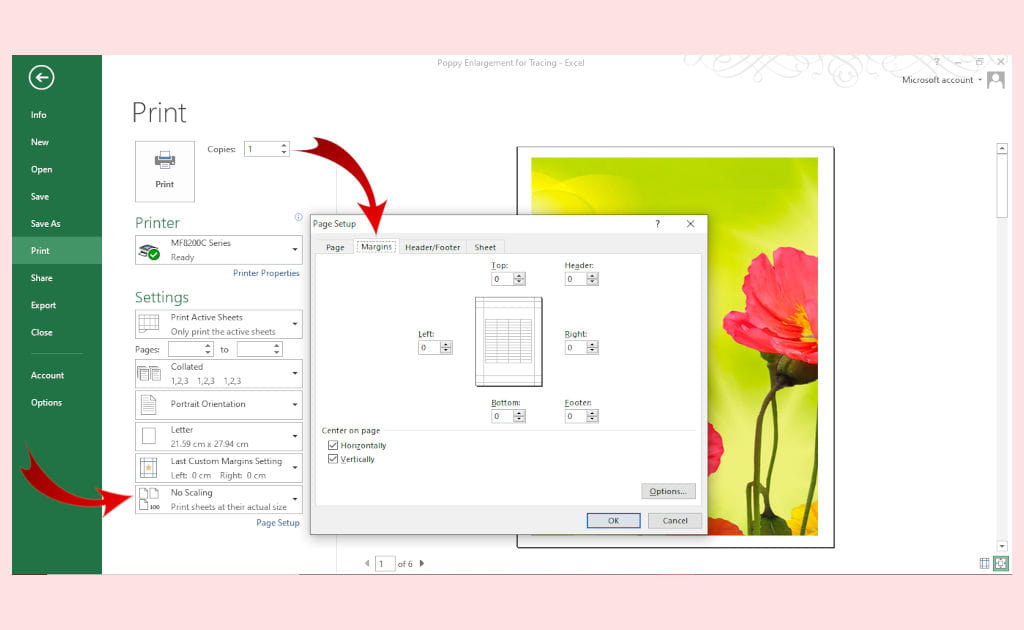
- Go to Print, and click the down arrow next to No Scaling under Settings
- Choose Custom Scaling Options
- Go to Margins and set all margins, plus header and footer, to zero
- Choose Center Vertically and Horizontally and click on OK
Pros
- Easily scale up the photo
- Easy to use
- Can use offline, so no worries about bad internet connections
Cons
- Paid product
- Hard to get the pages to line up correctly
Resize an Image For Tracing With Free Excel Online
- Go to Office.com and sign in to your Microsoft account or create a new account for free
- Choose the icon for Excel located on the left-hand side of your screen
- Open a New Workbook
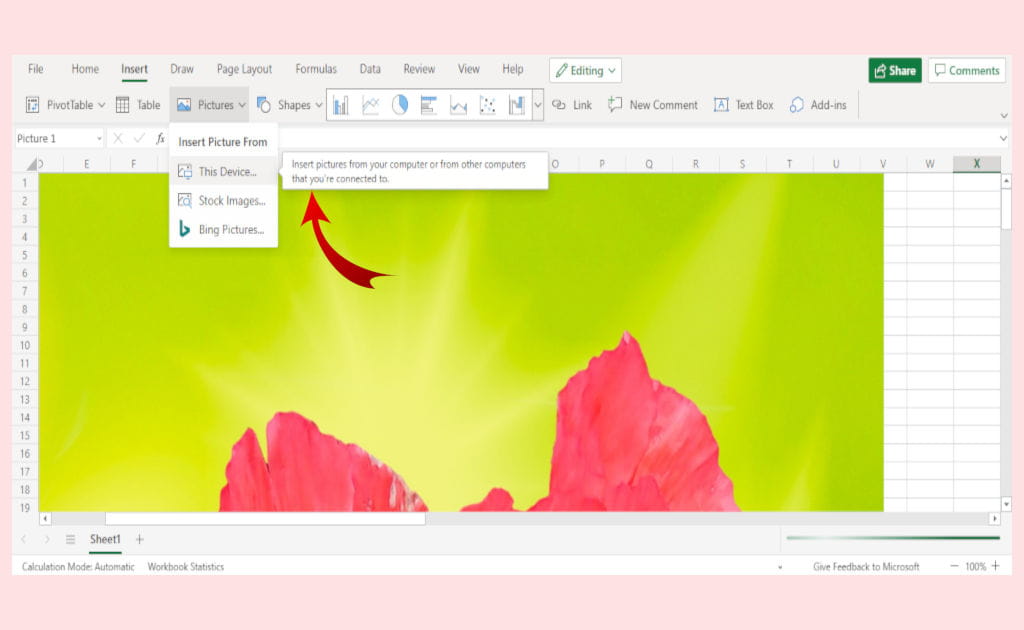
- In the top ribbon menu, click on Insert
- Choose Image, select where your image is coming from, and open your image
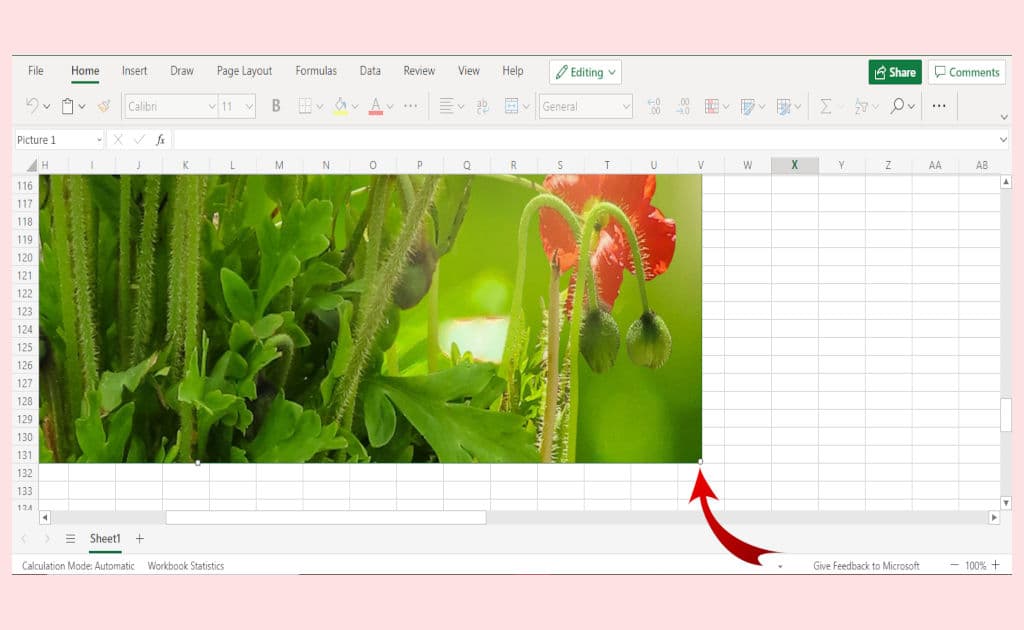
- Click on the photo and locate the small white circle located at the corner of the image
- Hover over the circle until your cursor changes from a plus sign to a diagonal arrow
- Click and drag the photo until you think you’ve got it large enough
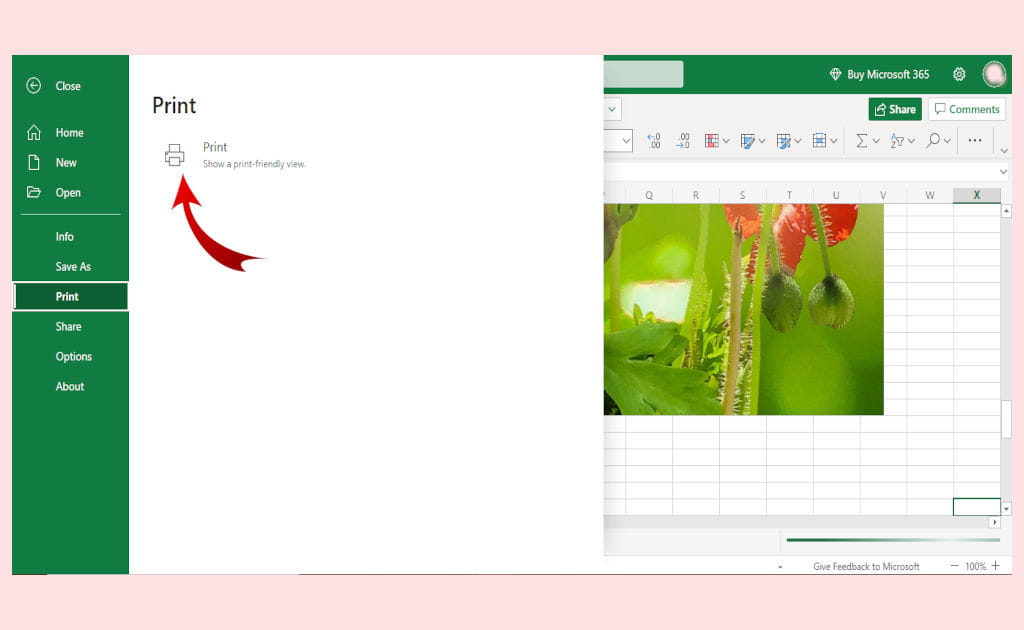
- Under File, in the ribbon menu, select Print, and click on Print: Show a print-friendly view
- Make sure that you keep the paper size at 8.5 x 11”
- Choose whether you want Portrait or Landscape
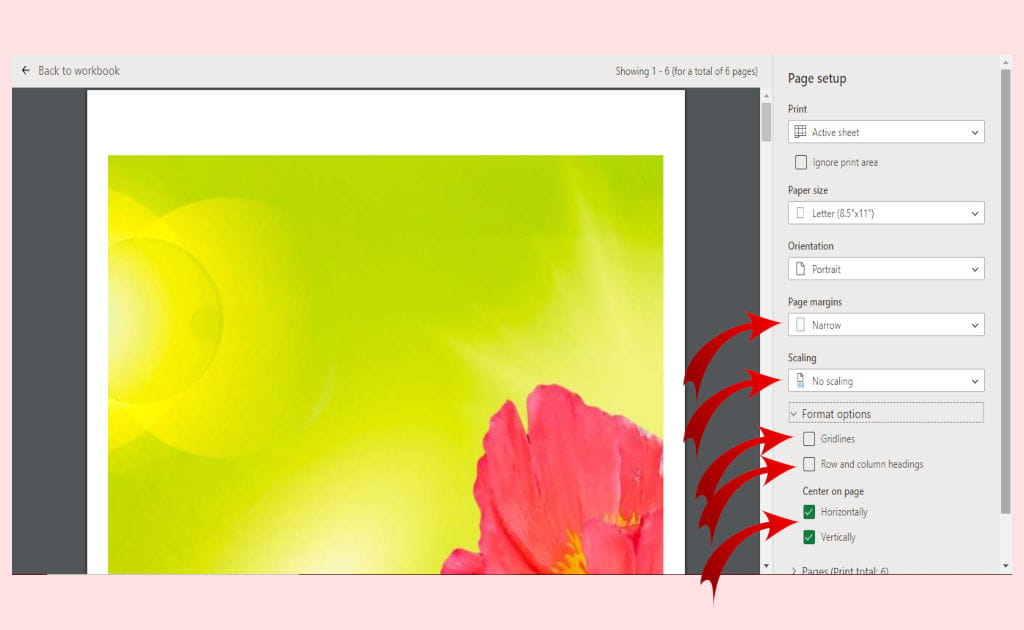
- Change the Page Margins to Narrow
- Set Scaling to No Scaling
- Open Format Options and make sure that Gridlines and Row and Column Headings are NOT checked
- Checkmark both Center on Page Horizontally and Vertically (optional)
- When you’re happy, click on the large green Print button located in the Page Setup menu at the very bottom
Pros
- Easy to use
- Free
- Lines up well
Cons
- No way to insert exact measurements
- Relies on an internet connection
- A lot of trial and error to get the photo enlarged to the proper size
Enlarge an Image For Tracing With Free Google Sheets Online
- Open your chrome browser and choose Google Sheets within the app drawer (located in the upper right next to your profile picture on the browser home screen)
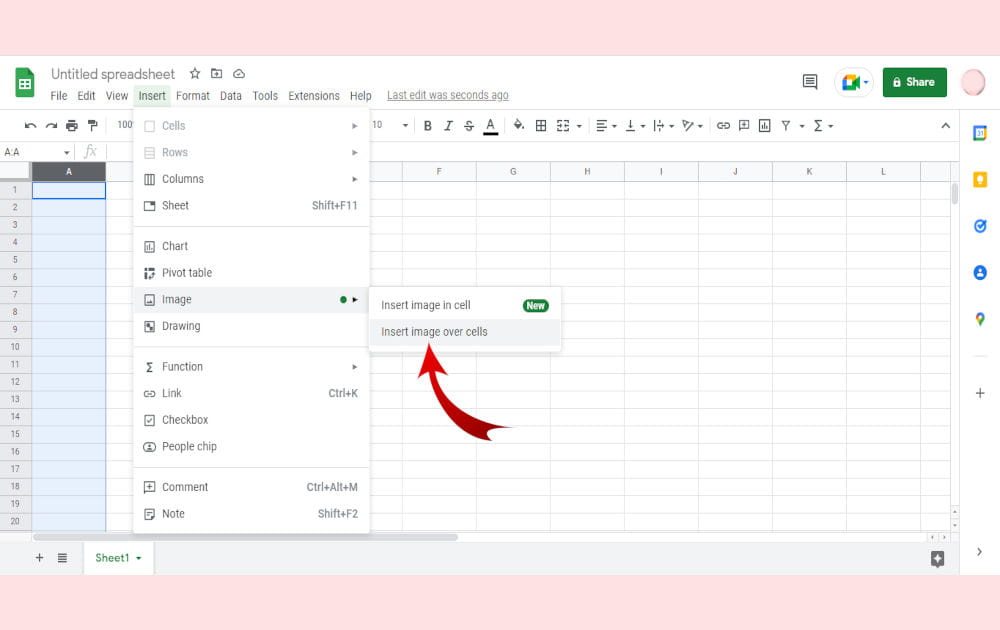
- In the ribbon menu, click on Insert
- Find Image and click on the arrow to open a sub-menu
- Choose Insert Image Over Cells
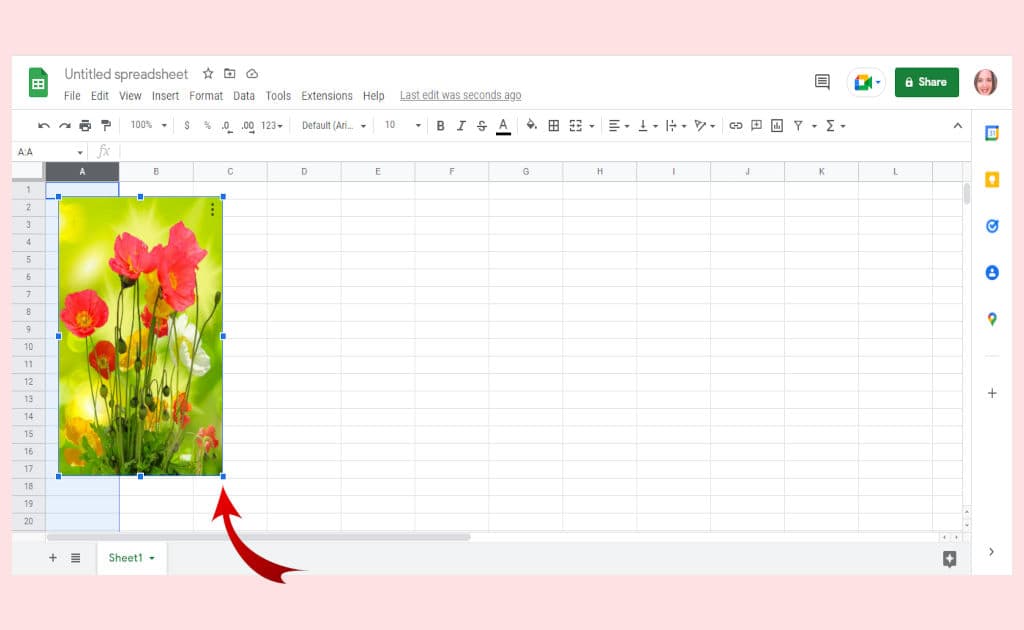
- Click on Browse to open the images on your computer and select the photo you want to enlarge
- Click the image until you see the blue border with the blue squares in each corner and along each side
- Click and drag from a corner of the image (on one of the blue squares) to enlarge it while keeping the proportions correct
- Open the Print Dialog Box
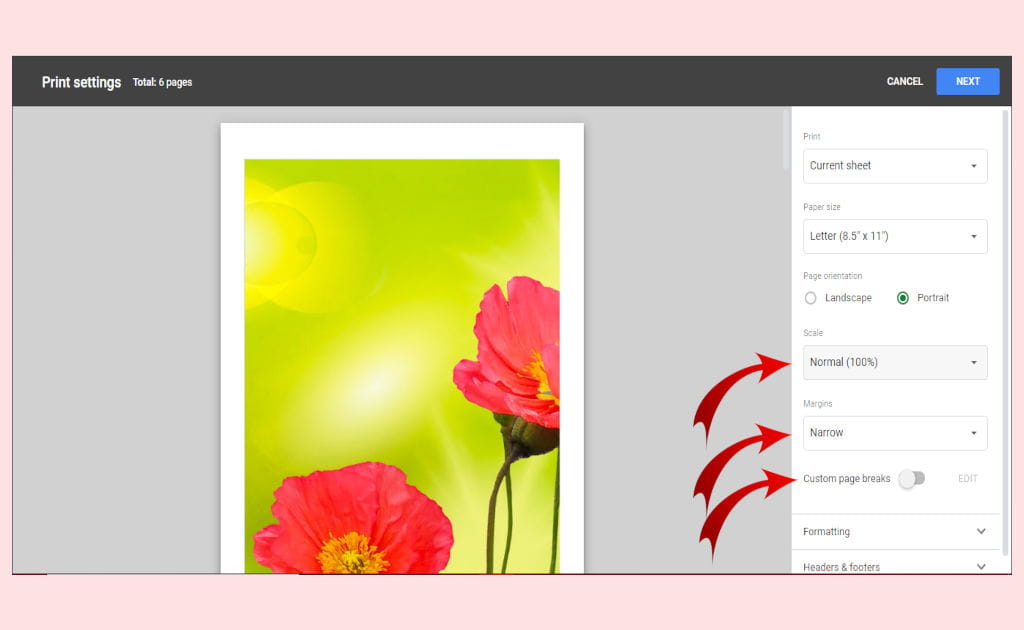
- Keep the Paper Setting as 8.5 x 11” and choose either landscape or portrait
- Set the Scale to Normal (100%)
- Change the Margins to Narrow
- From this point on, it’s going to be trial and error. Knowing that each page is 8.5 x 11″ and there will be a margin around each page, figure out how many pieces of regular sized printer paper you’d need to cover your canvas. For example, my canvas is 16 x 20, so I know that I need my image to cover at least 2 + pieces of paper, both in width and height.
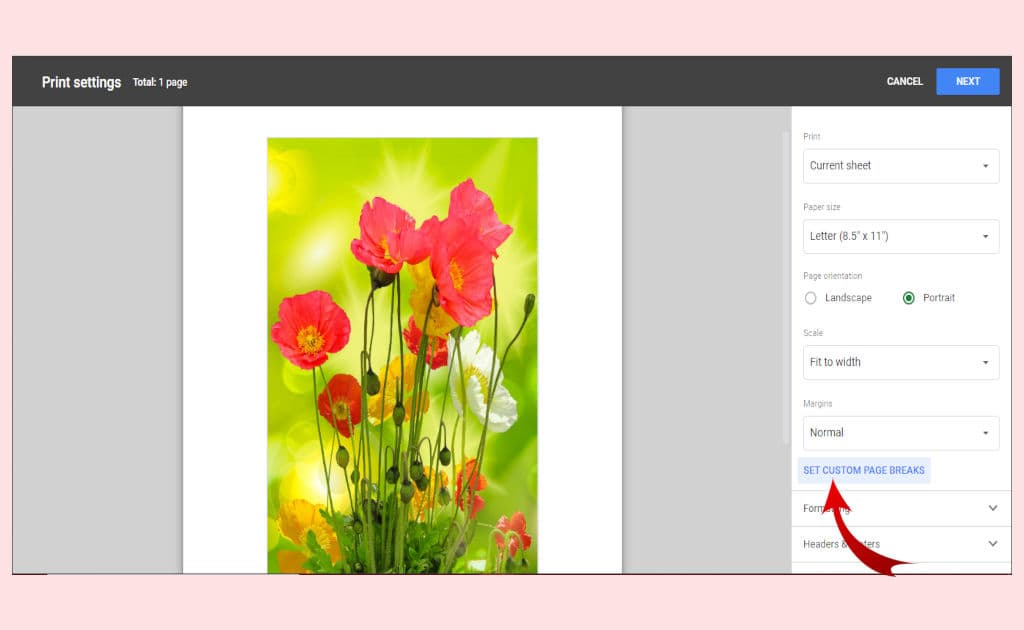
- Go into the Set Custom Page Breaks dialog and start clicking and dragging the little blue dots located on the right side of the image and the bottom
- Remember that there will still be a bit of a margin around each piece of paper to enlarge your photo so take that into consideration.
- When you’re finished estimating, click on Confirm Breaks
- Now that you’re back on the Print Settings page, take a look to see how many pages you have to print. If you think you’re pretty close to having the photo large enough, click on Next, located in the top right corner
- Go ahead and print

Pros
- Pages line up very well
- Free
- Super easy to use
Cons
- No way to set the exact size of the image
- A lot of trial and error
- Can only zoom out by 50%
- If image is larger than the area shown on spreadsheet, you have to click on a cell and then use up and down arrows
How To Assemble Enlarged Traceables
Now that you’ve got all of your pages printed off, how do you put them together? It’s fairly simple, but I’m going to share with you my process so you can get your resized image together in a jiffy.
- Have a copy of your photo nearby so you can use it as a reference to put your pages in the correct order
- Leave one side intact, both horizontally (top or bottom) and vertically (left or right), so you can either tape or glue your sheets of paper together easily
- Start by joining the top row of pages together using glue or tape (I prefer tape, so I don’t have to wait for the glue to dry)
- Continue joining each row of pages together until you’ve got them all together
- Attach the second row to the bottom of the first row
- Continue until all rows are attached, giving you one large image
- Add additional pieces of small tape to secure the papers to each other
- Flip the photo over and add more tape where needed
- Using scissors, cut off any remaining margins along the outside edge of the enlarged image
- Extra Tip: If you’re using tape to secure your pages together, make sure it’s transparent tape so you can easily see each shape and line when you’re ready to trace
Final Thoughts On Enlarging Reference Photos For Painting
When you know how to resize an image for tracing onto a canvas, you are no longer limited to paper-sized paintings.
You’ve learned how to enlarge an image without losing quality, three programs you can use to get the job done, and quickly assemble your printed pages to make one big traceable for painting.
Now that you know the steps involved in resizing an image to the size of your canvas get in there and start putting your newfound knowledge to good use and never miss out on painting epic masterpieces ever again!