Meet the Author

Artist | Owner of Squishing Paint | Educator - Sara brings over 40 years of creative experience, a decade of specializing in acrylic painting, and a passion for guiding new artists as they embark on their own artistic journeys


Some of the links in this article are affiliate links which means that if you choose to click on them and make a purchase, I earn a small commission at no extra cost to you.
Also, as an Amazon Associate, I earn from qualifying Amazon purchases.
For more details, please read the full disclosure here.
Thanks so much for your support!
Planning your artwork is a powerful way to tap into your inner creativity and succeed in painting original art.
In fact, it is the best way to create a painting from your imagination. Nothing will look exactly like what you see in your mind but planning your artwork gets you pretty darn close!
Let’s dive right in and start building a roadmap to creative success!
The Benefits of Planning Original Paintings
Coming up with an art project plan may seem like a waste of time, especially when you are jazzed about your idea and just want to get to the good stuff. But hold on there, friend.
Planning your artwork can actually save you time. There is no guesswork when you’ve built yourself a roadmap that breaks down the steps needed to go from a blank canvas to an entirely original painting. There will be no question about what you need to do and what order to do it.
Not only that but there will be less correcting once you’ve started slapping paint to canvas. I mean, have you ever tried to paint something from your imagination only to finish, and you’ve felt completely disappointed because it looks nothing like your vision?
No more of that! When you’ve got yourself a solid plan, it’s as easy as following the steps and you’ll get there so much faster.
In addition, you’re going to save some money, too, especially when it comes to planning out your tools and paint colors.
You won’t need to go out and buy a bunch of new paintbrushes because you’ve taken the time to see what you’ve already got and what will work best. Also, you’ve planned out your colors and made your perfect paint mixes beforehand so you won’t be needlessly squeezing colors onto your palette as you go.
Lastly, you won’t become overwhelmed with trying to figure out what order you should be doing things. You’ve got all of your steps figured out, your tools and materials organized, and you’ve gathered all of the links you need to help with techniques. You’re good to go!
But, how do you know what steps to take? We’ll go into detail with each step, but, basically, there are twelve steps that will help you to plan your painting idea.
When planning your artwork:
- Make detailed notes of your idea
- Find reference photos
- Draw a simple sketch
- Choose a painting surface
- Create a grid
- Build a color story
- Finalize your paint colors
- Pick your tools
- Research techniques needed
- Transfer sketch to canvas
- Plan your time (if you have a deadline)
- Choose your method for mounting your painting
The 12 Step Process For Planning Your Artwork
It may seem like there are a lot of steps but most are pretty simple to implement, and for others, I’ve found some really great resources for you to use that will make planning your artwork a breeze!
We’ll also be using an example throughout the steps so you can get a feel for how it all comes together.
Create A List Of Details
When planning a painting from your wonderfully creative imagination, detailed notes will be your best friend.
The more details you can write down, the better because you won’t have to rely on your memory to recall your artwork idea.
Let’s pretend we’ve got the idea of painting a seascape with sailboats and a big wave. Sadly, if we only wrote down this little bit of information, we wouldn’t get anywhere close to that fantastic picture we’ve got in our minds. So, let’s brainstorm.
Questions to ask:
- What do we want to include in our painting?
- Where do we want the main objects to be placed?
- What will the focal point be?
- Do we want to have this painting be in portrait or landscape?
- What time of day is it? Where is our light source?
- Do we want to create a mood with our artwork? If so, what feeling are we trying to convey?
- Do we want our painting to be bright and happy, dark and dramatic, or muted and calming?
- Are there any paint colors that absolutely have to be added to the painting?
Now, let’s answer these questions with our example in mind.
- What do we want to include in our painting? A bit of a blue sky (maybe some clouds) and light sand beach, some islands on the horizon, three sailboats with brightly colored sails, a large rolling wave, sun sparkles on the distant waves (maybe some distant birds in the sky)
- Where do we want the main objects to be placed? A large rolling wave stretching across the canvas, two sailboats further in the distance, one sailboat closer to the rolling wave and just right of center, seafoam where the ocean and beach meet
- What is the focal point? The large rolling wave
- Portrait or Landscape (canvas tall or wide)? Landscape
- What time of day is it? Time of year? Where is the light source coming from, and how strong is it? Mid-afternoon, tropical, warm, summer, sun will be slightly angled and strong
- Is this painting trying to convey a feeling? Happy, refreshing, reenergizing
- Will this painting have bright colors? Dark and dramatic? Muted? Bright paint colors
- Are there any paint color “must haves”? Red and turquoise
Extra Tips:
- Write down and answer any other questions you can think of to have as complete an image as possible
- Check out my article to learn more about adding mood to a painting
Find Inspiration and Gather Reference Photos
Planning your artwork means finding inspiration and images that you can use as references. Think of it as turning your vision into reality.
It can be tough to figure out things like perspective when you rely entirely on your memory, and that’s where reference photos come into play.
There are many places where you can find free reference photos, but my go-to is Pixabay, so we’ll use that for our example.
Pixabay has a great search function that you can filter by type of image, orientation, size, and color. The photos are free to download, making it a perfect option for reference photos and inspiration.
Here is a wave photo that would be perfect to use as a reference for our pretend painting.
Get Out Your Sketch Book
Next, you’ll want to create a simple sketch, preferably in a sketch book dedicated to painting ideas, to help you plan the composition. This sketch will also be used in another step later on, so it’s a pretty important part of planning your artwork.
Don’t worry about fine details on this; it’s just a basic sketch of the different elements you want to include. You want to decide the best spot to place each object, and what size will give the painting the perspective you’re looking for.
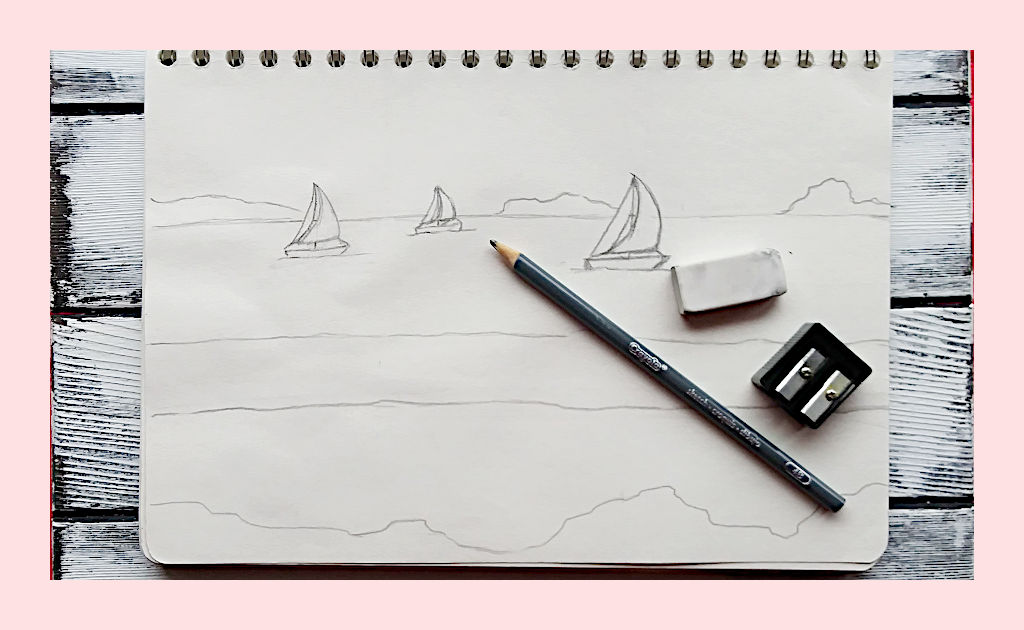
In the image above, you can see that I didn’t use much detail at all, but, at the same time, I now have a plan on where everything is going to go and how big each part needs to be.
Extra Tip:
- You can also create a more detailed sketch to use as a traceable later on after you’ve painted in your background
Choose Your Painting Surface
Before getting too far into planning your artwork, you’ll want to decide what type of surface to paint on and what size.
Choosing the painting surface is more of a personal choice, but it will tell you if you need to make time to prep the surface.
It will also give you a heads up on roughly how much paint will be needed and if you’ll have to have more water on hand to give your paint more spreadability.
If you choose to use paper instead of a stretched canvas, there will be things you’ll need to think about and add to your painting roadmap. You can look at my article about painting on paper if you want to learn more.
The size of your canvas is equally important to decide early on in the art planning process.
It will determine what size paintbrushes you’ll need to use and be super helpful for the next step.
Grid Your Sketch
This step in your painting plan is optional, but one way or another, you’ve got to get your sketch onto your painting surface, and making a grid is a great way to do that.
If you don’t know what gridding is used for in art, it’s where you make grid lines over a reference image and then make a grid on your canvas with the same amount of squares. Then, you go square by square, sketching what you see.
It’s a fantastic exercise to break objects down into shapes instead of focusing on the picture as a whole.
The only gridding that we’ll have to do ourselves is the one on the canvas. For the initial grid on our reference photo/sketch, we’ll be using an online tool that is the bomb!
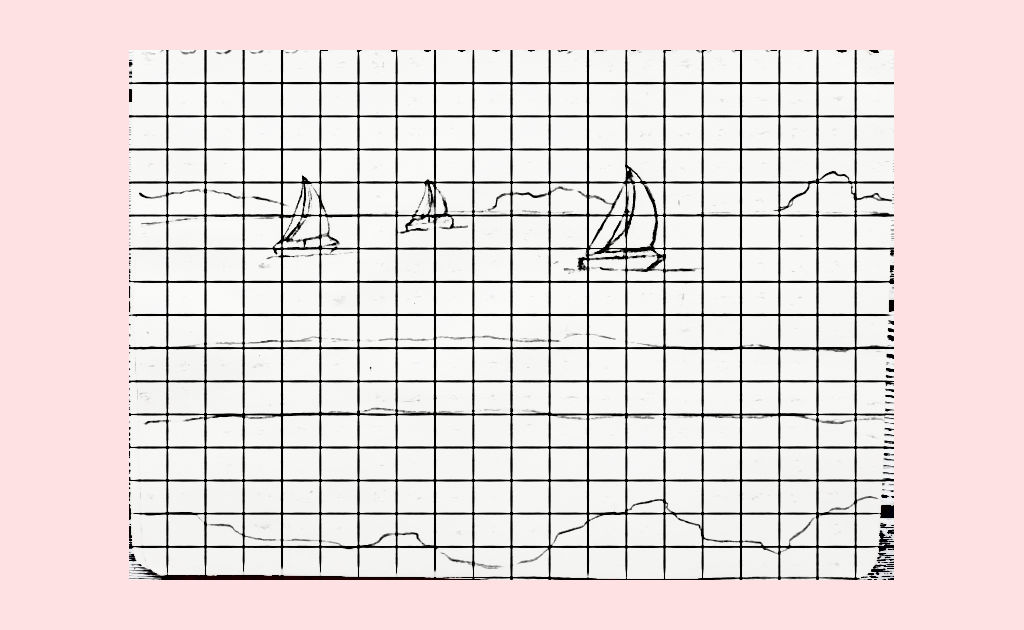
The Proportion Grid Tool allows you to input information and then grids your image to the exact proportions you need depending on the size of your painting surface.
Upload a photo of your sketch, choose whether you want portrait or landscape, and tell it which size canvas you’ll be using. Then you can crop your image to the exact size needed for your canvas or even crop just a small section of your image. Either way, it will be perfectly proportioned to the size of canvas you’re using. Isn’t that genius?!
There are also lots of apps you can use on your phone. Still, I prefer doing this step on my laptop to see everything clearly (does anyone else get wonky eye from staring too hard at a phone screen?).
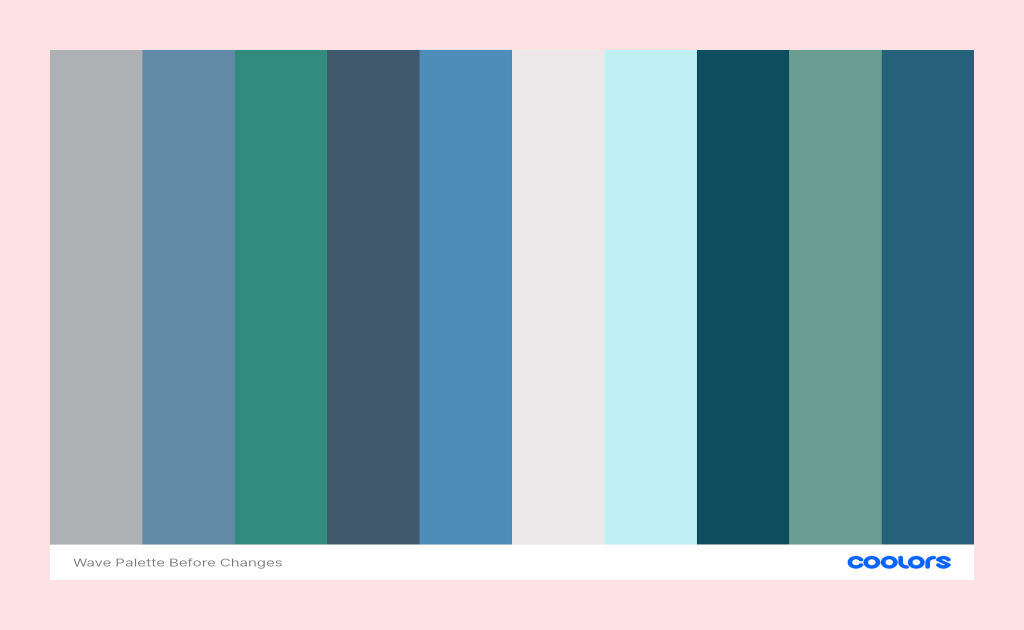
Create a Color Story
This step in planning your artwork involves another fantastic tool, but it’s not totally necessary if you’ve already got an idea of what colors you’ll need to complete your painting.
However, I encourage you to check it out because it’s a great way to create color chips that you can later use to match your paint colors.
It will also give you an idea of which paints you already have and which you’ll either have to purchase or mix up yourself.
I highly recommend learning how to mix up your own paint colors so you can save money. Plus, there’s just something about mixing paint that gives you a richer color than you get straight out of the tube. Not to mention, it involves squishing paint, and we all know how I feel about that!
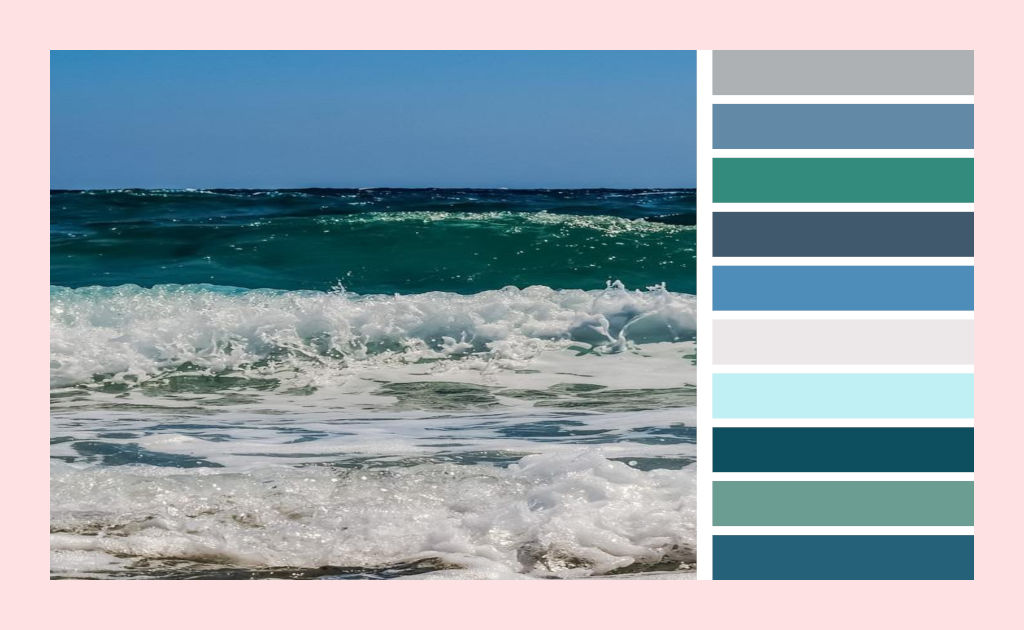
The online tool that I like to use is Image Picker by Coolors.
Image Picker allows you to upload an image and choose up to ten colors. You can adjust by clicking and dragging the little circles around your uploaded image. If you’d like learn more, I have a step-by-step guide on how to use Coolors to choose a color palette.
Once you’re happy with your color choices, you can export your palette and be done.
However, if you want to adjust further, click the down arrow next to the export button. This will open a menu where you can create a collage or open the image in a generator where you can adjust the palette.
If you want to have a copy that includes the original image and the color chips, you’ll want to make a collage and then export it.
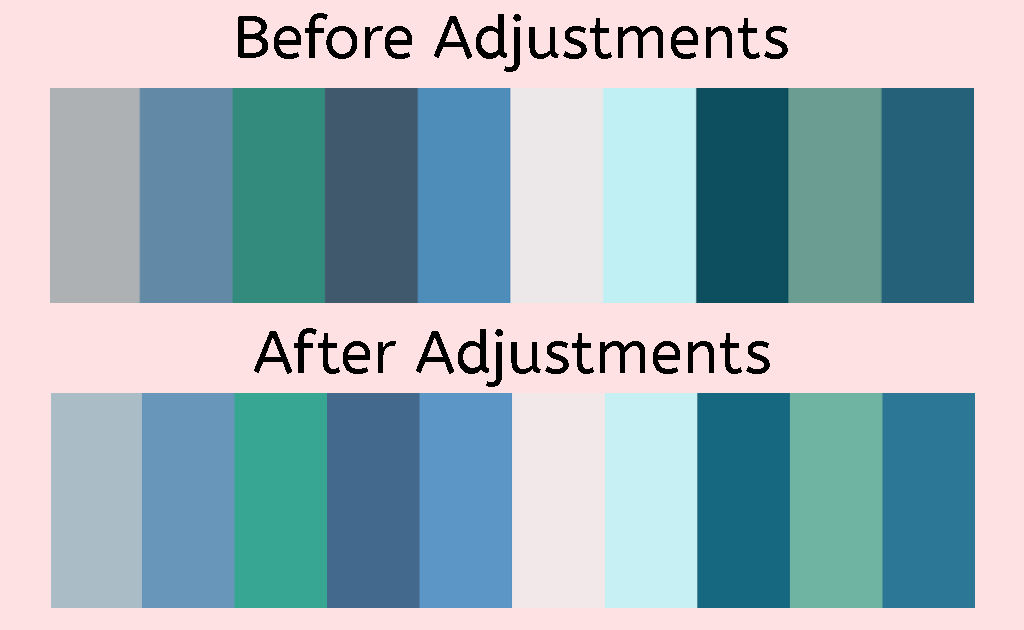
On the other hand, if you find the colors are not quite living up to your expectations, you can open the generator and adjust the hue, saturation, brightness, and temperature. Once you’ve finished refining your color palette, you can export it.
Decide On Your Paint Colors
This is where your color palette is very helpful. You can print the color story and then start experimenting with the paint you already have.
Start making color swatches and match them up as best you can. You can also make your own mixes to get close to the desired color.
This is also an excellent time to think back to the first step in planning your artwork and see if there were any additional colors that you wanted to incorporate. You can make a swatch and hold it up next to the color palette to see how well it will go with what you’ve already got.
If you find that the extra paint color isn’t jiving right, try finding a color that will bridge the gap between your color palette and the additional color.
Extra Tip:
If you want to practice mixing up your own colors, I’ve got a few articles for you to get you started:
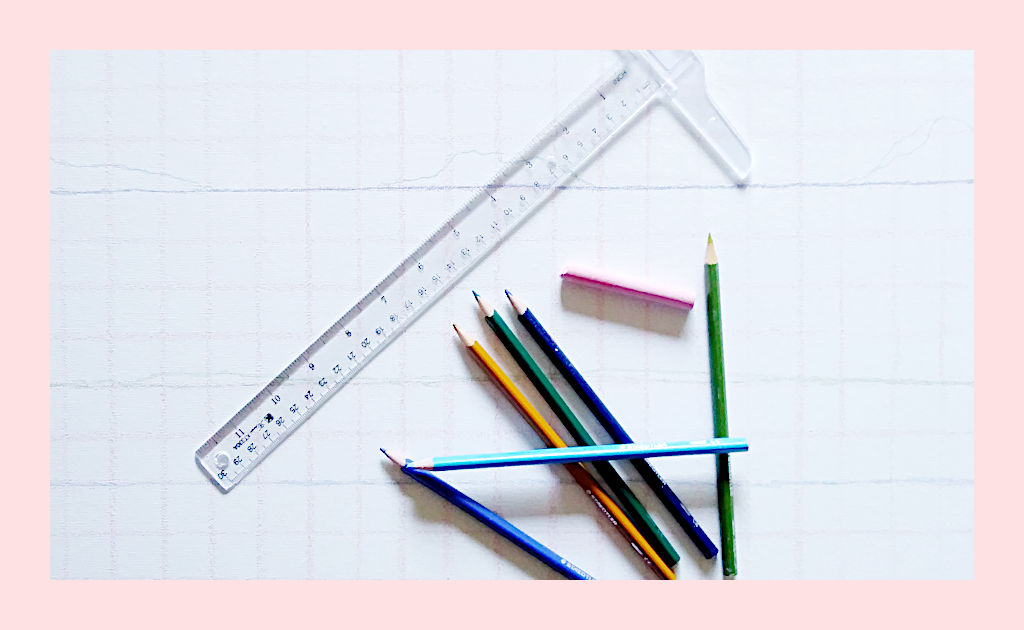
Gather Your Tools
Next up in the paint planning, I want you to think about the size of your painting surface (or go grab it if you have it on hand) and start thinking about all of the different elements you’ll have to paint.
Ask yourself these questions and find the right brush to get each job done:
- What brush do I need for the background? Do I need anything else, like a sponge?
- Does my image have a lot of angles?
- Does it have a lot of soft edges?
- Will the finished painting have a lot of small details?
- What am I going to use to sign my painting?
You get the general idea. You want to ensure that you’ve got the right size paintbrush to get the job done with the least amount of frustration.
Even if you don’t end up using all of the brushes you pick out, or you’re missing a few, having an organized pile going will save you time in the long run.
Find Technique Resources
Think about which areas of your painting you feel confident about completing, and make a list of which elements you will need some guidance with.
Then, start searching YouTube to find different painting tutorials to teach you how to paint the object or element.
Create a playlist on YouTube or add the links to a new word document. That way, everything is in one place and easy to find when you get to that part of the painting.
Don’t be afraid to use just the techniques taught in the YouTube tutorials to paint your own thing. You don’t need to use the same paintbrushes, same paints, or even complete the full tutorial.
For our pretend painting, this tutorial by Emily Mackey Art, “Crashing Wave” is perfect for teaching us the techniques needed to paint waves.
Extra Tip:
- I do recommend watching the part that you hope to learn before trying and then practicing on a piece of scrap paper
Transfer Your Sketch To The Canvas
If you’re still with me on this journey, hooray! You’re almost done planning your artwork and are that much closer to getting down to the business of slappin’ paint around.
If you’ve used the tool in step five, now’s the time to get it printed out or have it up on your computer screen.
After you’ve got your background painted, grab a ruler and a piece of chalk (a color you can easily see) and mark out a grid using the same amount of squares as the grid on your sketch.
Once you’ve got that done, you can use your chalk to sketch out exactly what you see in each square of the initial grid. Lastly, use a damp brush to “erase” the grid lines.
Extra Tips:
- I like to print out my gridded sketch because I find it easier on the peepers
- Make sure to take a moment to adjust any elements that don’t look quite right after you’ve sketched it on your canvas. If you make a mistake, it’s just chalk, so “erase” it and start again
Prioritize Painting Elements
Planning your artwork is even more critical if you’ve got a deadline to think about, like Christmas or a birthday!
After making a list of the different elements you want to include in your original painting, you can figure out how much time you have to spend on each component.
Make sure to split up your time according to which element is the most essential, ending with the least important.
For example, we planned in step one that the wave was our focal point and that we might add birds to the sky. So, we would start with anything we needed to paint to get our wave in first, and the birds would come last. That way, if we don’t have time to paint the birds, it’s no big deal.
At the very least, this will tell you whether you’re on track, falling behind, or ahead of schedule.
Extra Tip:
- Don’t forget to allow time for a bit of a cure before varnishing or wrapping (this amount of time will be even longer if you plan on doing both)
Plan For Displaying Your Art
The last step in planning your artwork is deciding how you want to hang your painting. Do you want to display it on a flat surface, leaning against a wall? Or maybe you want to hang it using eye hooks and piano wire. Also, are you going to finish the back by gluing craft paper over it?
Knowing how you want your artwork to be displayed, you’ll be able to make sure you have the materials needed and give yourself lots of time to pick up anything you’re missing.
Organizing Your Painting Ideas Gives You The Best Chance For Success (Final Thoughts)
And that’s it, my friend. You’ve just successfully finished planning your artwork. In just twelve steps, you’ll set the foundation for creating your very own original paintings with confidence.
You now have an action plan to follow and some pretty cool tools to help you along the way.
Prepping before painting will keep you organized and ready to take on any painting project without feeling overwhelmed.
Because painting should always be a good time, am I right?!
If you know someone who could use this blueprint for planning an original painting, make sure to pass it along!