Meet the Author

Artist | Owner of Squishing Paint | Educator - Sara brings over 40 years of creative experience, a decade of specializing in acrylic painting, and a passion for guiding new artists as they embark on their own artistic journeys


To transfer a traceable onto canvas without the aid of transfer paper is a super simple process. This article will show you how to make the transfer using an ordinary household material that’s easy to find and won’t cost you a fortune.
You don’t need transfer paper or any kind of fancy paper to get an image from paper to canvas. Besides, why spend the money on specialty paper when you can save it for glorious tubes of paint? Let’s get right into it!
Tools For Transferring An Image Onto Canvas
First, let’s talk about what materials you need to trace and transfer reference photos.
The best part about this method of creating a traceable and transferring it is that you don’t need to go to a special store or hand over a boatload of money.
This technique uses simple tools that you probably have already, and if you don’t, they’re easy to find and not pricey.
Tools Needed To Transfer a Traceable
- Parchment paper
- Low tack painter’s tape
- Scotch tape
- A black pen or thin marker
- Pencil and eraser
- A piece of chalk, watercolor pencil, graphite pencil (HB 2), or charcoal pencil
- A red ballpoint pen
- A painting surface
- Window (optional)
You can transfer your image onto canvas, paper, wood, or even fabric. But, for the purposes of this article, we’ll be sticking to canvas since that’s what most of my art buddies will be using.
You can use many tools to transfer a traceable such as transfer paper, carbon paper, a projector, and even apps.
However, we will be using parchment paper because you can pick it up at the grocery store, it’s thin enough to see through, and it’s inexpensive. Basically, it gets the job done beautifully without any fuss.
As I’ve already said, I use parchment paper a lot, and although I’ve heard that some people think it’s not ideal for tracing, I have never had a problem with either tracing or transferring. In fact, it’s always been an easy peasy process for me.
You can find parchment paper in the same section as wax paper, aluminum foil, and plastic wrap. It comes in different widths, and some are white while others are beige. I prefer white but mostly because it reminds me of regular paper. The beige paper will work just as well.
Before You Start Creating Your Stencil For Painting
Before we jump down the transferring and tracing rabbit hole, there’s a little bit of housekeeping to be done so we have everything ready and organized.
- Decide on your reference photo – it can be a photo you took while on an adventure, or you can take a look at websites to find tons of free images to paint (warning, you can’t just use any old photo you see on the web so make sure to read my article where I list the best websites to find free photos)
- Once you’ve got your reference figured out, you may have to enlarge it (you can find a step-by-step process in my article on three ways to resize an image)
- Figure out which window gets lots of light but not direct sunlight (this is important!)
- If you don’t have a window to use, you can tape everything to a wall, but you’ll need to make sure that your outlines are nice and dark so they’re easy to see
- Paint in your background first so you don’t have to try to paint around your transferred image (yes, the transfer will stick to the paint)
- You could just use the reference photo as the traceable, but I prefer to make a separate traceable so that my image stays as crisp and clean as possible. Plus, if I want to make any additions or take out something I don’t like, having a parchment paper traceable makes that super easy
How To Transfer A Painting Traceable Onto Canvas
Once you’ve gotten the hang of this transferring method, you won’t need to buy fancy papers or other tools to get the job done.
Unless, of course, you’re doing a giant wall mural. But you’d need a butt load of parchment paper to do that, not to mention a projector!
However, assuming you’re strictly interested in being able to paint whatever you want, even if you can’t draw, this will rock your world!
Extra Tip
If you need an image to practice with, here are a few free photos to get you started:
Step One: Make Sure You Can See The Important Stuff
Sometimes you’ll have a reference photo that will be challenging to trace because the colors are similar.
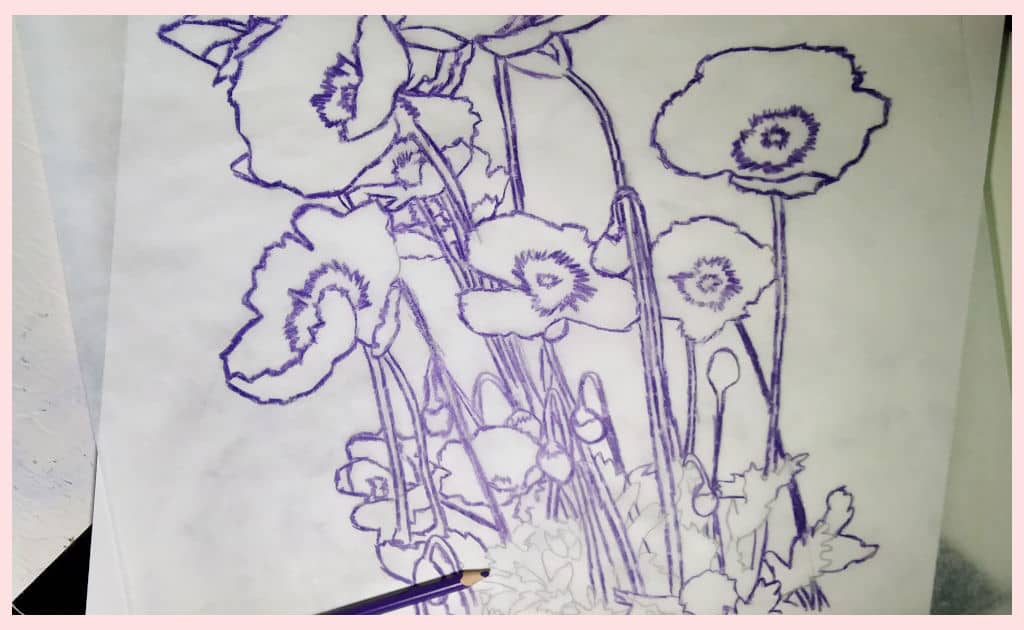
If you’re having difficulty distinguishing between where one subject ends and the other begins, you can take a pen or marker and outline the different shapes.
A thin black marker is the best tool for this job because it’s thick enough to give good definition without losing too many of the details you’ll need later when you begin to paint.
The second best tool would be a black pen, but any pen will do as long as you can easily see it against the image.
I wouldn’t recommend using a thick black marker unless you have no other option. Although it will make your outlines stand out, you will lose too many fine details you may need later in the painting process.
Step Two: Choose The Best Location
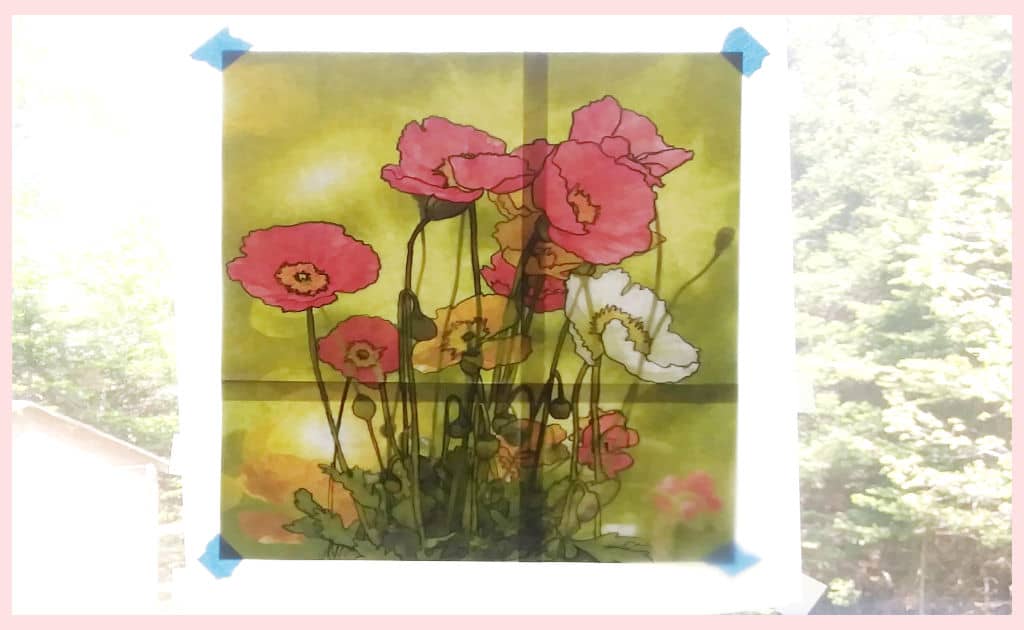
The absolute best place to trace your image is in a window. The window acts as a natural lightbox and makes the lines really stand out.
You want to use a window that doesn’t have a lot of panes and one that’s big enough for the reference photo and the parchment paper, which will be a bit bigger than your image.
Also, don’t want to use a window that gets direct sunlight. The last thing you want is to blind yourself and only be able to see light spots for the rest of the day! Ask me how I know….. moving on.
As I’ve already mentioned, no worries if you don’t have a suitable window. You can use this method by taping everything to a wall. You can also do this on a tabletop, but I prefer tracing in a window or on a wall so I can step back and see the whole composition as it will look when it’s done and hanging.
Step Three: Secure Everything So It Doesn’t Move
Let’s talk tape. You wouldn’t think it’s that important, but it can actually be quite helpful to use the right tape.
Use a low-tack painter’s tape to secure the reference photo to the window. It will be just tacky enough to stick to the glass but not tacky enough to rip the paper if you have to reposition.
For the parchment paper, I find that scotch tape works best. Parchment has a slippery coating and is not designed for things to stick to it. That said, I’ve never had a problem getting scotch tape to stick to parchment, and I’ve done this a gazillion times.
Make sure that both the photo and the parchment are as flat to the window as possible to avoid the paper shifting around and potentially changing the shape and structure of the original photo.
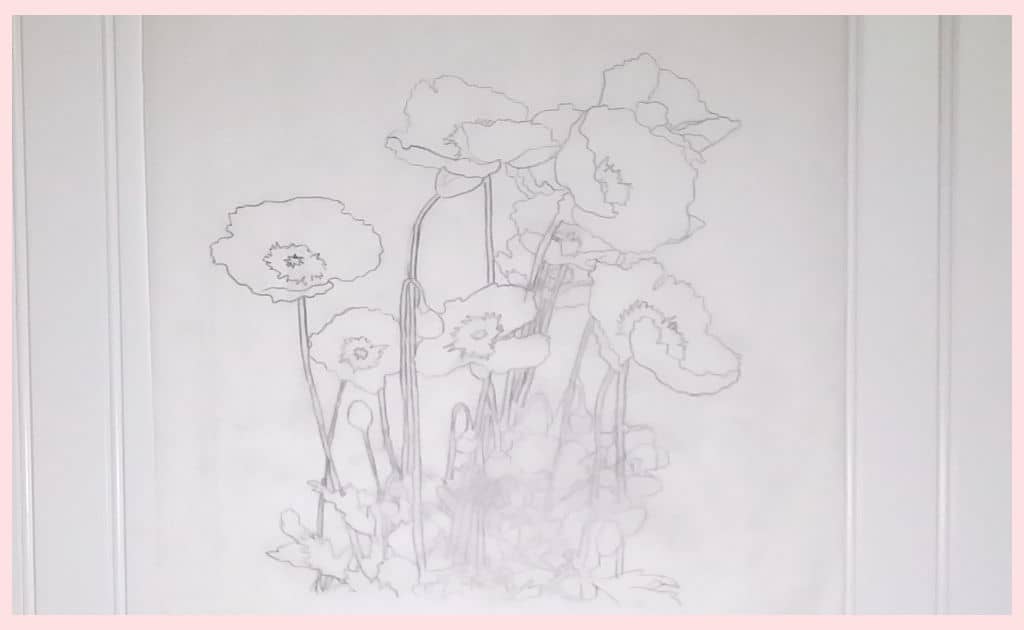
Step Four: Trace The Outlines
Now that you have your image and parchment paper secured to the window take a pencil and start tracing. You want to use a pencil in case you make a mistake and need to erase it.
Start off using light pressure so that your tracing is light, but you can still see it. You can always go back in later and make your pencil tracing darker.
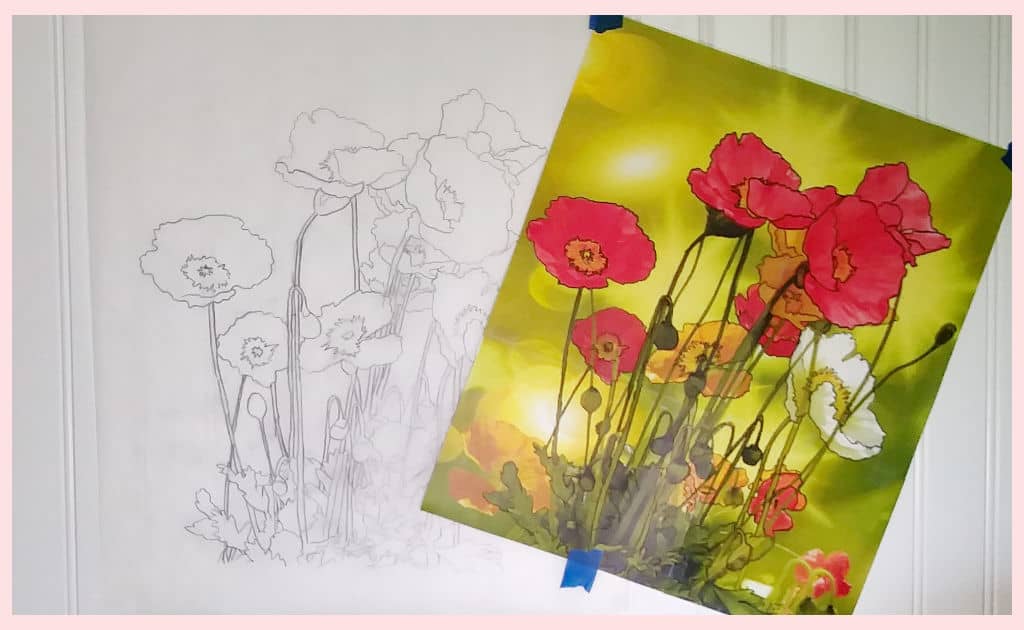
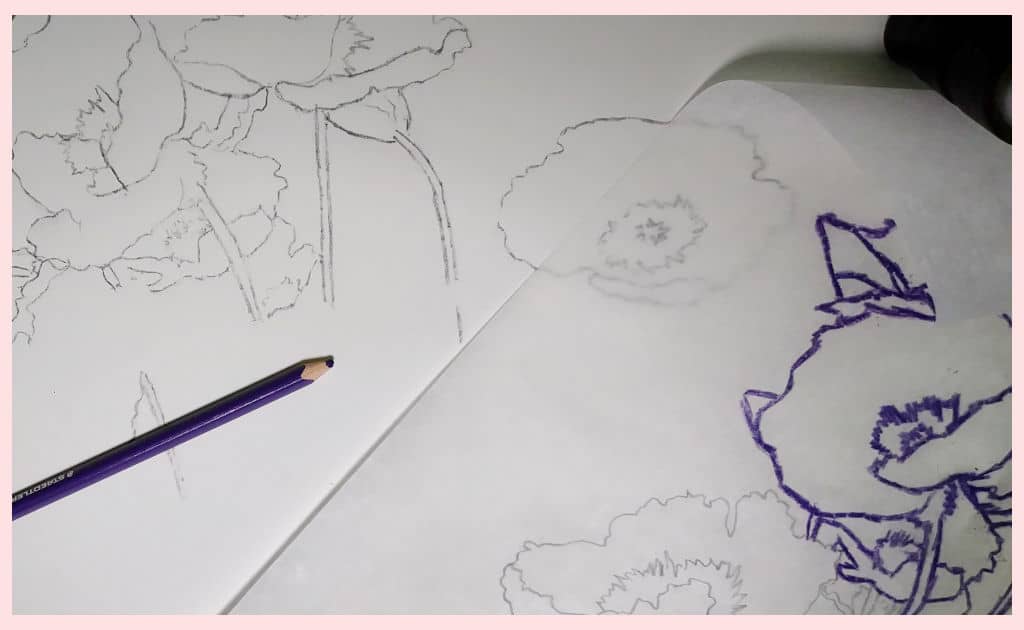
Step Five: Check Your Progress
Even with the most care and attention, sometimes your tracing can go awol. You can end up with something that looks very different from the original. So, it’s best to compare your progress every once in a while.
Keeping a firm grip on the top of your parchment and photo, detach the bottom of the parchment and lift it up. Go back and forth between the original and your tracing and make any corrections as needed.
Now is the best time to erase anything you’re not crazy about or move something in the original to a new spot in the tracing.
For example, let’s say that you’re tracing a beautiful beach scene. In the background is a bit of blue sky with big puffy clouds that transitions into the clear blue sea. You’ve got lots of waves in the mid-range and a tropical white beach. In the foreground, you’ve got a large piece of driftwood that sits to the far right.
You love this photo…mostly. It would be perfect if that driftwood piece was just a bit more centered, though. Sighhhh…
This is where repositioning your parchment paper over the reference photo comes into play. You see, you can basically take any element in the original image and move it wherever you want on your traceable!
This is also a great way to take two reference photos and merge them into one, so you get the best of both.
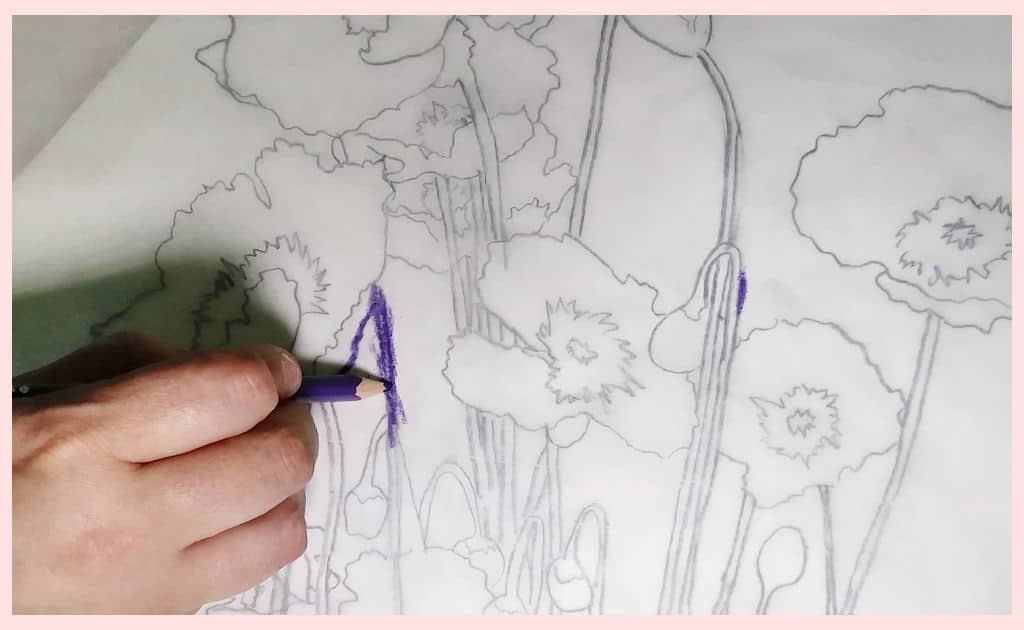
Step Six: Turn A Traceable Into A Transfer
Once you’ve got your image exactly how you want it, it’s time to turn that regular ol’ parchment paper into transfer paper!
You’ll need chalk, a watercolor pencil, a graphite pencil, or a charcoal pencil for this step. My weapon of choice is a watercolor pencil because it leaves a nice thin clean line without any extra transfer.
I’ve also used chalk for this part, and it works well enough, but it can leave extra chalk dust on your canvas.
I’m not a fan of graphite pencils because they can be hard to cover with paint, and I don’t like using charcoal because it can get messy.
That said, use what you have on hand or what you prefer.
Flip your parchment paper over so the sketch is facing down, take your pencil of choice, and scribble over all of the sketch lines. Don’t be stingy with how much you scribble. You want to have lots of color down so your image transfers evenly onto your canvas.
Step Seven: Transfer A Traceable Onto Your Painting Surface
And now, the moment of truth. To transfer a traceable onto canvas or any painting surface, you want to position it with the scribble side against the prepared canvas and secure it with scotch tape.
You want to keep the tape off of the painted background so you don’t accidentally lift the paint. Instead, wrap the parchment around the sides of your canvas and tape it down in the back. This is why we started with a piece of parchment paper bigger than the original reference photo.
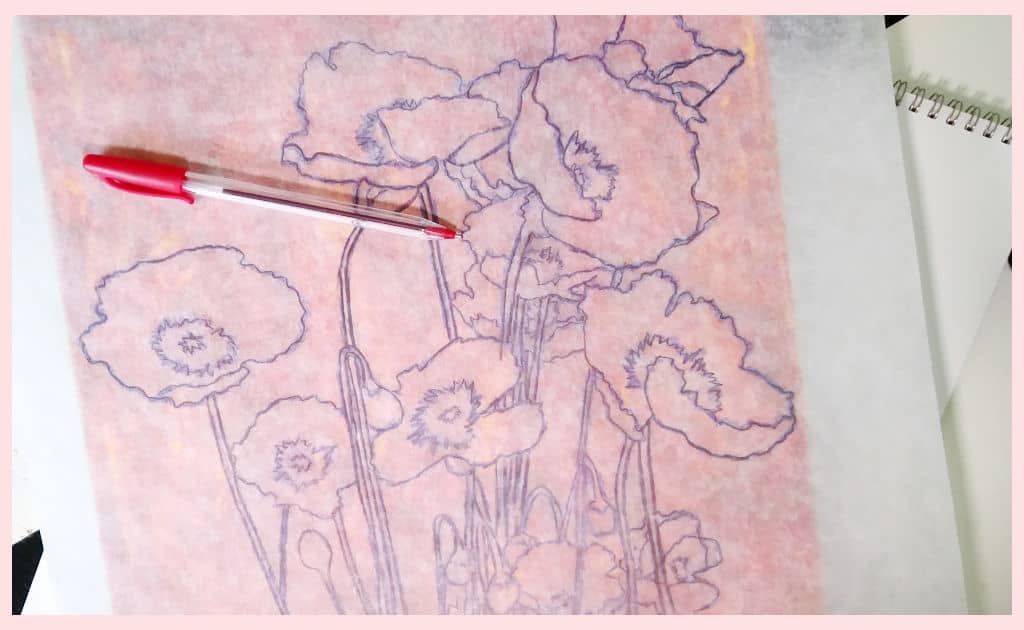
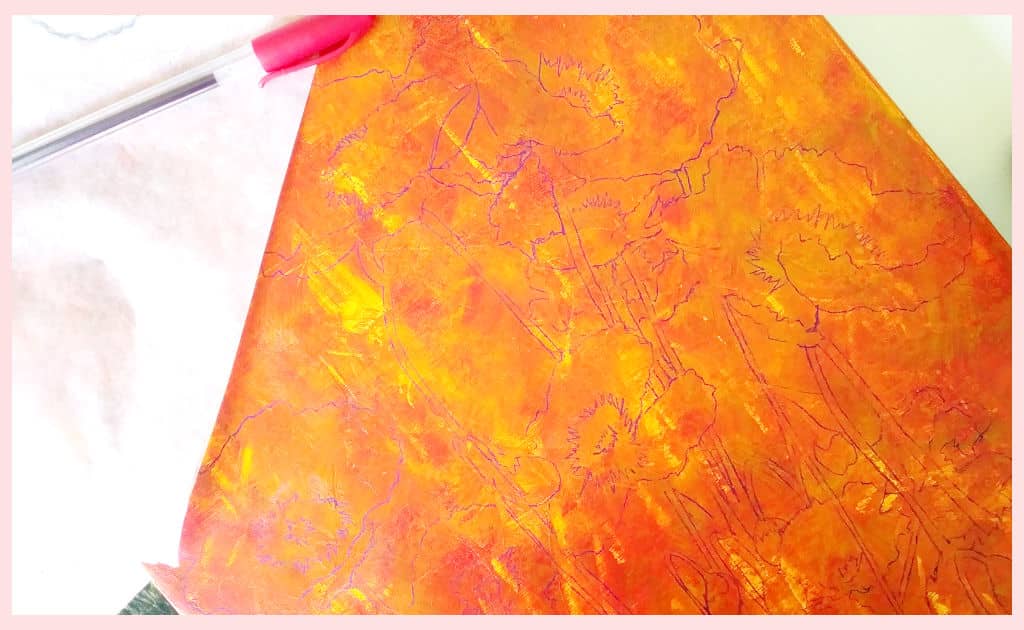
Taking a ballpoint pen, firmly start to trace your outlines on the parchment paper. You want to use firm pressure but not so firm that you break through the paper or, even worse, go right through the canvas!
As you’re tracing, don’t go over one spot too many times, as it may cause the transfer to come out wonky. To keep track of where you’ve already traced, you can use a colored ballpoint pen and lift the parchment now and then to check how things are coming along.
Once you’ve finished, remove the parchment and revel in the amazing transfer you’ve now got on your painting surface!
Extra Tips
- You can reuse your traceable multiple times, so if you find your painting is getting away from you, just get out your traceable, add more chalk, watercolor pencil, etc. to the back, line it up with your painting as best you can, tape it to your canvas again, get out your ballpoint pen and transfer the area that went sideways
- Use your pencil of choice to darken the lines on your canvas or fill in places where the image didn’t transfer completely
- Unless you don’t mind seeing black lines on your canvas, don’t use a sharpie to darken the lines (most paint isn’t opaque enough to cover it)
Summing Up Tracing An Image Onto Canvas
And there you have it, an easy and affordable way to transfer a traceable without any fancy gadgets.
You’ve learned which tools to use, why parchment is a great option, everything you should do before creating your DIY transfer paper, how to make a traceable using everyday items, and how to get your stencil from parchment paper to painting surface.
Congratulations! A whole new artistic world of possibilities has opened up for you. If you see an image that’s legal for you to use, you can make it into a traceable and transfer it onto canvas. Pffft, who says you need to know how to draw to paint!
If you have any tips on how to transfer a traceable, share them with our art buddies in the comments below.