Meet the Author

Artist | Owner of Squishing Paint | Educator - Sara brings over 40 years of creative experience, a decade of specializing in acrylic painting, and a passion for guiding new artists as they embark on their own artistic journeys


Some of the links in this article are affiliate links which means that if you choose to click on them and make a purchase, I earn a small commission at no extra cost to you.
Also, as an Amazon Associate, I earn from qualifying Amazon purchases.
For more details, please read the full disclosure here.
Thanks so much for your support!
Are you wondering how to make a wet palette for acrylic paint to keep your paints fresh and workable for longer periods? This guide will be a game-changer for you.
Before I discovered how to make a wet palette for myself, I would literally be trying to suck the paint back up into the tube so I wouldn’t waste it. It was a time drain that could’ve been used to squeeze a few more brushstrokes in before having to quit for the day. Now, I can start and stop an art project as I please without worrying about wasted paint.
If having fresh paint without waste sounds good to you, follow along as I walk you through creating your own wet palette, step-by-step.
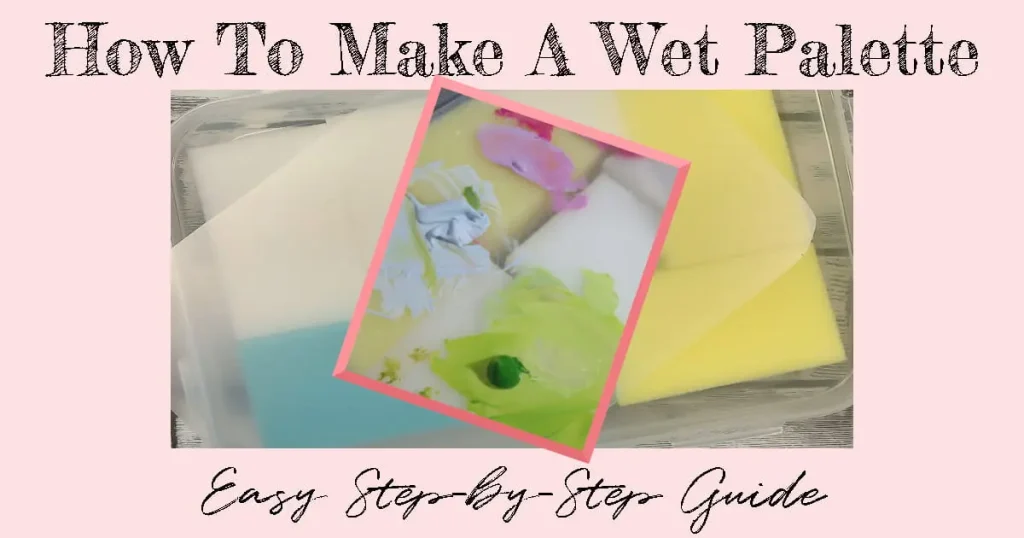
Understanding the Wet Palette
A wet palette might sound fancy, but it’s simply a genius tool that keeps your acrylic paints damp and usable for extended painting sessions. It’s also very useful if you tend to paint in short bursts, which is how I paint. In a nut-shell, a wet palette is an air- tight container with a flat damp surface that prevents your paints from drying out too quickly.
Benefits of Using a Wet Palette
Using a wet palette isn’t just a convenience; it’s a game-changer for beginners:
- Enjoy improved paint consistency and easy blending:
- Consistent Moisture Levels: The wet palette maintains a more consistent level of moisture across the paint surface. This consistency is crucial for achieving uniform paint viscosity, ensuring that each stroke of paint has a similar texture and thickness.
- Prevention of Skinning: Traditional palettes can lead to the top layer of acrylic paint forming a skin when exposed to air, depending on length of time exposed and dryness of the environment where you’re painting. The wet palette’s airtight design prevents this skinning effect, preserving the integrity of the paint underneath and maintaining a more reliable consistency.
- Save on paint costs by preventing wastage due to drying.
- Elevate your painting experience, giving you more time to experiment and learn.
Why I Use a Wet Palette
Between blogging, website maintenance, other business related tasks, keeping up with family, and home, my time is very limited. That said, I make it a priority to paint every day even if it’s only for 30 minutes first thing in the morning before everyone wakes up and things become chaotic.
Recently, I started a painting during the worst possible time…the Christmas holidays…I know. What was I thinking, right? Being such a busy time of year, my painting sat for over a month before I could get back to it. Thanks to my wet palette, the paint was still as fresh as the first day! There was no mold, no weird smells, and very minimal additional moisture. To say I was surprised would be an understatement.
How to Make a Wet Palette Affordably
Obviously, you can buy a sta-wet palette and call it a day but if you want to save some money, you may enjoy trying my design out to see how well it works for you.
Keep in mind, the environment where you live and where you paint will affect how long your paint will stay wet but you should be okay if you use a decent container with a tight seal.
Materials Needed
To make your own wet palette for acrylic painting, you’ll need:
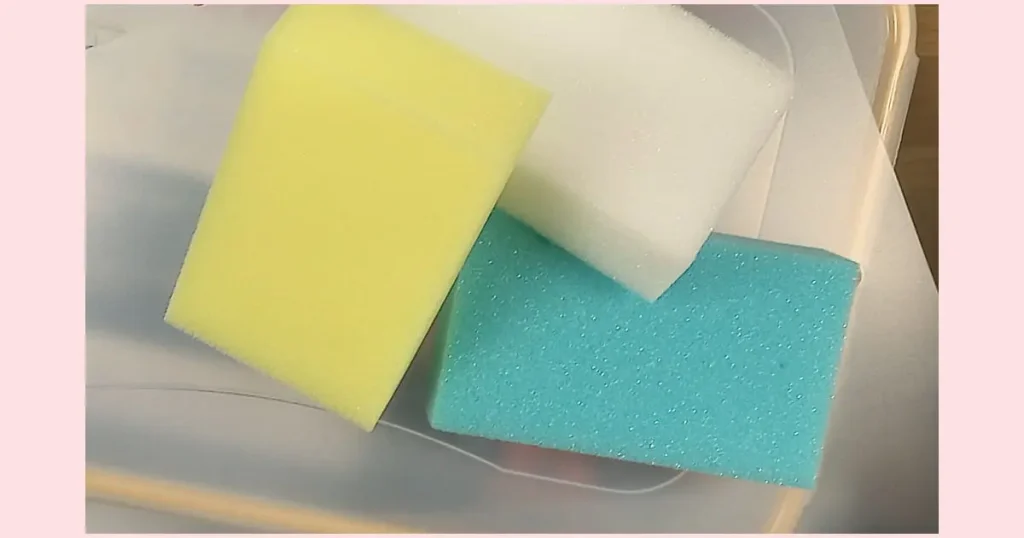
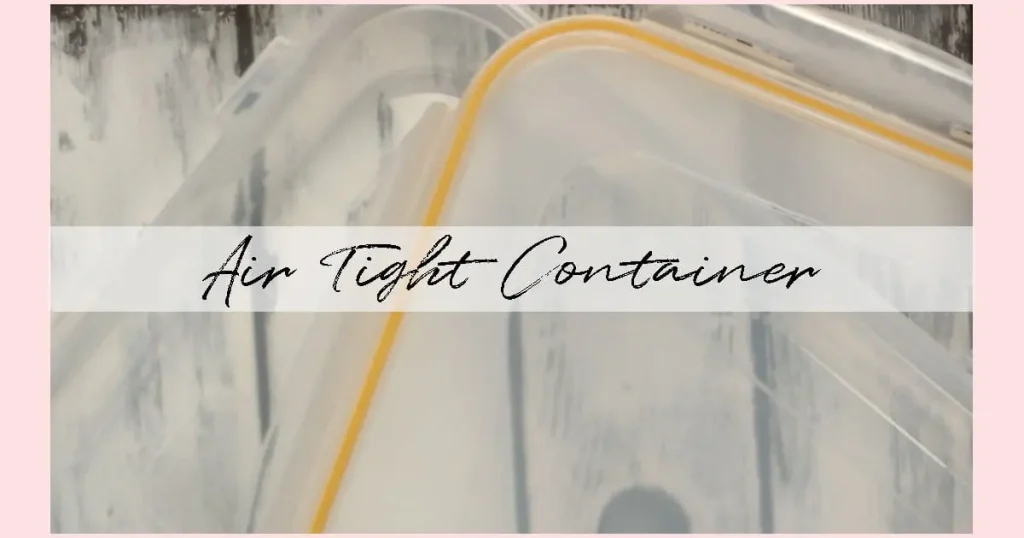
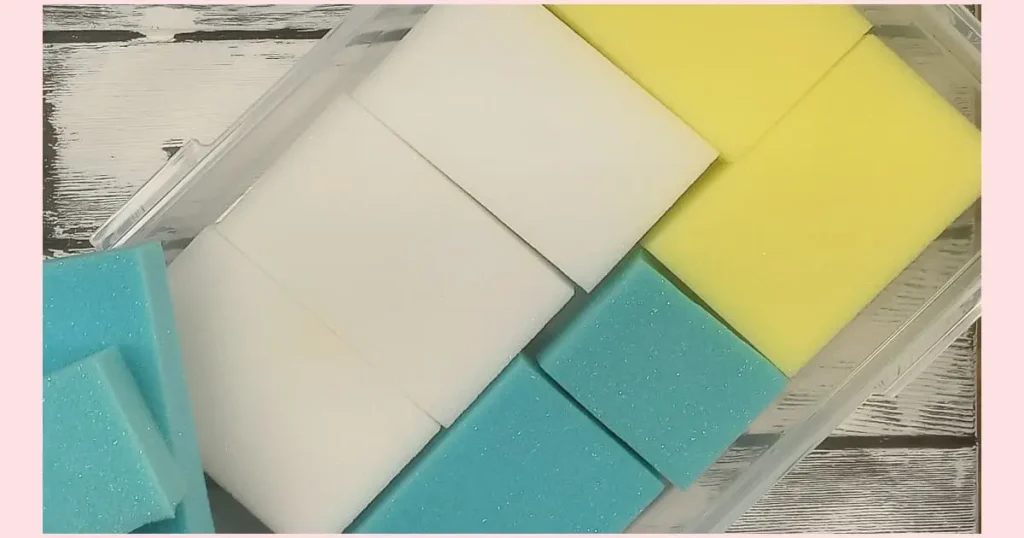
- A shallow 9×13” plastic container with a locking lid (Any plastic container will work, you just want to make sure that it has an airtight seal and it’s big enough to hold enough paint for large acrylic painting projects)
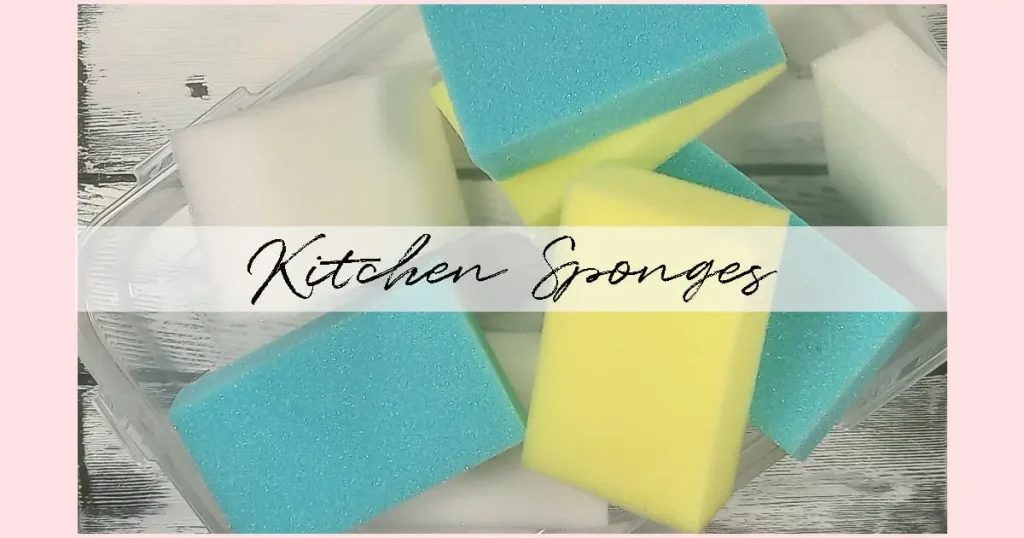
- 7 regular sized (4.5”x2.75”/11.5mm x 7mm) white kitchen sponges with no scrubbing side (I have no experience with using magic eraser sponges for this since I only use the inexpensive regular ol’ sponges from the $ store)
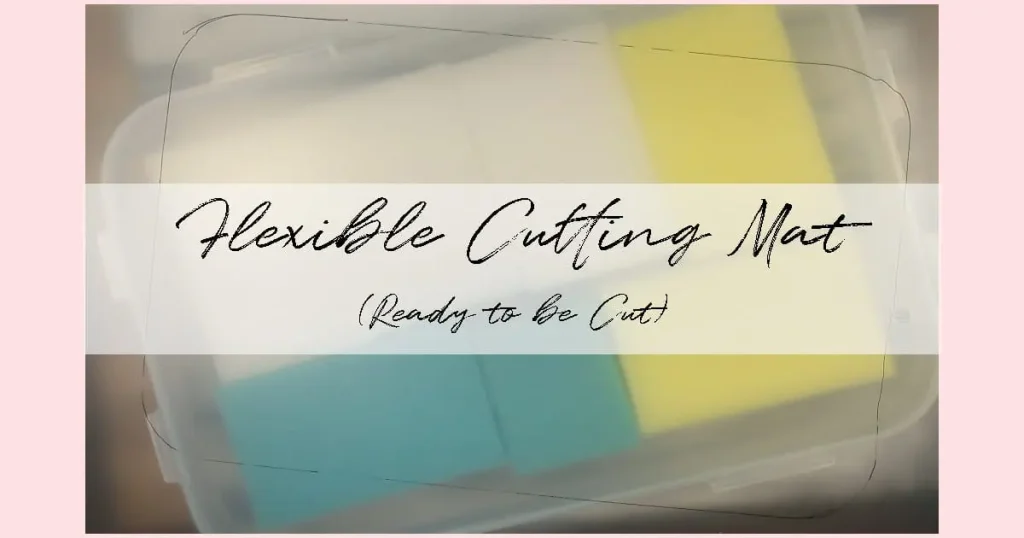
- A clear flexible cutting mat (You could probably use any kind of thin plastic sheet as long as it’s thin enough to cut with scissors, doesn’t have any type of pattern, and is either clear or white)
- Water (I use plain tap water because I have a whole home water filtration system. If your water isn’t the best or you’re not sure, you might want to invest in a water filtration pitcher)
Before diving in:
- Clean your container and cutting mat in warm soapy water and let dry
- Lay your sponges on the bottom of the sink, drizzle soap over them, and add warm water
- Work the soap into the sponges until you get lots of thick dense lather
- Empty the water out of the sink and start rinsing your sponges
- Squeeze as much of the soap out of the sponges
- Using the bottom (or lid) of your container as a template, cut the flexible mat to size and set aside
Assembling the Wet Palette
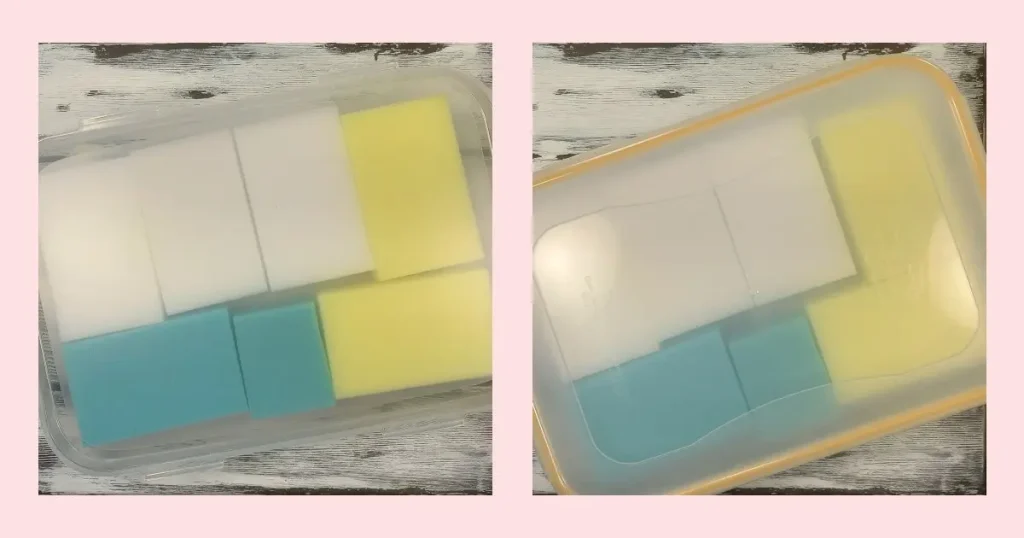
- Moisture Source: Give the sponges one final big squeeze and line the bottom of your container with them (my container has enough space for 6.5 sponges). You want them to be damp but unable to squeeze water out of them.
- Add Palette Surface: Lay the flexible cutting mat directly on top of the sponges.
- Seal it Up: Replace the lid and snap into place so it has an air-tight seal.
Tips for Using a Wet Palette Effectively
To get the most out of your wet palette:
- Keep an eye on the moisture level and add water as needed. You can do this by gently lifting a corner of the palette mat and poking one of the sponges. If your finger comes back dry, you need to add water
- Make sure to use either white sponges or a white flexible cutting mat. Using colors can affect the paint on the palette by changing its color slightly
- If you know you won’t be using your wet palette for an extended period of time, make sure to clean all surfaces and dry out the sponges.
- If you see mold or smell a funky smell, wash your wet palette and replace the sponges with new using the preparation guide above
- In between painting projects, make sure to flip the cutting mat to the other side so you keep wear and tear to a minimum
- If you are planning a longer painting session, you may want to spritz your paint with a fine mist of water (the longer acrylic paint is in contact with air, the more likely it is to dry out)
Troubleshooting Wet Palette Woes
While a wet palette is a valuable tool for acrylic painting, users may encounter some common issues. Here are potential problems and suggested solutions:
- Mold Growth:
- Problem: If not properly cleaned and maintained, a wet palette can develop mold, affecting both the palette and the paint.
- Solution: Regularly clean and dry all components, especially the sponges. If mold develops, thoroughly wash the wet palette, replace the sponges, and ensure the container is completely dry before reusing. Consider adding a small amount of bleach to the warm soapy water you use to wash the wet palette.
- Inconsistent Moisture Levels:
- Problem: The wet palette may not maintain consistent moisture levels, leading to paint drying too quickly or becoming excessively wet.
- Solution: Monitor the moisture levels regularly. Adjust the amount of water in the sponges accordingly. If the paint is drying too quickly, add more water; if it’s too wet, reduce the water content. Also, check the seal to make sure there is no breakage.
- Color Contamination:
- Problem: Using colored sponges or cutting mats can lead to color contamination in the paint on the palette.
- Solution: Use white sponges and a clear or white flexible cutting mat to avoid color interference. This ensures the true color of the paint and prevents unintended changes.
- Container Seal Issues:
- Problem: The container may not seal properly, leading to the drying out of the paint.
- Solution: Check the seal of the container regularly. If there are issues, consider using a different container with a reliable airtight seal. It’s crucial to prevent air from entering the palette, as this can expedite paint drying.
- Palette Size Limitations:
- Problem: The size of the wet palette may limit the amount of paint that can be mixed at once.
- Solution: Consider using a larger container or multiple wet palettes for larger projects. This ensures you have ample space for color mixing without crowding the palette. This also allows you to work on multiple art pieces at a time. Just make sure that you have enough space to store your wet palettes.
- Difficulties Cleaning the Palette:
- Problem: Dried paint residue can be challenging to clean, affecting the quality of the palette’s surface.
- Solution: If you have left your palette out and the paint has completely dried, use a sturdy straight edge, like a pot scraper or a paint scraper. Be sure to use a gentle hand as too much pressure while scraping could lead to rips in your thin plastic mat. Once you’ve removed the dried paint, you may notice pigment stains which can be easily removed with isopropyl alcohol and a paper towel.
How to Clean Your Wet Palette
Each piece of your wet palette should be cleaned thoroughly between acrylic painting projects.
- Container: Either wash in warm soapy water or wash in the dishwasher if appropriate (make sure to pay special attention to cleaning around the seal since this is a popular spot for mold to form). Allow to fully dry.
- Sponges: Use the prep instructions above, making sure to really work that soap into the sponge. Don’t worry if you can’t get every bit of soap out of the sponge (I’ve had some accidentally left in my sponges and it didn’t affect the acrylic paint at all). Either air dry or lay on the bottom of your wet palette, if you plan to paint again within the next day or two.
- Palette (cutting mat): When you finish an acrylic painting project, wipe away leftover paint with a paper towel. Once you’ve wiped up as much paint as you can, spray isopropyl alcohol onto the palette and let sit for a minute or two (make sure to protect your work area as isopropyl alcohol can strip color from just about any surface). Next, use more paper towels or a rag to wipe the alcohol from the palette. Repeat the process until the surface is completely clean.
Comparing A Brand Name Wet Palette With This DIY
So, what’s the big difference between this handmade wet palette and a Masterson Sta-Wet Palette? Beside the price, there are a few differences worth mentioning:
- The depth of the DIY version is much deeper than the Sta-Wet. This gives you more space for your paint piles without worrying that you’ll have to constantly scrape it off the lid.
- The palette paper used with the Sta-Wet can stain which means replacing it often if you want a clean palette to see your paint colors clearly. This could cost you more over time.
- The sponge for the Sta-Wet is thin so you have to be careful with it. The DIY wet palette uses inexpensive regular sponges that are easy to find and quite a bit thicker which gives them the ability to take a bit of wear and tear.
- Although the lid for the Sta-Wet claims to be airtight, there is no rubber seal, no locking mechanisms, and the plastic seems to be quite thin.
Now, don’t get me wrong, there are a lot of artists who absolutely love the Masterson Sta-Wet Palette. It’s been around for a very long time and is still very popular. It’s an excellent choice if you decide you don’t want to make one from scratch.
To learn more about the Masterson Sta-Wet Palette, take a look at this quick instructional video by The Weekend Beckons:
Final Thoughts on Making a DIY Wet Palette
Congratulations, you’ve now mastered how to make a wet palette for acrylic painting and the best part – it’s totally affordable! Having a wet palette at your disposal means less waste, more consistent paint viscosity, money saved, and an overall more enjoyable and stress-free acrylic painting experience.
This is going to open up your world to more experimenting and practicing, not to mention allowing you to use a spare moment (or two, or three, or four) for de-stressing and being creative every day. From this moment forward, you no longer need to worry about getting a whole painting finished before your paint dries up so relax and enjoy your acrylic painting journey!
Howdy! You explained the wet pallette wonderfully! I am on an extremely tight budget and this will help me tremendously! I have the supplies already hear at home. I will sign up for your newsletters.
Thank you kindly,
Mary Grace
Yay!!! I’m so glad you’ll be able to make your own. Happy Painting!
Thank you for the information; as a new beginner painter, retired, and on fixed income I appreciate your suggestions and knowledge. I’ve wasted paint drying out. Thanks for your help!
Thanks for your kind words! I love my diy wet palette and use it all the time. It has saved me from feeling like I have to rush through a painting, which I can’t stand. I’m the type of artist that loves the process of painting and like to take my time with each project. Happy painting!