Meet the Author

Artist | Owner of Squishing Paint | Educator - Sara brings over 40 years of creative experience, a decade of specializing in acrylic painting, and a passion for guiding new artists as they embark on their own artistic journeys


Some of the links in this article are affiliate links which means that if you choose to click on them and make a purchase, I earn a small commission at no extra cost to you.
Also, as an Amazon Associate, I earn from qualifying Amazon purchases.
For more details, please read the full disclosure here.
Thanks so much for your support!
Welcome to the world of painting clouds with acrylics, where the sky’s the limit! Feeling a bit nervous about giving clouds a try? You’re not alone – it’s one of the most common questions beginners ask. But, once you learn the real trick to painting clouds, it’ll become a breeze.
In this beginner’s guide, we’ll cover everything you need to know to master the art of acrylic cloud painting. In fact, I’m going to show you the results of successfully painting clouds with the following tools:
You’ll also learn about mastering cloud colors and shades with some stunning cloud inspirations and corresponding color palettes to spark your imagination. Plus, I’ll throw in my top picks for YouTube tutorials that will walk you through the entire process.
But before we dive into the nitty-gritty, let’s take a moment to appreciate why painting clouds can be such a challenge for beginners.
(mix black and white and add to the purple, also, add the yellow to the purple to dull it down a bit)
Why Is Painting Clouds So Hard?
Beginners to acrylic painting often find themselves scratching their heads when faced with the challenge of painting clouds. But here’s the thing: it’s not about the brush you’re using or the type of paint. It’s all about how you perceive clouds in your mind.
You see, many of us have been conditioned to think of clouds as those fluffy, cotton-ball-like shapes with perfectly defined edges. And when we gaze up at the sky, we often don’t pay much attention to the intricate shapes and details of the clouds above.
The real trick to painting clouds lies in seeing them for what they truly are – abstract shapes full of unpredictability and uniqueness. Just think about it: clouds come in all shapes, sizes, and colors. That’s what makes cloud gazing so fun – you never know what shapes you might spot up there!
So, here’s my advice: don’t overthink it. Instead of getting caught up in what a cloud “should” look like, trust your instincts. Paint loosely, quickly, and let your brush dance freely across the canvas. Embrace the spontaneity and unpredictability of the process. You might just surprise yourself with what you can create.
Painting Clouds 8 Ways For Beginners
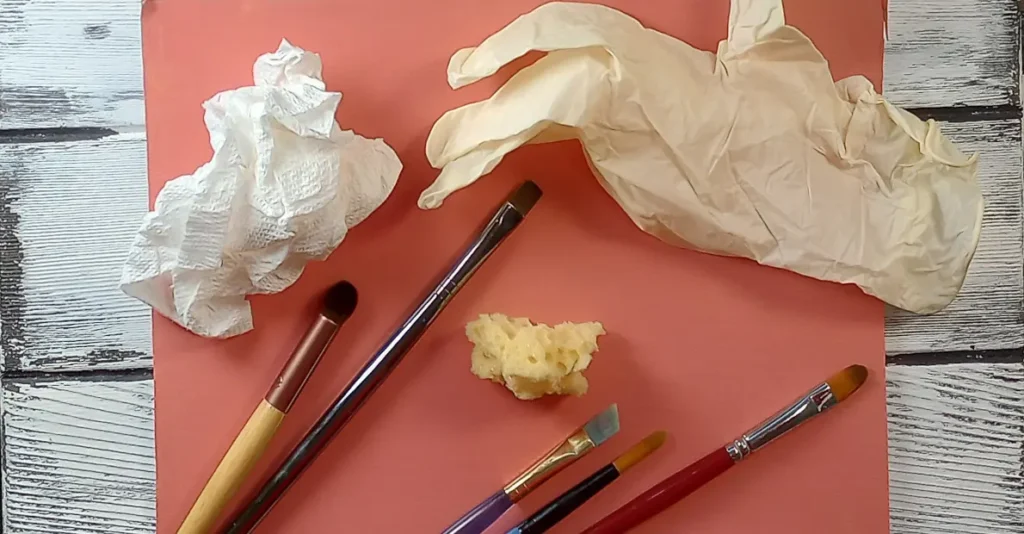
Let’s dive into an exciting experiment where we explore the versatility of various painting tools for creating clouds. From classic brushes like mop, filbert, round, flat, and angle to unconventional choices such as paper towel, sponge, and even our own fingers, I’ll demonstrate that there’s no one-size-fits-all approach to cloud painting.
By trying out different tools, you’ll see that the real struggle isn’t about getting everything just right. Instead, it’s about finding our groove and letting our creativity flow. Keep in mind that I painted all of the clouds on one cracker box sized piece of cardboard. If you’re going to do a cloud painting on a larger surface, you’ll want to adjust the amount of paint you use on your painting tool accordingly.
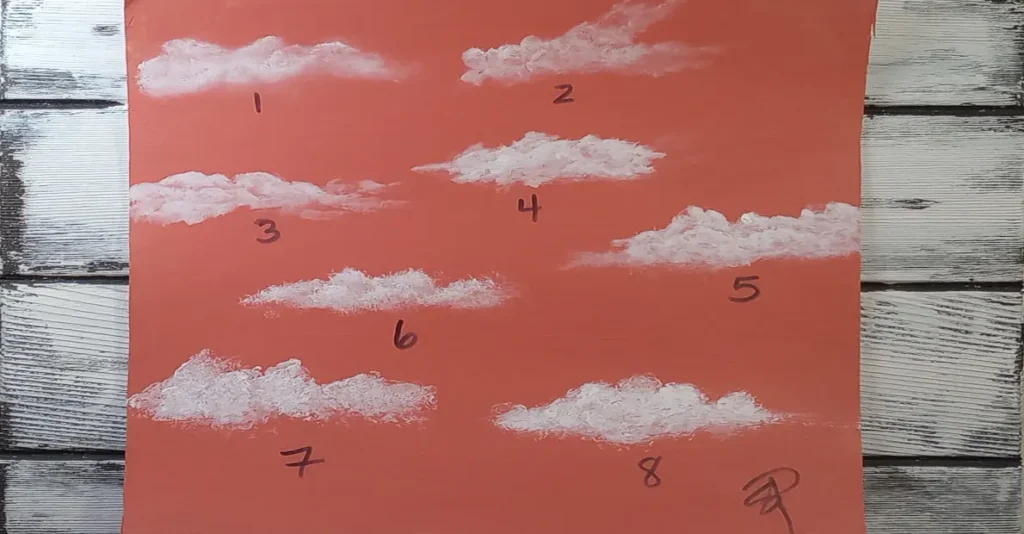
Mop Brush
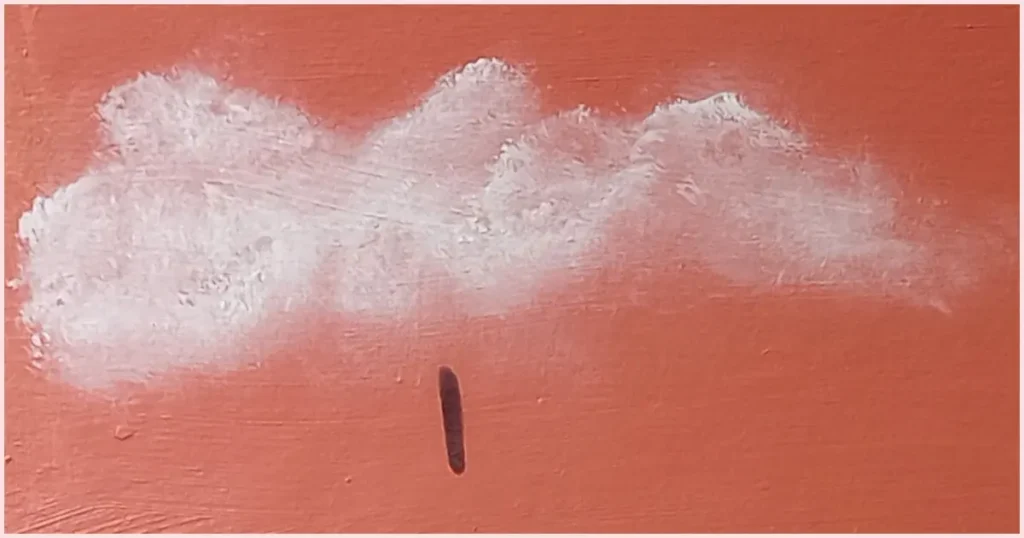
Alright, for our mop brush experiment, make sure your brush is nice and dry, and don’t go overboard with the paint – less is more here. Use a circular motion and a light touch to spread the paint out over the canvas. Then, layer it up where the sun would hit to give those clouds a bright, white highlight. Continue with the painting technique until the paint on the brush runs out. That will give the impression of wispy clouds radiating out from the more dense cloud formation.
If you’re having trouble with the paint lifting off the canvas, just let it dry completely before adding more layers. Oh, and a handy tip: it’s smart to have a couple of mop brushes handy so you don’t have to wait around for them to dry after washing. These brushes can get pretty floppy when they’re wet, so having backups is a lifesaver!
Flat Brush
Alright, let’s dive into the flat brush experiment! Start by dampening your brush slightly, then try using it on its side instead of the usual way. Embrace the scumbling technique – it’s like controlled scribbling! You’ll want to use pressure to scribble the basic shape of the cloud but then switch to using a lighter touch to blend the edges out. You’ll need a bit more paint than you would with a mop brush, but don’t go overboard. You want to avoid putting big blobs of paint on your brush; instead, less is more and then build up the layers where you need super dense clouds.
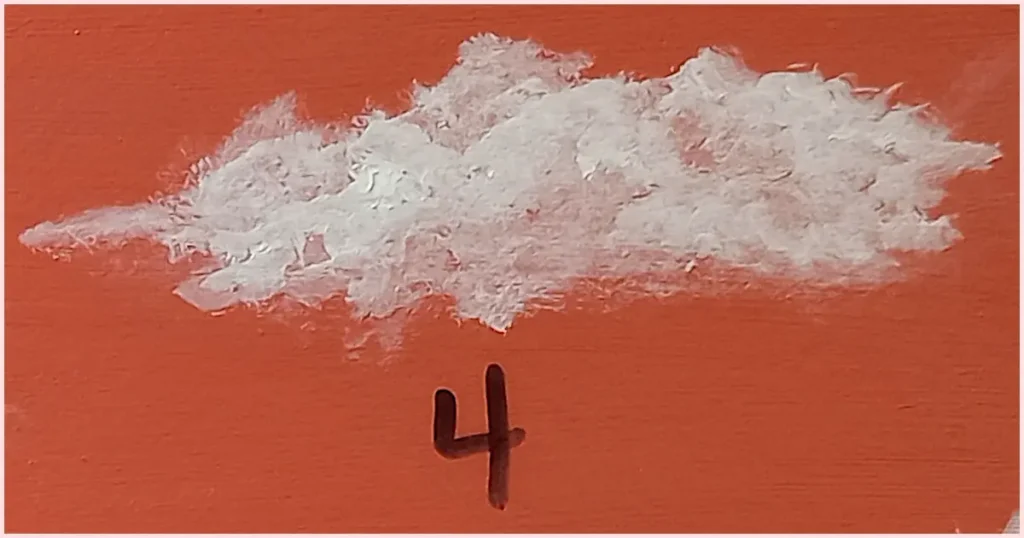
Filbert Brush

Next up, let’s talk about the filbert brush. Get your brush slightly damp with water for smooth painting. Remember to use just a bit of paint and layer it up slowly for a realistic look. When scumbling, basically scribble with the brush, but twist and turn it to keep those cloud edges from looking too petal-like. This method gives your clouds that natural, soft look we’re aiming for.
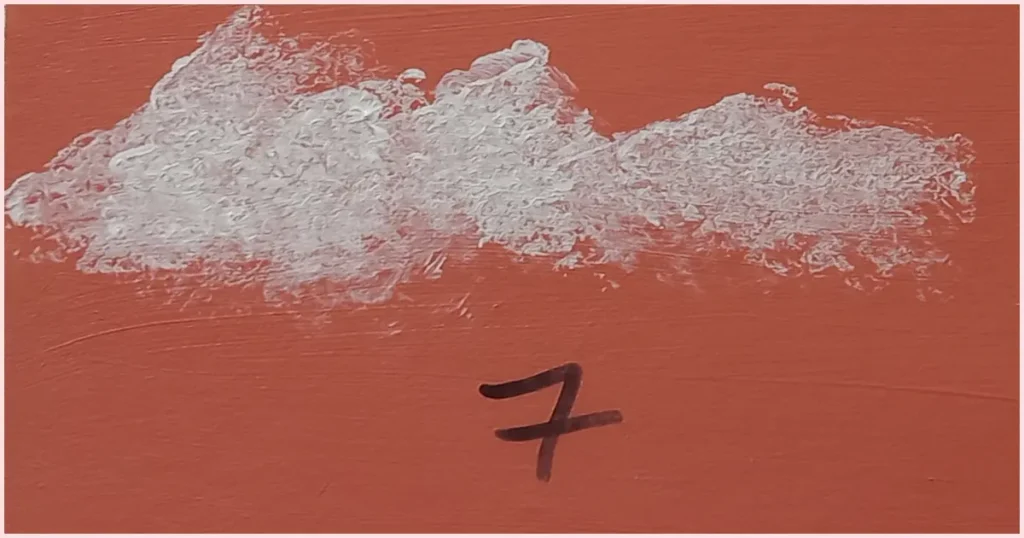
Angle Brush
Alright, let’s experiment using the Angle brush for painting clouds. Just like with the other brushes, besides the mop, you’ll want to dampen the brush slightly for smooth application and use the scumbling technique. However, with the Angle brush, you’ll want to use a bit more paint to prevent the sharp point from leaving pointed edges on your clouds. It can be a bit trickier to use, but don’t worry, it’s totally doable! Just take your time and practice getting the hang of it, and soon you’ll be creating beautiful, fluffy clouds with ease.
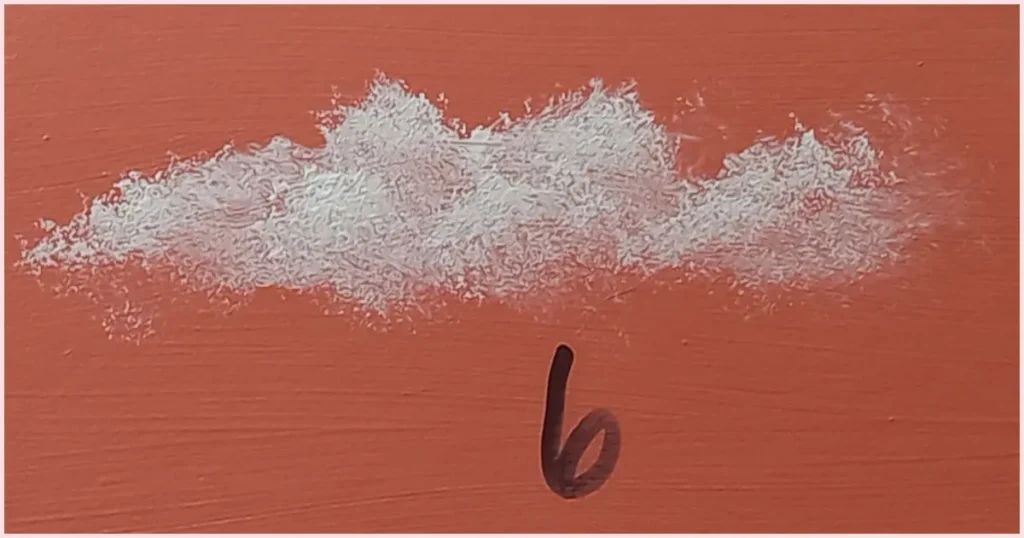
Round Brush
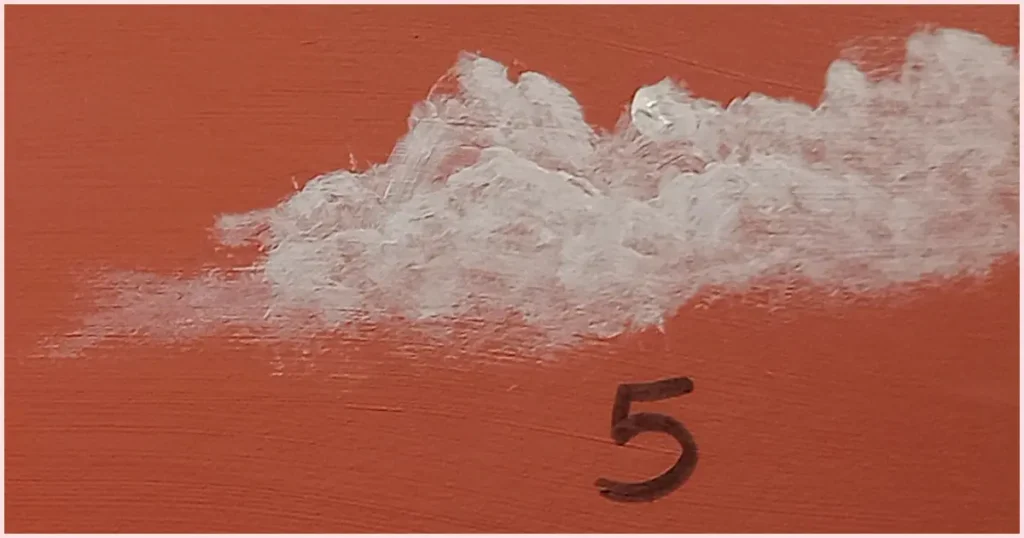
Let’s move on to using the round brush for painting clouds. Just like with the flat brush, you’ll want to dampen the brush slightly and use a light touch with the scumbling technique. Remember, it’s all about layering up the paint gradually to create depth and texture in your clouds. Once your cloud is dry, don’t forget to go back in and add layers in unexpected places. Don’t just focus on the outside edges; let the transparency of the paint guide you to build up fluffy textures within the cloud. This adds dimension and realism to your cloud formations.
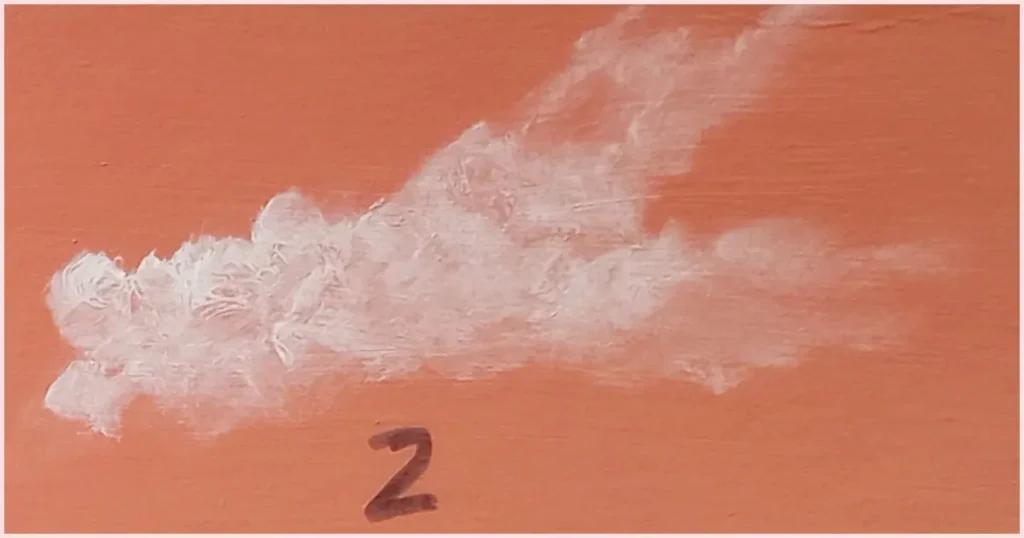
Sponge
Next up, painting clouds using a sponge – it’s a fun and unique technique! Grab a dry sponge for this and add just a small amount of paint to the sponge to avoid blobbing it on your canvas. Now, start dabbing the paint on in a bouncing motion, making sure not to squeeze the sponge too hard. Begin by working out the basic shape of your cloud, then go back in with more paint to add thickness or highlights where needed.
Paper Towel
Let’s explore a creative way to paint clouds using a piece of paper towel! Start by crumpling and straightening the paper towel a few times to give it texture. Begin painting with the paper towel in its crumpled-up state. Dip the paper towel into the paint, but make sure to remove most of it before applying to the canvas. Now, use the same dabbing or bouncing technique that you used with the sponge. Additionally, don’t hesitate to experiment by occasionally rubbing the paper towel on the canvas to create interesting textures and effects.
Fingers

Let’s dive into cloud painting using your fingers – finger painting for adults? Yes, please! Remember the dabbing and bouncing technique we discussed earlier, similar to using a sponge? Apply the same method here: dip your fingers into the paint, then remove most of it. Use a lighter touch with your fingers, similar to using a sponge. For added precision, use your smaller fingers to highlight the cloud’s interior details. While controlling pressure may be a tad trickier, it’s still achievable with practice.
Looking for some inspiration? Take a look at this huge curated group of cloud photos on Pixabay. Any one of them would be perfect for practicing painting clouds.
What Colors Are Best For Clouds?
Now, let’s talk about why color is truly the backbone of painting clouds. It’s what gives your skyscapes that extra oomph, infusing them with depth, realism, and mood. Clouds aren’t just simple white blobs in the sky; they’re living, breathing entities that interact with light and atmosphere in endlessly fascinating ways. Whether it’s the time of day, the weather, or the sun’s position, clouds are constantly changing and adapting, showcasing a diverse range of colors. By carefully selecting and blending your colors, you’ll unlock the ever-changing beauty and complexity of clouds, bringing them to life on your canvas in all their glorious hues.
Color is a super star at creating depth within the heart of the cloud. Start by laying down your base color, like a light blue or gray, to set the cloud’s vibe. Then, slowly add darker tones where the cloud is all thick and shadowy, like underneath overlapping cloud layers. On the flip side, use lighter hues or warm colors to mimic those spots where the sun’s peeking through, or highlighting the edges, or where the cloud’s all wispy and transparent. It’s like adding layers to your cloud cake, giving it that 3D wow factor that’ll make your art pop off the canvas.
Basic Paint Colors For Clouds
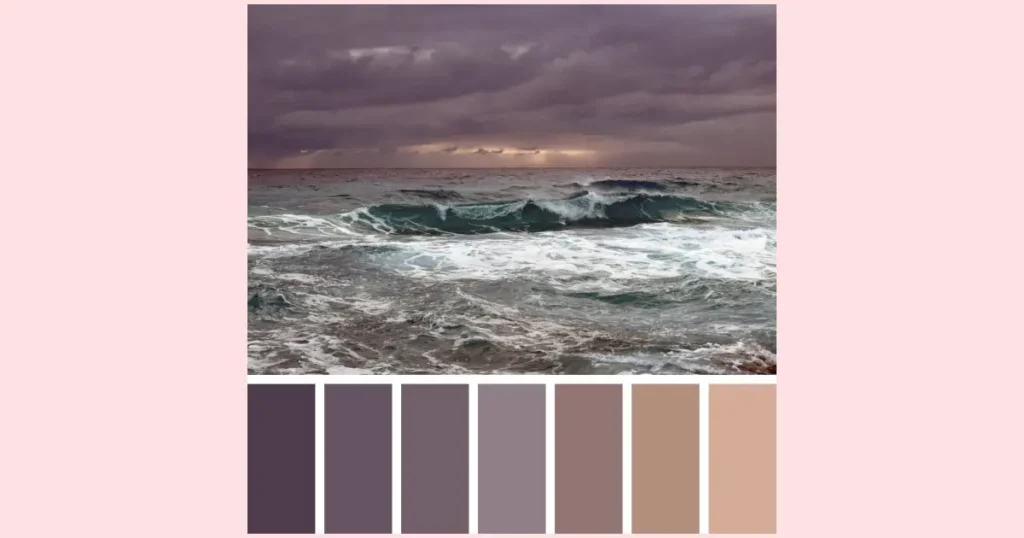
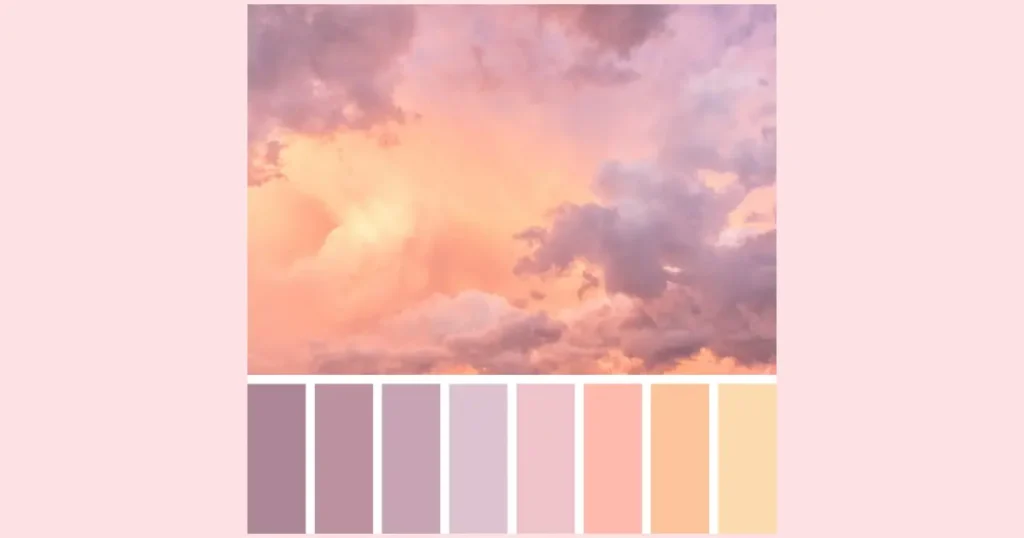
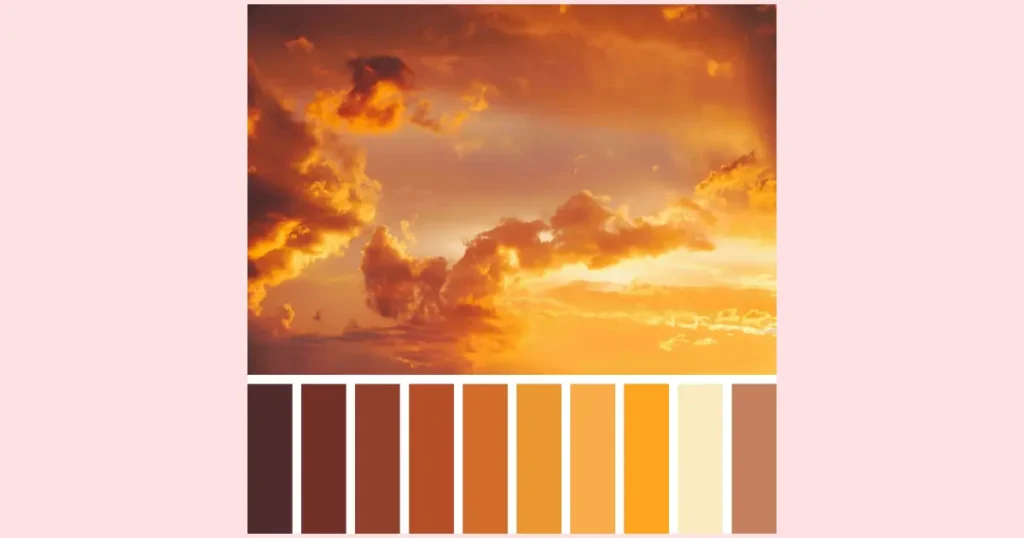
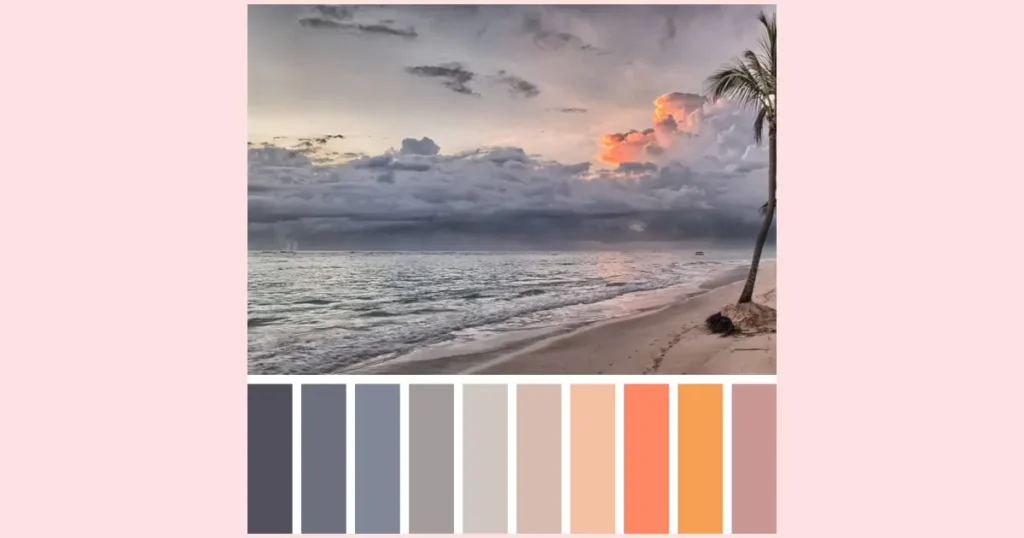
As a beginner setting out to paint clouds, having a good mix of colors at your fingertips is your secret weapon. For those sunny skies and fluffy white clouds, shades of white, light blue, and warm yellow can conjure up a cheerful scene. But for those stormy, dramatic skies, you’ll want to dip into darker hues like gray, deep blue, and hints of purple to add depth and intensity to your cloudscape. And don’t overlook the importance of colors for highlights and shadows: think soft pinks or peachy tones for sunrise or sunset clouds, and deeper blues or grays for storm clouds.
If you’re just starting your journey with painting clouds, here is a basic list of colors to consider having in your toolkit:
- White: Titanium White
- Light Blue: Cerulean Blue
- Warm Yellow: Cadmium Yellow Medium
- Gray: Payne’s Gray
- Deep Blue: Ultramarine Blue
- Purple: Dioxazine Purple
- Pale Pink: Azo Pink
- Peach: Quinacridone Magenta or Cadmium Red Medium (mixed with Cadmium Yellow Medium)
- Darker Blues or Grays: Prussian Blue or Mars Black

YouTube Recommendations For Painting Clouds
So, here’s the deal: what works like a charm for one person might not quite click for another, and that’s okay! That’s why diving into tutorials and experimenting with different techniques and tools is key. It’s all about finding what feels right for you. And hey, here’s a little nugget of wisdom: the more you practice, the easier it’ll be to see clouds as these beautiful, abstract shapes instead of just cartoon fluff balls.
How to Paint Clouds for Beginners by Idyllic Acrylic Art
Alright, painting pals, I hand picked this YouTube tutorial for painting clouds because it’s like having a front-row seat to see what I’ve been chatting about in action when it comes to using a sponge for those fluffy clouds. Plus, this tutorial even dives into painting clouds using cotton buds, which I think is perfect for capturing the intricate patterns of a mackerel sky. Trust me, you’re in for a treat with this one!
How To Paint Clouds – 3 Easy Steps In Acrylic By Joni Young Art
So, let me tell you why I picked Joni Young Art’s cloud painting tutorial. It’s like the holy grail for painting those big, billowing clouds you see on a gorgeous day right before a storm hits. What’s cool is that even before Joni dives into the nitty-gritty with the smaller brushes, you’ve got yourself a stunning cloud masterpiece. And get this – Joni mainly uses Filbert paint brushes in different sizes for the majority of the painting.
But hey, don’t sweat it if you don’t have Filberts – with a bit of practice, you can rock it with any brush you’ve got lying around. She enjoys using Filberts because they have that nice rounded edge that easily creates the puffiness of these types of clouds. I’m already picturing this tutorial as a vibrant sunset sky, painted with rich yellows, pinks, and oranges. Trust me, it’s a gem you won’t want to miss!
How to Paint Clouds! Easy Step By Step Instructions-Beginner Acrylic Painting Tutorial by Michelle the Painter
I decided to include Michelle the Painter’s tutorial for painting clouds in the mix because, unlike some tutorials that dive deep into technique, Michelle’s focus is all about the art of placement – specifically, where to pop those highlights and shadows depending on the time of day. It’s totally in line with what we’ve been chatting about regarding the importance of color in capturing the essence of clouds. Plus, she dives into the nitty-gritty of cloud size and placement on your canvas, which can make all the difference in bringing your sky to life. Consider it the perfect companion tutorial to round out your cloud-painting arsenal!
Final Thoughts On Learning How To Paint Clouds
Okay, painting pals, we’ve made it to the end of our journey learning all about painting clouds. But, jeez, clouds… those puffy marvels that seem simple from afar but turn into intricate puzzles up close. Sounds challenging, right? But here’s the secret: once you crack the code and embrace their complexity, you’ll find yourself sailing smoothly through the world of cloud painting.
Along the way, we’ve explored a treasure trove of tools – brushes, sponges, even our trusty fingers – each offering its own magic touch to bring those clouds to life. And color? It’s like the spice that adds flavor to your dish! Choosing the right hues isn’t just about picking colors; it’s about creating a whole mood and atmosphere on your canvas, turning your painting into a masterpiece.
Remember, practice is your best friend. Embrace the trial and error, laugh off the frustration, don’t be afraid to get a little messy, and above all, don’t give up. With dedication and perseverance, I have no doubt that you’ll soon be painting clouds like a true master. You’ve got this!