Meet the Author

Artist | Owner of Squishing Paint | Educator - Sara brings over 40 years of creative experience, a decade of specializing in acrylic painting, and a passion for guiding new artists as they embark on their own artistic journeys


Guys, I am so excited because it’s that time of year again where all things spooky reign supreme and to kick off the scary season, I’ve got a frightfully fun list of Halloween painting ideas that are perfect for beginners.
Every single one of these hand-picked Halloween tutorials will teach you valuable lessons that you can take with you on future painting projects. We’ll be looking at light glow, blending, reflections, lots of creepy trees, and more.
Not only will you get the advice and tips from the tutorial instructors but I’ll be sharing my own wickedly good tips to help you conjure up your very own Halloween masterpiece. So, grab your broomstick (or paintbrush, whichever is closer), and let’s brew up some artistic magic together!
A Few Words About Acrylic Painting Tools
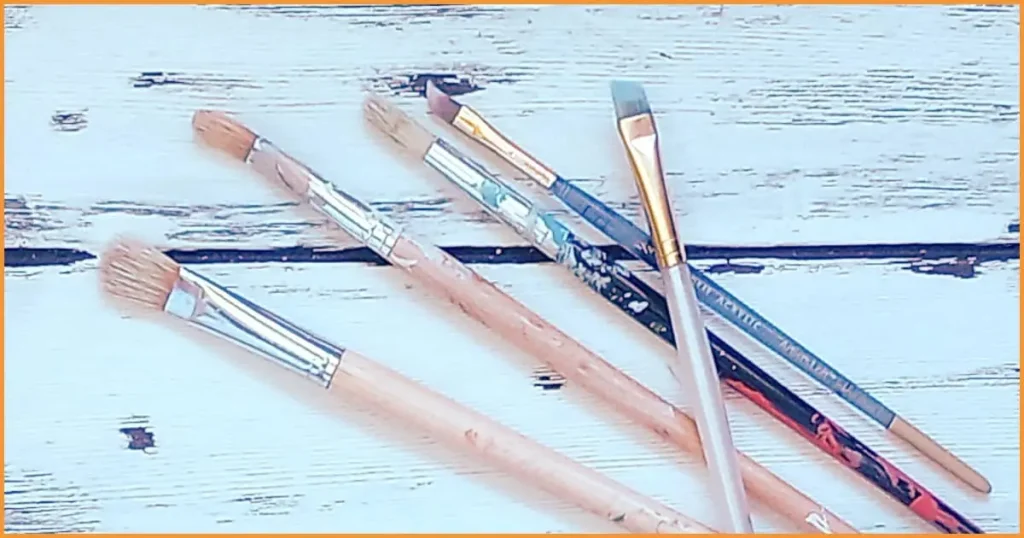
So, I thought it would be a good idea to go into some explanations and substitutions of the different brushes you’ll come across in these Halloween painting tutorials. This will give you options, just in case you don’t have the exact brush that’s called for. Keep in mind, there are many different ways to get a job done when it comes to acrylic painting. Heck, you can even use paper towel to paint in a background!
Bristle Brushes
You may hear an instructor talk about using a bristle brush and this may seem confusing since….don’t all paintbrushes have bristles??? And, you’d be totally right. However, in this case, bristle brushes are being used to scrub paint onto the canvas. So, your best bet is a paintbrush with very firm bristles but, be aware, some of these bristle brushes are created to hold a lot of water. That said, make sure to squeeze the water out of the brush before applying paint.
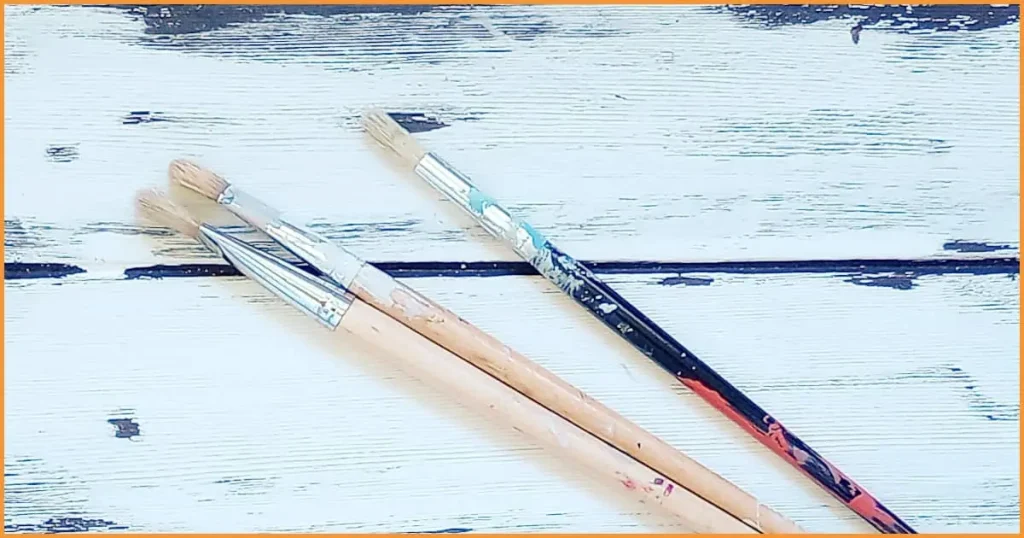
Old Scruffy Paintbrushes
Your other options for scrubbing and scumbling paint onto a canvas is to use old paintbrushes that have seen better days. This is why I say to never throw out old paintbrushes! Your puffed out brushes, that no longer have a sharp edge, are perfect for so many different techniques. From painting grass and fur to scumbling and scrubbing, you should always save your old brushes so you can save you new and favorite brushes for gentler techniques.
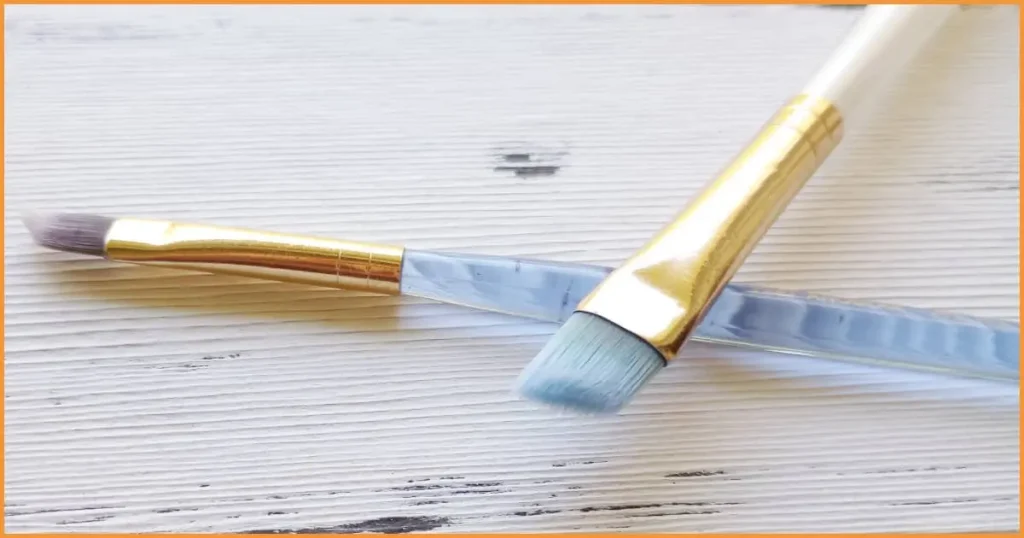
Mop Brush Alternative
Mop brushes are fantastic for creating beautiful soft blends between acrylic paint colors but if you don’t have a mop brush, don’t despair. You can easily substitute with soft dome-topped makeup brushes! Powder, blush, and blending brushes all make amazing mop brushes and you can find these type of brushes fairly easily wherever makeup is sold. Note, makeup brushes will hold a lot of water so make sure to squeeze the water out until just damp and you may want to have two of each for each painting project, one for starting the wet blend and the other to go in gently and finish with a dry blend.

Spooktacular Ghost Acrylic Painting Ideas
Let’s start this frightfully epic Halloween painting ideas list off with a BOO-tiful assortment of ghostio painting tutorials from some of my favorite art instructors on YouTube. As you’ll see, the spectral world can be portrayed as cute little spirits frolicking through the woods or as imposing shadows lurking in the darkness.
“Ghost In The Rain” by Michelle the Painter
Michelle the Painter doesn’t disappoint with this cute little ghost strolling through the rain-drenched forest. I love how the dingy background really makes the ghost and his umbrella pop. Also, the folds in the fabric and the reflections in the wet path are eerie-sistable!
Here are just a few of the techniques you’ll be practicing:
- Misty background
- Easy trees
- Fabric dimension
- Easy reflections
- Water ripples
- Rain
Tips for Success:
- Michelle does a lot of scrubbing and scumbling with her brushes so I highly suggest you use a bristle brush or an old scruffy brush that you’re not too attached to
- If you do use a bristle brush (these are the brushes that are very stiff and rough feeling), make sure to really squeeze the moisture out of them (they hold much more water than a synthetic bristle brush)
- Feel free to get creative and change up the color of the umbrella and leaves
- Leave perfectionism at the door with this one! This is more impressionistic so stay loose and free with your brushstrokes (if you have trouble with this, try holding your brush further back on the handle)
“BOO!” by Joni Young Art
If you want a ghost that seems to pop right off the canvas, this one’s for you! The play of light and shadow, as well as the colors used, help to make this ghost look as if he’s going to float right off the canvas and into the living world!
In this tutorial, you’ll be practicing:
- How to paint Spanish Moss
- An easy blended background
- Wispy fabric
- Craggy gnarled tree branches
Tips for Success:
- If you don’t have any mop brushes, you can actually use soft dome-topped makeup brushes (you’re going to want a couple of them)
- Don’t have any turquoise? No worries! Check out my article that has tons of turquoise paint mixing recipes
- When Joni paints the fabric, she uses a pull-and-flick motion with her paintbrush
- There is some scrubbing/scumbling involved in this painting so make sure to use old scruffy brushes or brushes that can handle the wear and tear
“Spooky Halloween Ghost” by Painting with Jane
Next on our list of Halloween painting ideas, we have a more frightfully fiendish-looking ghost. In fact, this one kind of reminds me of the Ghost of Christmas Future in A Christmas Carol. There is something so ominously creepy about staring into the depths where a face should be.
Jane is going to teach you:
- How to use matte medium to create layers of translucent fabric
- How to create a fangtastic painting with only black and white paint
- Layering to create depth
- Using highlight and shadows to create directionality
- Easy but spooky-looking hand
- How to make things seem to fade into the background
Tips:
- Since this tutorial focuses on layering, you may have to stop and start up again more than normal to give the medium a chance to dry
- If you don’t have medium, I think you could still do this with a dry brushing technique (to learn more, check out my article on how to blend acrylic paint)
- I think this would also be cool with a glowing background behind the ghost (maybe red, purple, or even green)
- This tutorial is perfect for making a sign on your front door that could say something like “Enter…If you dare”, or a sign that says “Help yourself” and pointing to your bowl of Halloween treats
Ghoulishly Good Jack O’Lantern Painting Tutorials
Would it really be the absolute best list of Halloween painting ideas without a few creep-tastic Jack-O-Lantern painting tutorial video options for ya. The best part about painting Jack-O-Lanterns is changing up the facial expressions. I mean, you could do one of these tutorials multiple times, just changing up the face, and you’ll have a different painting every time!
“Spooky Pumpkin” by The Art Sherpa
Cinnamon is so generous with giving everyone extra resources to help you be successful with all of your painting projects. It’s actually why she’s one of my top YouTube instructors. Well, that and her personality. She just seems like one of those people who would make even a simple coffee date between friends a complete blast.
My favorite parts about this particular tutorial are the colors used, the painterly effect, and the free traceable she gives with every tutorial. It will make your painting experience that much more enjoyable.
The Art Sherpa is going to teach you:
- A neat trick if you need a fluid white paint but don’t have any on hand
- How to make a streaky, yet blended, background
- How to paint grass using a fan brush
- Painting with loosely mixed paint straight on the brush
- The secret to painting a glow at night
Tips:
- If you don’t have the Saral paper Cinnamon uses in this video for tracing, take a peek at my article that teaches you, step-by-step, how to transfer a traceable
- If you struggle using a fan brush, I’ve got an article that shows you different brushes you can use to paint grass and the results of each
“Jack-O-Lanterns” by Michelle the Painter
I absolutely love this one and thought it would be perfect for you! In this awesome painting by Michelle the Painter, she shows you how to paint jack-o-lanterns sitting on a set of stone steps. It’s going to give you so much practice with painting pumpkins, glow, and facial expressions that you’ll be an old pro by the time you’re finished.
In this tutorial, you’ll learn:
- A super easy way to make a set of stairs
- How to paint impressionistic leaves
- How to create a glow
- Perspective
Tips:
- When painting in the steps, you can use chalk and a ruler, or even painter’s tape, to figure out where you want to place your steps before adding paint (if you aren’t happy with how the steps look, just go back in with your dark grey paint and paint out the step. Once it’s dry, paint it back in with your light grey)
- Be prepared to do some dry brushing which means you probably won’t want to use your favorite brush for at least part of this (get out your old scruffy brushes!)
- You could easily change up the stairs from stone to wood by using more burnt umber than black, and then add white
- If you don’t have the same colors that Michelle uses for her jack-o-lanterns, start with a deep dark red/wine color, then use a combination of red and yellow (adding more yellow as you get to the highlights)
“Jack-O-Lantern” by Painting with Jane
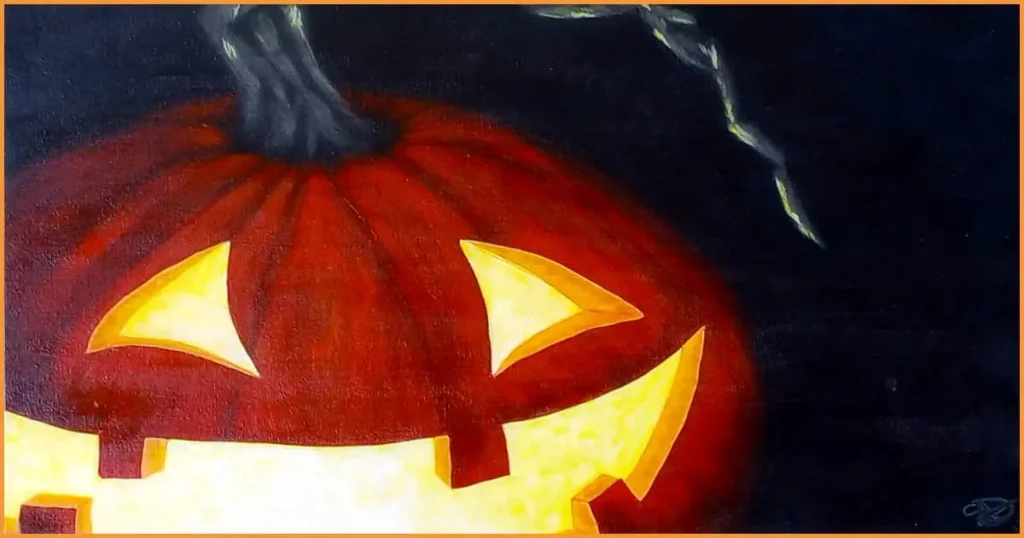
When I was deciding which Halloween painting ideas I wanted to add to this list, Jane’s jack-o-lantern was a no-brainer. In fact, I love this one so much that I painted it for myself and it gets hung every year during spooky season.
What I love most about this jack-o-lantern acrylic painting tutorial is how vibrant the colors are, how the edges of the pumpkin seem to disappear into the blackness, and the composition. I find having the pumpkin partly off canvas interesting to look at.
You will be practicing:
- Layering
- Highlighting
- Candleglow
- Depth through shadow placement
- Shape through directional brushstrokes
Tips:
- Keep your brush strokes loose (if needed, hold your paintbrush back further on the handle)
- You can absolutely use whatever colors you have on hand to paint your pumpkin
- If your layers aren’t looking the way you want just keep adding them until they do
Wickedly Wonderful Witch Halloween Painting Ideas
Not all witches are wart-nosed green-faced cackling instruments of evil so I decided to focus on witches that enchant with their beauty. These witch painting tutorials made it onto our list of Halloween painting ideas for a few good reasons. All of the witches are seen from behind so there’s no need to worry about painting details on a face, the colors used are spectacular, and there is a lot to learn while painting these gorgeous goddesses. Let’s dive in!
“A Pretty Witch” by Joni Young Art
Nothing says Halloween more than the combination of purple and orange, am I right?! That’s why this painting tutorial is the perfect start to all of your witchy portraits. Also, the composition of this painting focuses on her gorgeous dress which, surprisingly, uses basic brush strokes to get the job done.
Joni is going to teach you:
- How to paint hair
- How to easily paint an outline for the witches’ proportions
- How to use directional brush strokes to show the flow of the fabric
- Using different colors to create shadows and highlights
- Painting with a limited palette
Tips for Success:
- If you don’t have the same paint colors as Joni consider using a mix of Diox Purple and Titanium White for the background, use the Diox Purple with Cad Yellow Medium, and Cad Orange for the dress (if you don’t have Cadmium Orange, I’ve got an article with lots of different orange paint mixing recipes for you)
- I suggest that you watch the video through as normal and then go back and rewatch, as you paint, using the mute button so you don’t get distracted and also slowing the speed down on the video so you can really see the brush strokes that Joni uses
- Remember, when you’re painting the dress you’re just using different colors (black, purple, orange, yellow, and white) to make sweeping lines. This will give the illusion of folds in the fabric (there is a tiny bit of scumbling to be done, as well)
- If you don’t have a rake brush to paint the hair, use a fine round detail brush, with a bit of extra water added, and a light touch
- If you’re intimidated by painting the small hand, just stop at the wrist and that will make it look as though she’s holding a bunch of fabric from inside the fold
- If you find your colors aren’t bright enough, let the paint dry, add some white, then add the color over the top once the white has dried (you can also dry brush a bit of white on and this will create a more diffused look to the bright color you want to add)
“Witchy Women” by Michelle the Painter
Besides the dramatic sky and the super cool fire staff, my absolute favorite part of this step-by-step painting tutorial is how Michelle explains how to create the human form using really basic shapes. Actually, I feel like that is one of Michelle’s strongest skills. She has a way of showing how, with just a few strategically placed markers, you can block in just about anything. Even when you’re transferring a traceable, you only want the very basic lines to trace. Too much detail is a waste of time since you’ll be painting over them.
In this painting project, you’ll practice:
- How to paint a pathway
- Create flame glow
- Using highlights on silhouettes to create dimension
- How to make translucent/transparent colors pop on black (If you’re looking to learn more, take a look at my article that goes more in depth about painting on black canvas
Tips:
- If you want to make your trees look more spooky use angular brush strokes (use a small liner brush, with a bit of extra water, hold your hand further back on the handle, twist and gently jerk your brush as you pull up toward the tip of the branches (I’ve got more tips for painting thin branches that you can pause to take a look at)
- To give form to tree trunks don’t just highlight the edges of the trunks. Add highlights in random broken lines within the trunk that are a bit darker than the edge highlight (this will cause the lighter parts to see closer to the light source which pushes the darker parts of the trunk back)
- If you use jagged twisted lines for the highlights in your tree trunks you’ll get the same effect as the gnarled branches (this will suggest that the tree is very old)
“Halloween Painting Tutorial” by Aham Art
This little painting tutorial is so cute and super easy to do. Although there is no vocal instruction, you’ll easily be able to follow along. The artist makes sure to list materials as they go along and you get a clear view of each brush and brush stroke used. I recently saw where a family with young children did this tutorial as a fun and festive activity and each one of them did a wonderful job!
What you’ll learn:
- Create a forest scene using tone on tone paint colors
- How to paint the silhouette of a witch
- How to strategically place a shadow so the witch looks like she’s floating
- How to paint jack-o-lanterns
- How the use of complementary colors (blue and orange) can create instant drama
Tips for Ultimate Success:
- Don’t over blend your background
- Allow the streakiness of the paint on your brush to create the distant trees
- If your orange is too transparent and not showing up, paint the pumpkins white, let them dry, and then paint over with orange
- Instead of adding the crow, you could add a broomstick or just leave the arm out of the painting altogether
- Don’t forget, if you need to slow down the video, go to settings (the little cog wheel), click on playback speed, and choose a slower speed
Scream-Worthy Supernatural Painting Tutorial Ideas
Here are a few bonus acrylic painting tutorials that were just too good to leave out of this list of Halloween painting ideas. I mean, could I even say that I did my research if I didn’t at least include a haunted house? That’s just crazy talk! Let’s check out who the honorable mentions are.
“Easy Halloween Ghost Candle” by The Art Sherpa
I thought this painting tutorial for beginners was perfect to include in our Halloween painting ideas because it uses fun colors, painterly brush strokes, and the composition is pretty straightforward.
What you’ll learn:
- Paint a dripping candle
- How to paint a ghost flame
- Add highlights and shadows to give the illusion that something is rounded
- How to add highlights and shadows from multiple light sources
- Flame glow using painterly brush strokes
Extra Tips:
- If you’re too intimidated to paint the face in the ghost flame, just add a couple of black dots for the eyes and leave the rest as is (although, I think you can do it!)
- Cinnamon adds agitation lines around the candle to make it look like the ghost flame is shaking but it’s not really necessary
- If you’re having trouble painting in the vase so that it’s even on both sides just keep adding paint to the background (to make the side less round) or add paint to the vase (to make the sides more round)
- I do believe that this particular tutorial is a great one to start learning how to draw your composition right onto the canvas but, when in doubt, Cinnamon always gives you access to a traceable
“Haunted Scarecrow” by Painting with Jane
Again, this is another one that made it onto our list of delightfully spooky Halloween painting ideas because it uses super easy brushstrokes. That said, what I really like about it is that the way the brushes are used to apply the paint is different. I feel like this is a good exercise in learning that you can use your tools in unexpected ways and create interesting compositions. Most of all, this is just a totally creep-tastic painting that you could customize in so many ways.
What you’ll learn:
- Using brushes in a different way to create interest
- Paint straw
- Paint trees (both close up and distant)
- Paint a pumpkin
- Paint a tombstone
- Paint a spooky sky that uses a brightly colored underpainting
Tips:
- Keep your brush strokes loose and don’t try to force anything (just let the brush do what it wants and see what happens. You can always go back and fix it later if you feel you need to)
- Play with the underpainting color (it will give you a different look depending on what color you choose)
- If you do decide to change the underpainting color, I would stick with something bright (yellow, red, orange, magenta, etc..)
- You can also paint the grass using a sponge
“Haunted House” by Michelle the Painter
I’m so excited about this one, guys! I mean, an eerie scene with a haunted house? Come on! This haunted house has a beautiful full moon, a quirky bent house, glowing windows, and craggy old trees. It’s got everything you need to get your spooky on!
What you’ll learn:
- Paint a big moon
- Moonglow
- Dramatic sky
- Glowing distant landscape
- Painting bats
- Glowing windows
- How to add highlights to black to define shape
- How to paint a house
- Twisted trees
Helpful Tips:
- Michelle does a lot of scrubbing in the sky so you might want to use an old brush that’s seen better days or you can also just get the paint on there quickly and then use a mop/makeup brush and a light touch to gently blend
- Feel free to skip the bats in this one (it’ll still be stunningly scary without them)
- Since the house is off to the side, you could make this an awesome sign by painting “Happy Halloween” down the other side
- You could paint a large jack-o-lantern (from one of the curated tutorials above) in the bottom right corner to add a bit more light to the painting and to help the eye travel from the jack-o-lantern to the window glow
- Don’t fuss over having straight lines on the house (remember, the bent and twisted lines will help to make the house look spookier)
Wrapping Up Our Halloween Painting Tutorial List
And, there you have it! I’ve unveiled a cauldron of Halloween painting ideas that are sure to cast a spell of creativity over your festive artistic projects. From wicked witches to eerie landscapes and ghostly ghouls, there’s something for everyone to sink their fangs into.
So, whether you’re planning a chilling Halloween paint night with friends or looking to adorn your haunted lair with spooktacular masterpieces, you’ve got yourself a portal into the very best ideas for beginners.
Let your imagination run wild, embrace the supernatural, and let the Halloween spirit flow through your brushes. Happy painting, and may your creations be more “boo-tiful” than ever!