
Meet the Author

Artist | Owner of Squishing Paint | Educator - Sara brings over 40 years of creative experience, a decade of specializing in acrylic painting, and a passion for guiding new artists as they embark on their own artistic journeys


Hello, my friend! Today we’re going to talk about one of my favorite things, how to paint a sunset. Sunsets can be super easy or more complicated depending on how dramatic you want them to appear. Either way, I think we can all agree that breathtaking sunsets are all about the colors you choose.
How to Paint a Sunset

We’re going to talk about colors, brushes, how to fix little mistakes really easily (there’s no such thing as a mistake, by the way), and more. Also, we’ll do a bit of a practice piece and I’ll recommend some fun YouTube tutorials so you can practice even more.
My hope is that, after we focus on everything you need to know when learning how to paint a sunset, you’ll be able to take beautiful photos and turn them into extraordinary works of art. Let’s do this!
Colors
There are so many beautiful colors you can use to paint a sunset. From reds, yellows, pinks, and oranges to purples, and blues, and greys, you have a lot of choices!
When I was first learning how to paint a sunset, I started with the obvious, red and yellow. My thought was that it would create a nice vibrant orange but this fell short of what I was trying to accomplish. It was very flat looking and, to be honest, looked more like something a child would paint in elementary school. I was less than impressed.
After a ton of experimenting, I found my favorite color combination and it made a world of difference! For me, the perfect combination is quinacridone magenta and cadmium yellow medium. It creates the vibrancy I always look for and reminds me of some of the gorgeous sunsets we get in my little corner of the world.
CHOOSING YOUR COLORS
- Stick to using mostly warm colors like yellow, orange, red, and/or pink
- You can add cool colors, such as purple and blue, but use sparingly
- Pastel colors will give you a hazy looking sunset
Brushes
Choosing your paintbrush is fairly easy. The best brush to use is a flat brush that isn’t too stiff but not really soft either. How to paint a sunset that looks realistic will depend on blending your paint colors together without using too much pressure. The size you use will depend on how large of a painting you are doing. You’ll be painting broad strokes horizontally, using pressure to lay the paint down, and then using feather-light strokes to blend the colors together. For more detailed instructions on how to blend paint, check out my blending article here.
Tricks for Hiding Boo-boos
When I was first learning how to paint a sunset, I made soooo many mistakes! I’m kinda glad I did, though, because I’ve learned how to hide those boo-boos without having to start all over again.
HOW TO MAKE IT LOOK LIKE YOU MEANT TO DO IT:
- If your horizon line isn’t perfectly straight, cover it by painting a landmass like mountains, or a piece of forested land that juts out into the ocean
- If your sunset colors aren’t blending well, cover that spot with a cloud
- If one of your sunset colors creeps too far down, or too far up, on your canvas, let it dry and add another layer of your colors
- If you have added the sun near the horizon but it’s looking a bit too much like a ball, surround it with a slightly deeper shade than the color you used for the sun and make sure to let it cover the sun ball in a few places but not too much! Make sure this added color is done horizontally and allow it to fade out, horizontally, the further you get from the sun
- If you add clouds and they’re looking a bit flat, make sure to add really bright highlights near the bottoms of your clouds, with your shadows closer to the tops. Make sure to add little bits of highlights and shadows to the inside of your clouds, as well, and, also, add a few shades from the sky here and there to create depth
Practice Time!
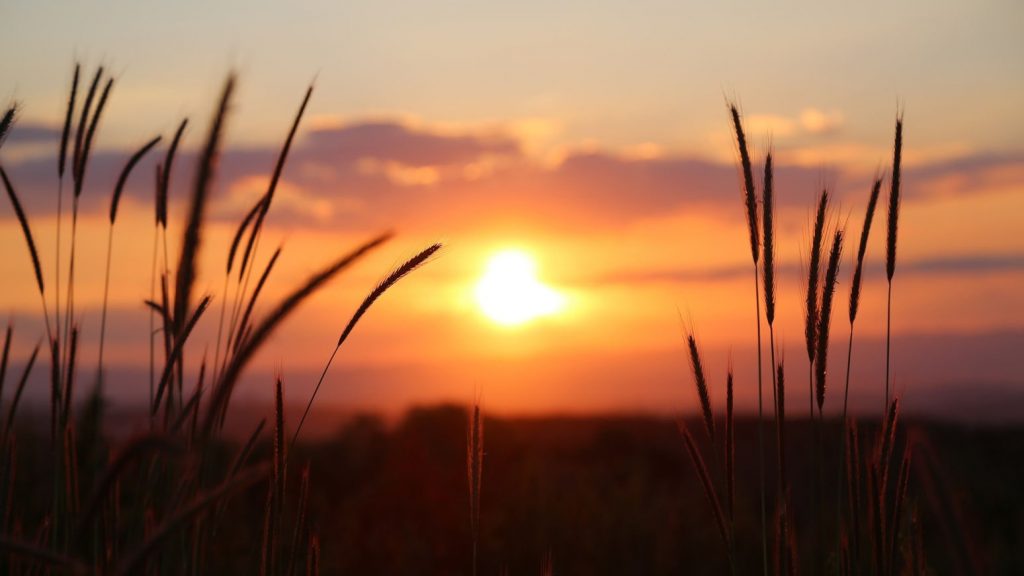
I tried to choose a fairly simple photo as our reference since this is just practice and not meant to be a masterpiece. If you look closely at the photo, you can see that there are clouds that cover the transition area where blue and orange/yellow meet and also near the horizon. This is great because you won’t have to work super quick and you won’t get any mixing that will result in muddiness.
Also, in the background, you’ll see what looks like bumpy ground. Again, this is awesome because you won’t have to worry about getting your horizon line exactly straight. You can click on the photo and be taken directly to a page where you can download your own copy, if you like.
Now, before we even start, please be kind to yourself. You’re just starting to learn how to paint a sunset so it’s going to take time and patience. Just remember, perfection is something that is never attained so it’s a losing battle. You want your painting to look like a piece of art, not a photo!
PAINT COLORS:
We’ll be using Liquitex Basics paints in colors that come close to the original but not exactly the same. We want to make this painting our own and this is one way to do that. If you don’t have the colors listed, just use what you have.
- Quinacridone Magenta (or a pink purple)
- Phthalocyanine Blue (any blue you have)
- Cadmium Yellow Medium Hue (a sunny yellow)
- Cadmium Red Medium Hue (a bright red that leans a bit toward orange)
- Burnt Umber (dark chocolate brown)
- Raw Sienna (an orange brown)
- Titanium White (whatever white you have as long as it’s opaque)
- Ivory Black (any black will do)
MATERIALS:
- Jar of clean water
- Rag for drying your brushes
- Something to mix your paint on
- Something to paint on (I used a 6×6” piece of cardboard from a cracker box)
- Flat brush
- 2 round brushes (One that’s more of a liner brush and one just slightly larger)
INSTRUCTIONS:
Step 1:
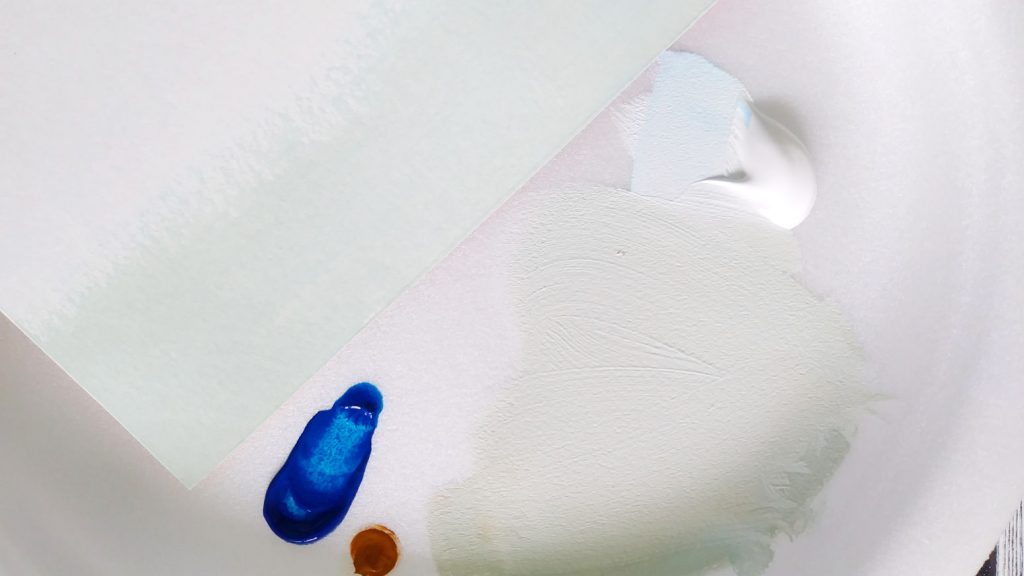
- Wet your flat brush and drag off the access water on the side of the jar
- Mix a tiny amount of your blue color with white to create a very pale blue
- If you find your pale blue is still too vibrant, add a bit of your raw sienna (or substitute) to dull it down
- Dip just a few corner bristles of your flat brush in your water and shake any drops off
- Starting at the left hand side of your “canvas” brush on your blue color (don’t worry about streaks. You can either leave them and go for a painterly look or you can wait for your blue layer to dry and add another layer)
- Once you’re satisfied, let that layer dry
Step 2:
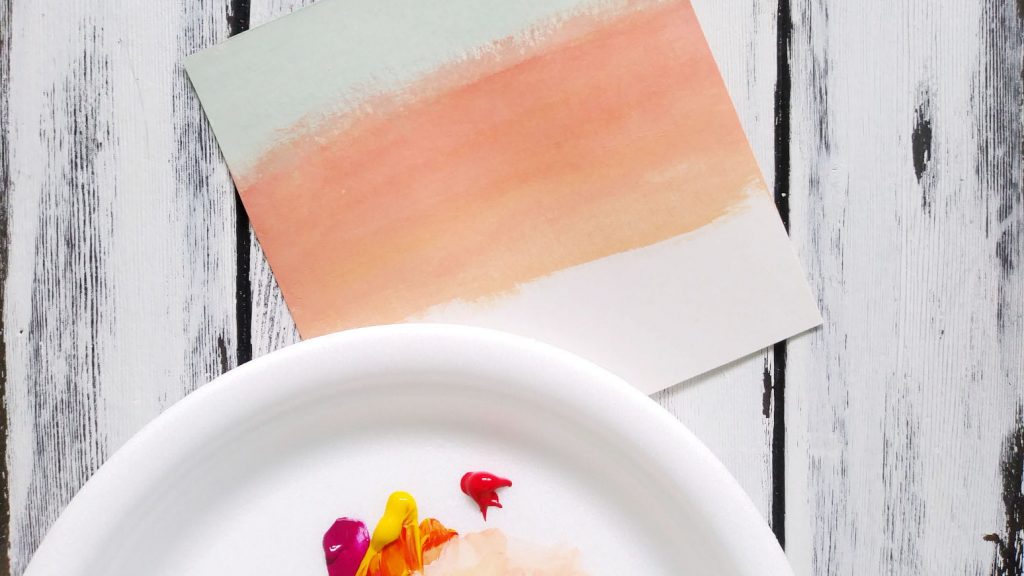
- Mix some yellow, magenta, and red together and start adding white until you’ve got a pale peach shade that leans more toward orange
- Using the same method as above, spread your paint mixture onto your canvas, adding a tiny bit of water if your paintbrush feels like it’s dragging
- Next, add some more yellow and do a few random strokes of it, here and there, within the peach shade (you can also use a bit of a darker peach shade and add that where you want but not within the blue part of the sky)
- You can play with this part as much or as little as you want. Just have fun and experiment!
- Let dry
Step 3:

- Wet your larger of the two round brushes and mix together a white that has a bit of yellow in it
- Using your round brush, make a circle and paint it in (don’t worry if your circle isn’t perfect. We’re going to make it look diffused so it doesn’t look like a ball in the sky)
- Take what’s left of that real pale yellow and lightly drag it through the edge of your sun (just a bit!)
- You can do this again on the other side of the sun if you want
- Next, make up a bit of a deeper yellow and start making horizontal streaks that move outward from the sun in random spots (these will end up looking like very thin clouds that are catching the sunlight)
- Once you’re satisfied with that, let dry
Step 4:
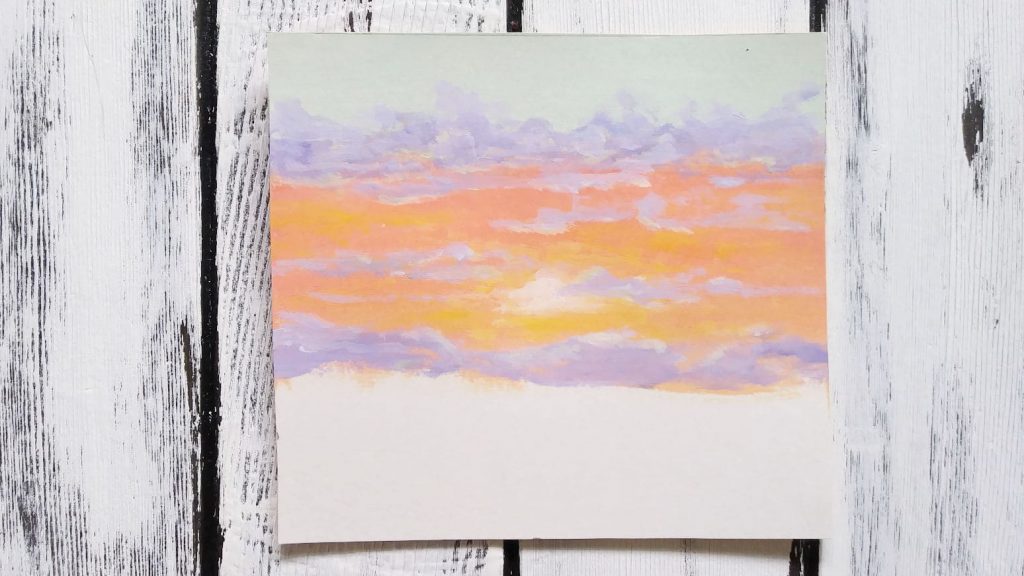
- Using the same round brush (clean), mix some magenta, blue, and red with white until you make a light purple for the clouds
- Where the blue and orange sky meet, and using just a bit of paint, start loosely sketching in some clouds (notice that the clouds in the reference photo aren’t fluffy. They’re straight with a few puffs here and there)
- Use this same shade of purple to paint the rest of the lower clouds in, using the same technique (don’t waste time trying to place the clouds in the exact same place as the reference photo. Just let your hands guide you)
- Next, add some white to your purple mixture and add in just a few lighter bits to your clouds where you think the sun would hit them and where you want to show thinner clouds (If you look at mine, I put some of this lighter mixture in the clouds as well as along the edge where I thought the sun would hit. This gives the clouds some dimension and stops them from looking like a big stripe)
- Let dry
- Lastly, take a tiny bit of the really pale yellow mix, that you used for the sun, and add a bright highlight in just a few places
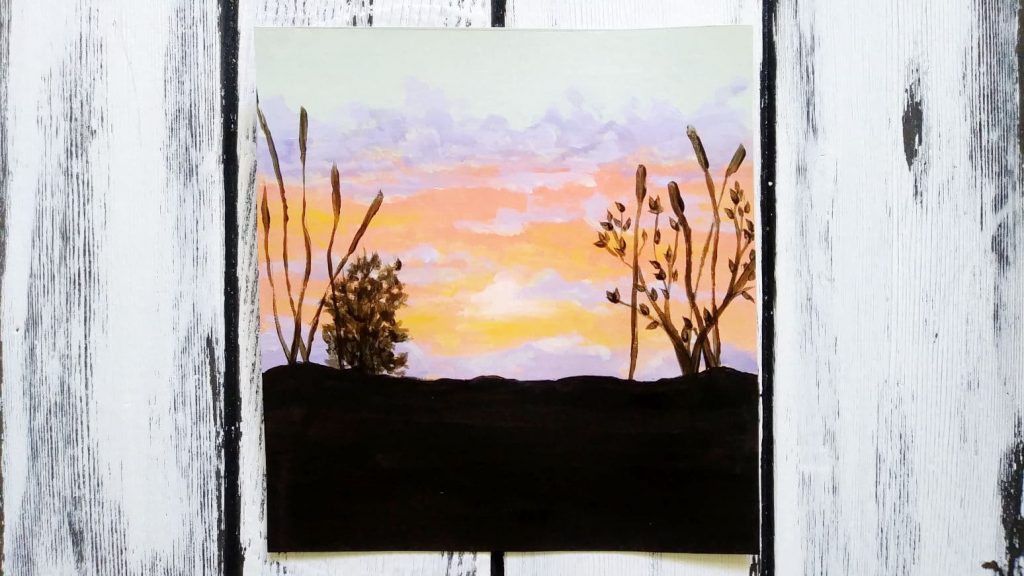
Step 5:
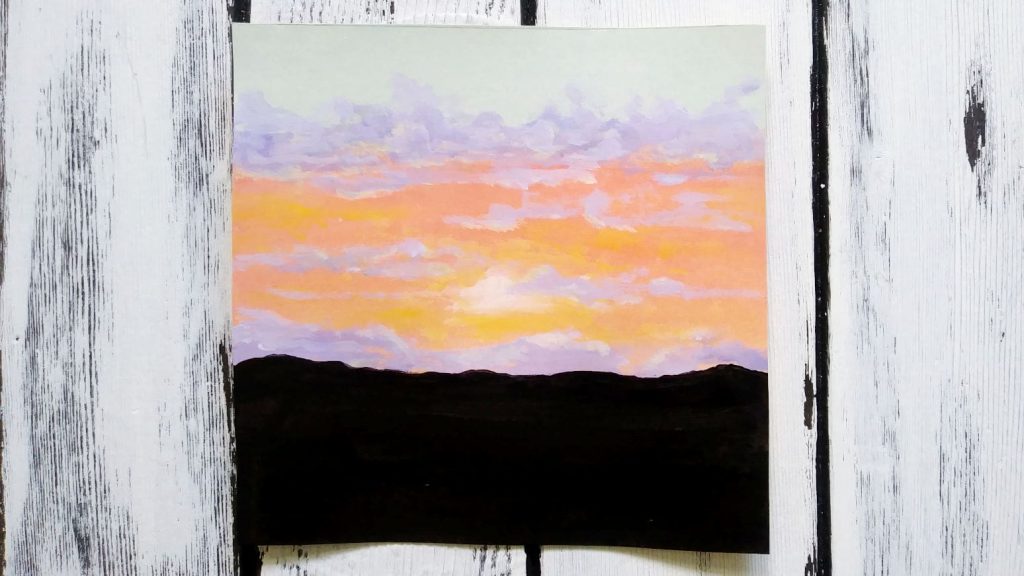
- Mix up a very dark brown (or you could just go with black)
- Using your larger round brush, sketch out your land where it meets the sky (I made mine really bumpy because it gives interest to the piece and you don’t have to worry about trying to paint straight lines. Bonus!)
- Once you’re happy with your new horizon, fill the bottom of your canvas with the same dark brown mixture (or black), using your flat brush
- Let dry
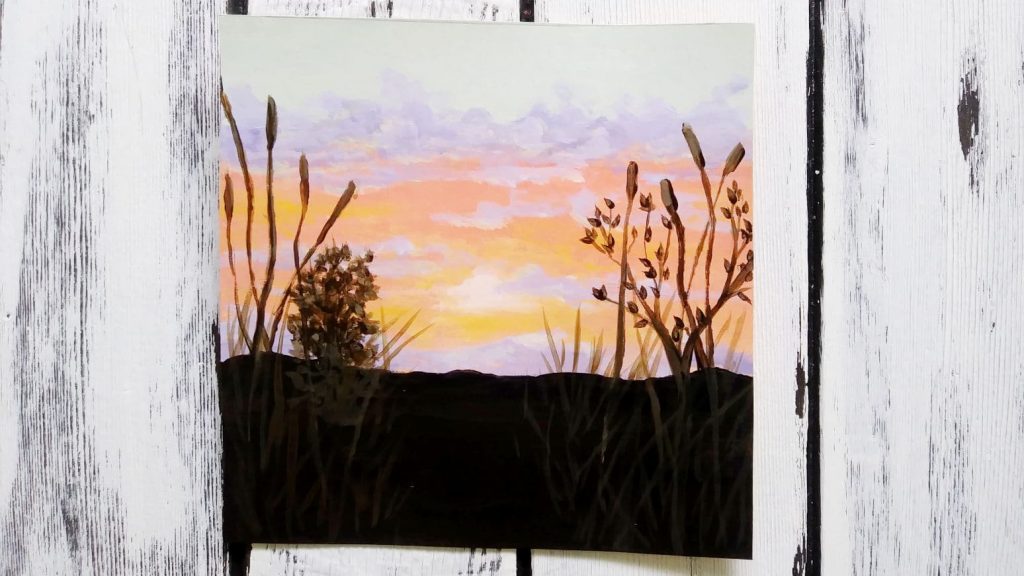
Step 6:
- Grab your smallest, thinnest round brush and wet it, tapping off any access (you want this to have very damp bristles so you can make thin lines)
- Put a small amount of the very dark brown/black color on your brush and twirl your brush as you pull it out of the paint to create a very sharp tip
- Starting from the bottom, with a very light touch, paint a line, stopping where you’d like to (you don’t have to follow the reference during this part and, in fact, you don’t have to do this part at all! You could call it done and have a very nice little sunset study.)
- Continue doing this as many times as you like and don’t be afraid to have grass that isn’t perfectly straight (everything from this point forward is more about making the sunset look like it’s distant)
- When you’re happy, let dry
Step 7:
- Mix a bit of your raw sienna (orange brown) into your dark brown and add just a tiny speck of white, still using your super small round brush
- Use this highlight color on the grass where you think the sun would hit (I also used this color to make shorter grass. Doing this created the illusion that my horizon line is actually the edge of a cliff that slants upward)
Step 8:
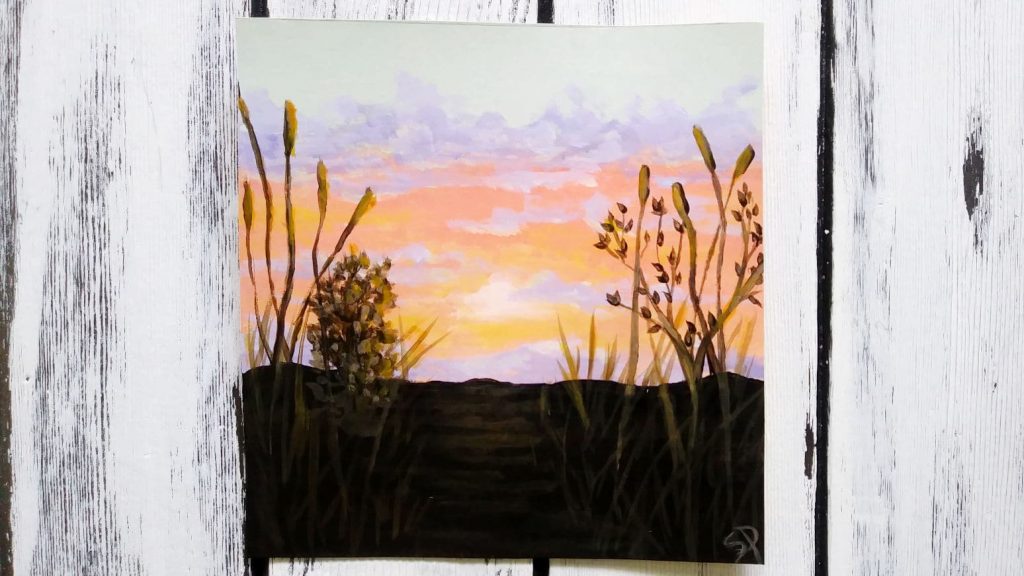
- For the very last step, put some of the peach color, that you used in the sky, onto your small round brush and place the tiniest amount on different parts of the grass (this is going to show where the grass is really reflecting the sunlight)
- Once you think you have enough bright highlight, add a tiny bit of yellow over the top of the peach highlights you just made (this will warm the highlights up)
- Sign your little practice piece and do a happy dance!
At this point, you may want to make notes about what things you feel were really easy, what parts you liked, what you didn’t like, if you changed anything, what colors you used, brushes you used, etc. Keeping track of how to paint a sunset will help you to keep what you like and ditch what you don’t.
YouTube Recommendations

- For a real warm and glowing sunset, try “Golden Hour Sunset” by Painting with Jane
- If you’ve been dreaming about how to paint a sunset with lots of drama, The Art Sherpa’s “Sunset at the Beach” is the one for you!
- Emily Mackey is an absolute blast to watch! In her step-by-step tutorial, “Purple Ocean Sunset”, she teaches you how to paint a sunset with lots of pretty purples and pinks.
If you want to practice how to paint a sunset, but don’t want to follow a YouTube tutorial, check out my article on 5 websites with free photos you can paint. There are literally a gazillion sunset photos for you to use as a reference!
Learning how to paint a sunset is not as difficult as you may think and, once you’re more comfortable with the process, it can be a real pick-me-up when you’re feeling kinda blah. I think that’s probably why I love painting them so much. It’s all about the color and color makes me so happy. Let me know below, what are your favorite paint colors to use when you paint a sunset?