Meet the Author

Artist | Owner of Squishing Paint | Educator - Sara brings over 40 years of creative experience, a decade of specializing in acrylic painting, and a passion for guiding new artists as they embark on their own artistic journeys


Some of the links in this article are affiliate links which means that if you choose to click on them and make a purchase, I earn a small commission at no extra cost to you.
Also, as an Amazon Associate, I earn from qualifying Amazon purchases.
For more details, please read the full disclosure here.
Thanks so much for your support!
Learning how to paint the moon with acrylic paint can be a fun and rewarding experience. It’s all about focusing on the moon’s light and texture rather than trying to recreate its exact appearance. Painting the moon is a great exercise in painting what you see even if the shapes don’t make sense.
In this article, we’ll go over what the biggest challenges will be, then we’ll try our hands at an easy eight step painting tutorial of the full moon over a sparkling ocean, and we’ll finish with three additional tutorials on how to paint the moon. Let’s do this!
The Basics of How To Paint The Moon For Beginners
Generally speaking, here is a brief summary of the steps needed to paint the moon but, don’t worry, I’ll be taking you through a detailed tutorial later on.
- Figure out your composition: Do you want a full moon? Half? Crescent? Do you want clouds or stars? What time of day is it? Will there be anything other than the moon in your painting (land, water, trees, etc.)?
- Round up your materials: Decide what size canvas you want to use, choose your acrylic paint colors and the paint brushes you’ll need, find/make a template for the moon shape you’re going for, and gather any specialty tools (like an old toothbrush if you want to make stars), a jar of water, an old rag or paper towel, and don’t forget a palette.
- Decide on color and paint the background: The moon will pop more against a dark background, so consider painting the sky black or a deep blue. But, really, you could paint your background any color you want. Purple gives it a mystical feel, while pale blue/pink gives the look of early morning or just after the sun sets.
- Sketch in the moon: Using a piece of chalk/watercolor pencil, and your template, lightly trace your template to add the moon to your dried canvas. You can use just about anything as a template; a plate, bowl, cup, or even a cookie cutter. If you’ve decided to paint a crescent moon, you can also make a template by cutting out the shape on a thick piece of paper, laying the paper on top of your canvas, holding it firmly in place, and gently painting the cut out onto your canvas.
- Add stars (optional): If you want to have a sky full of stars, now’s the time to add them. Water down some Titanium White paint and, using an old toothbrush or even a nailbrush, flick the paint onto the canvas.
- Paint the moon glow (optional): Dry brush light blue and Titanium White around the outside edge of your moon, allowing it to fade into the background as you get further away from the moon.
- Paint the moon: Fill in the moon with Titanium White (be careful around the edges!).
- Add craters: Use a small fuzzy brush, sponge, or even paper towel crumpled up to add craters and other details to the surface of the moon with different tones of grey paint.
The Most Challenging Part Of Painting The Moon
The hardest part when painting a realistic moon is capturing its glow and surface texture. What this really all comes down to is knowing how to add light and shadow in a way that creates the illusion of depth and dimension. Additionally, it’s about knowing which technique to use to create a transparent glow around the moon that slowly fades as it gets further away from the light source.
How To Paint Moon Glow
We’re going to do a bit of hands-on practice in just a bit, but basically, you’ve got two ways to create moon glow.
You can dry brush around the outside edge of your moon with white paint allowing it to get thinner and more transparent the further away from the moon you go.
Dry brushing is super easy once you get the hang of it and it doesn’t take any extra tools or mediums to get it done! The best way to explain dry brushing is to think about when you’ve been painting in the past and you’ve run out of paint on your brush. Your paintbrush starts to kind of skip and drag over the canvas, making the paint look really patchy and transparent.
Normally, this would cause a ton of frustration but, in this case, it’s exactly what you want!
The other way to create moon glow would be to use a medium like Liquitex Liquid Matte Medium or Golden Acrylic Glazing Liquid Gloss.
If you add just a tiny bit of Titanium White to a larger portion of either medium, it will create a transparent “wash” of color. If you do decide to go this route, I highly recommend letting a layer dry before adding more. It can lift off the canvas if it has dried even a little bit, leaving a very obvious spot that you’ll have to fix after it’s dried.
This might seem like no big deal but, trust me, it can be a pain in the backend to try to match up the translucency of the other paint around it. You could be looking at a lot of wasted time, paint, and medium to get that annoying spot to disappear.
How To Paint Craters On The Moon
When you start researching how to paint the moon, you’ll come across a ton of tutorials with all types of moon shapes, and sizes, and in various detail.
The one thing that tells a person that what they’re looking at is the moon, is the craters. I mean, how many of us can say that we’ve never tried to find the man in the moon? Without those craters, our moon man would be invisible!
The craters aren’t particularly difficult when you realize that you’re just talking about using different values of paint color in a random blotting motion. That’s it.
Think of it this way, if you want to create a crater, the darker the paint color you use, the deeper the crater becomes. The lighter your paint color becomes the brighter and whiter your moon will appear.
In addition, the more uniformly you add the paint to your craters, the denser and closer the moon will appear.
The whole process isn’t hard but it can easily get out of hand if you go overboard with the shadow colors. Less is more! However, if you do go crazy with the shadows, just go back over it with white. No biggie.
How To Paint The Moon For Beginners: An Easy Tutorial
Ready to learn how to paint the moon? I promise, it won’t be difficult and, in the end, you’ll have a wonderful painting that would be perfect for in a bedroom or to give as a gift to any moon gazers in your life.
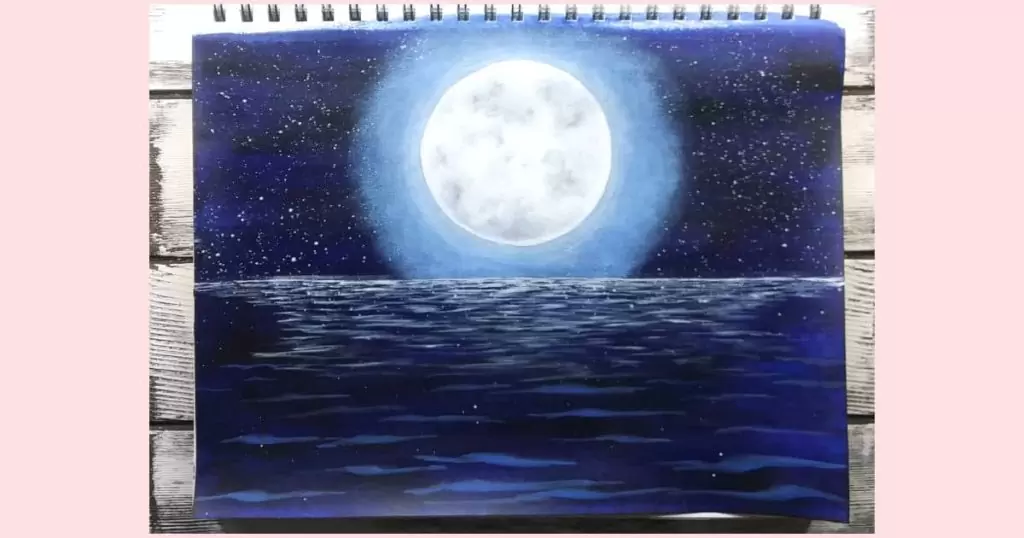
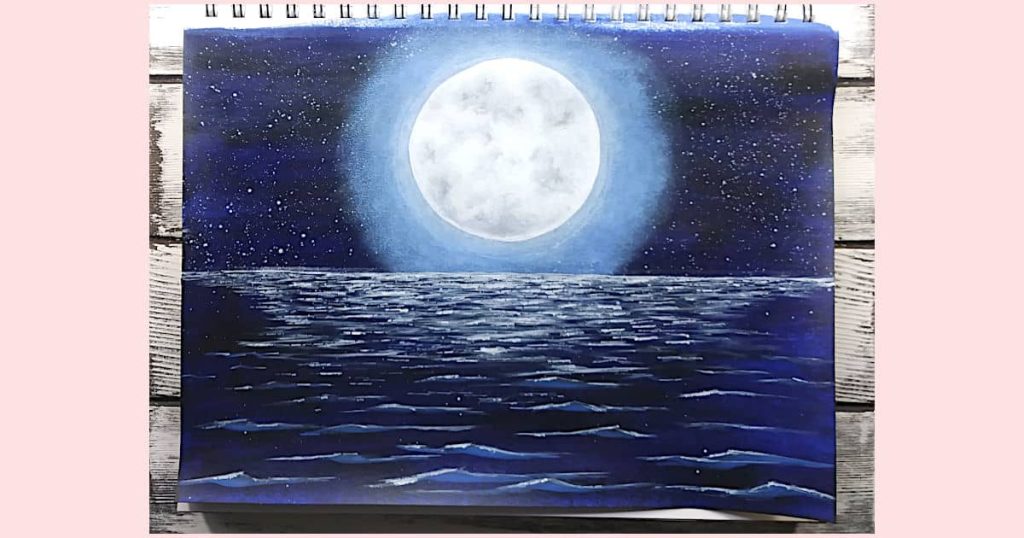
I’m going to keep this simple by making a lot of the steps optional. If you do choose to follow along with each step, you’ll be creating a gorgeous dark scene of a large full moon with moon glow, lots of stars, and reflections and sparkles in the ocean waves below. Sound good? Let’s go!
Materials Needed:
- Stretched canvas, canvas panel, paper, or even cardboard (any size you want as long as you have something big enough to use as a template for your moon)
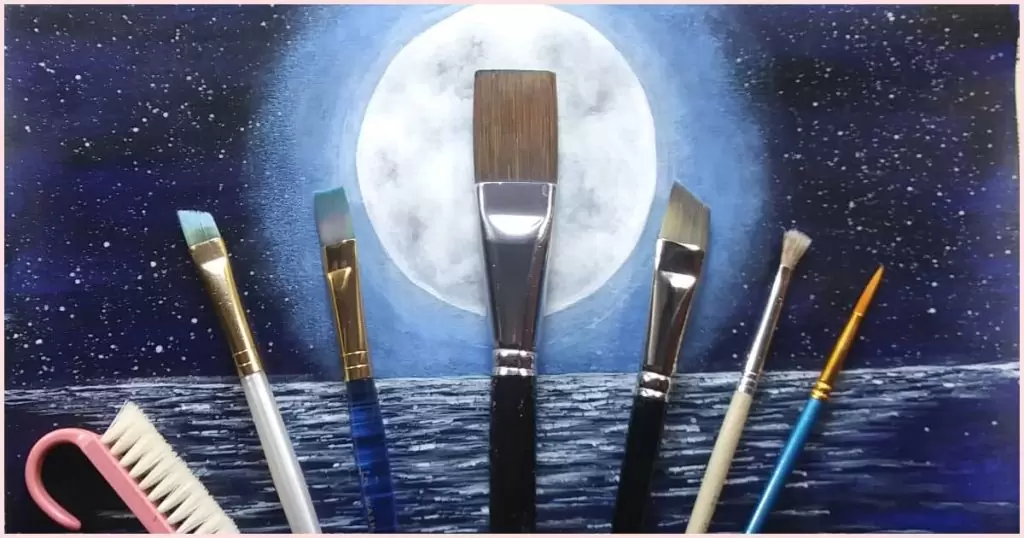
- Paintbrushes (this is what I used but use whichever brushes you feel comfortable using for making clean edges and fine lines):
- Two sizes of flat brush (large enough to cover your background and a smaller one for painting the distant ocean waves)
- Small round brush
- Medium angle brush
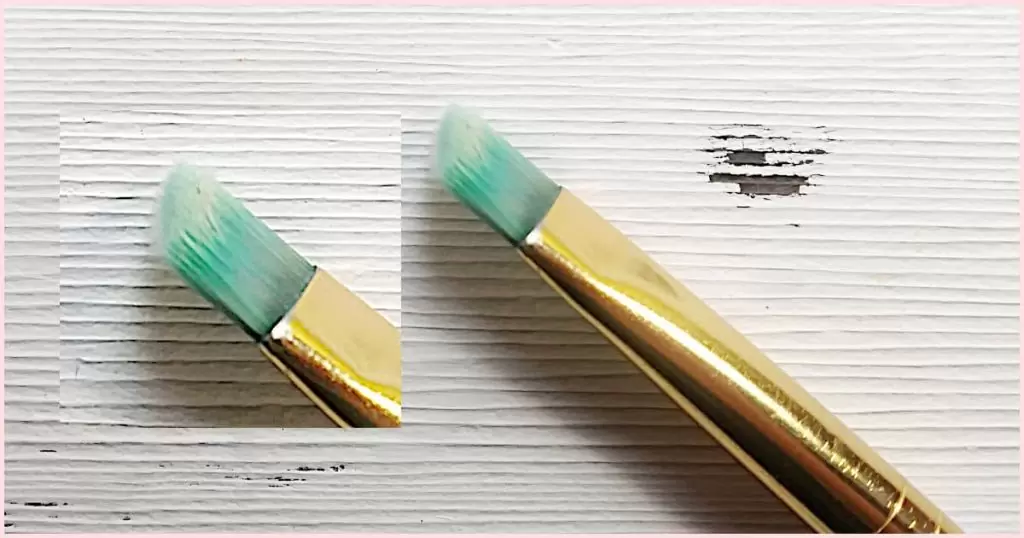
- Any brush that has been well used and is now fuzzy (the fuzzier the bristle, the better!)
- Paint (these are the exact colors and brands I’m using but you can use whatever you have):
- Old toothbrush or nailbrush
- Anything to use as a template for your moon (cup, plate, jar lid, etc.)
- Jar of water (for cleaning your brushes)
- Old rag or paper towel (for wiping and drying your brushes)
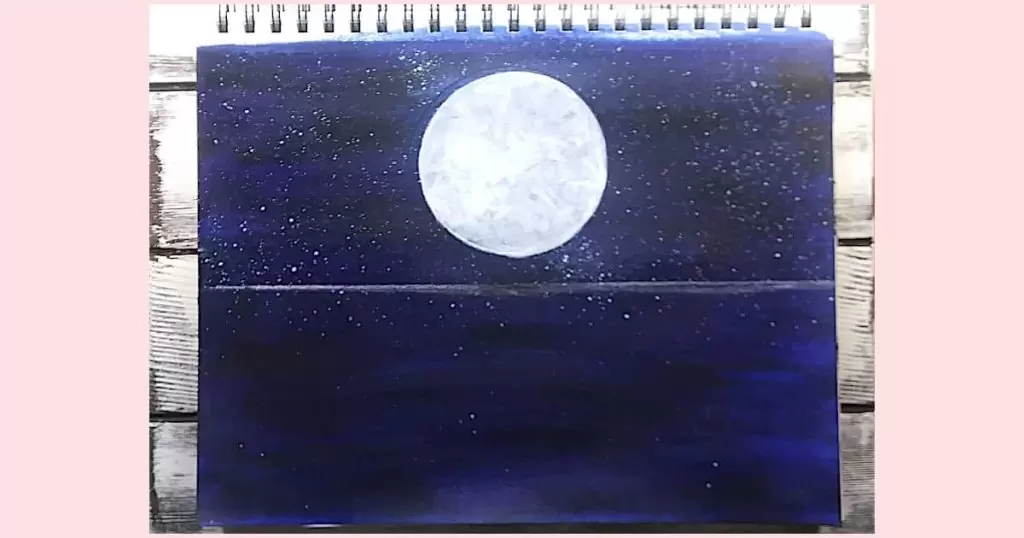
Step One: Paint The Background
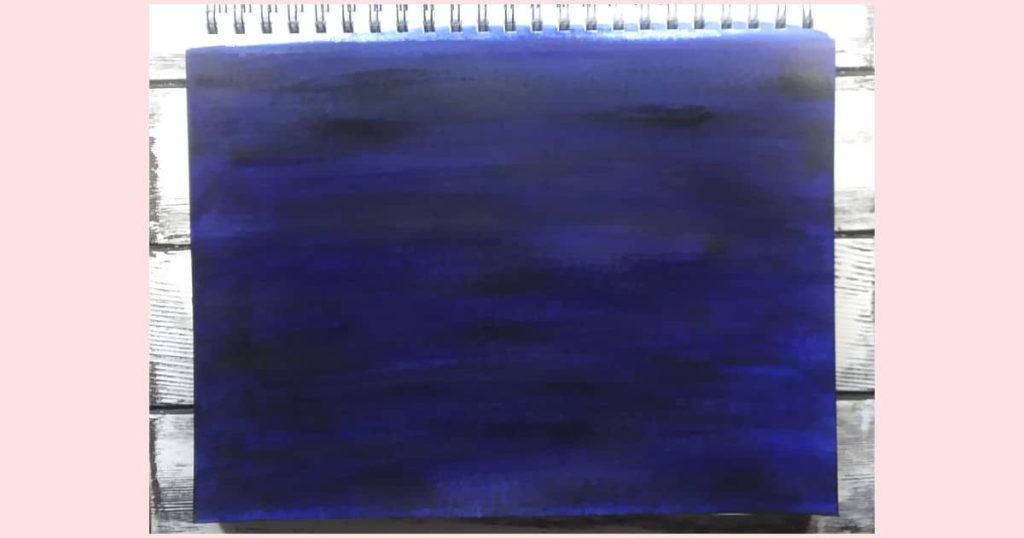
- Load your largest flat brush with your sky color (I started with Prussian Blue) and paint the whole surface (I like to use horizontal strokes simply because it helps get me into the habit of doing it before getting to the ocean part of the painting)
- Let dry and paint another layer if needed to have a more even coat of color and to make the background look deeper (I did another coat of Prussian and then streaked in some Mars Black to make it even darker)
Tip
- If you don’t have Prussian Blue, you could just use Mars Black. However, if you really have your heart set on using color, and you don’t have Prussian Blue, take a minute to head over to my article for mixing up your own navy blue paint. I’ve got tons of paint color mixing recipes over there that would be perfect for a project like this.
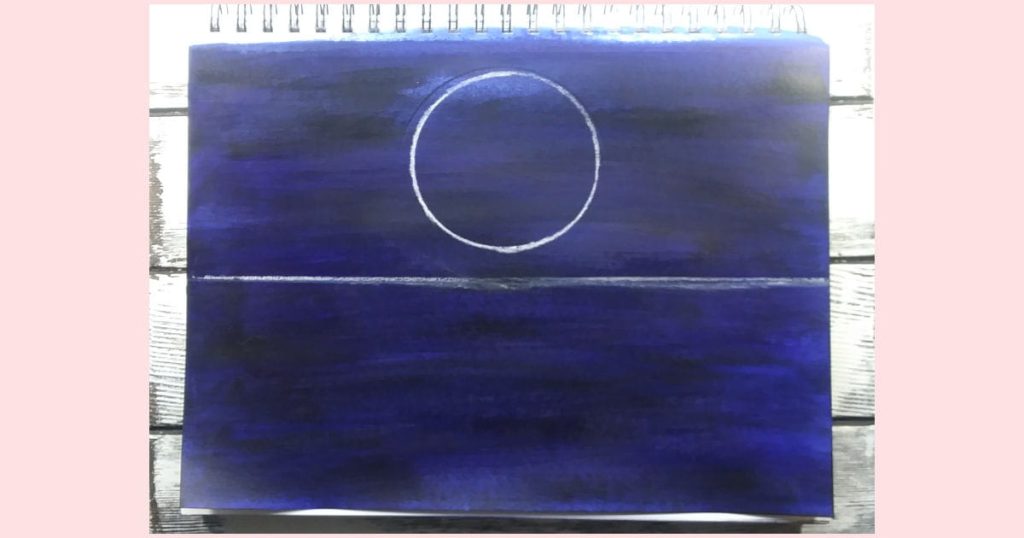
Step Two: Sketch In Your Moon
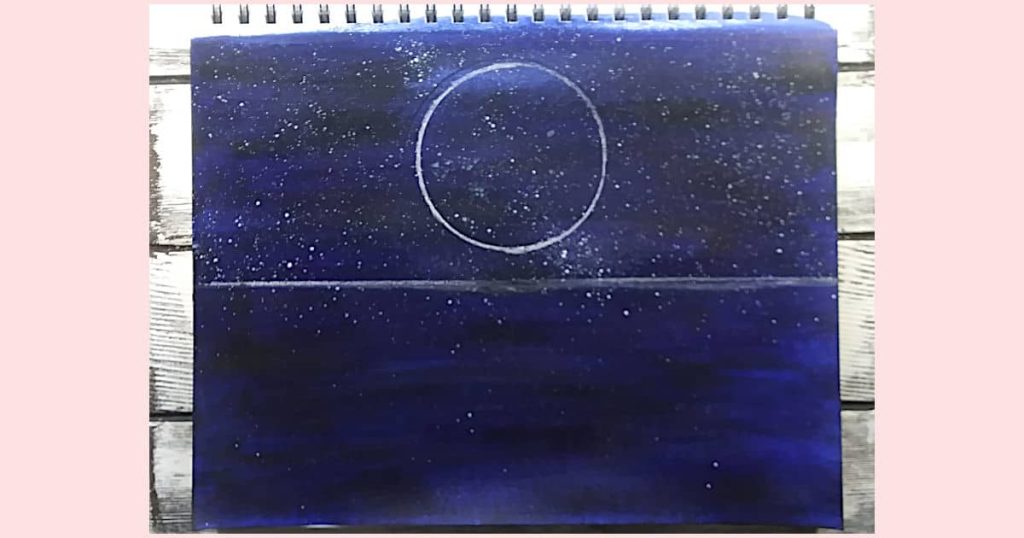
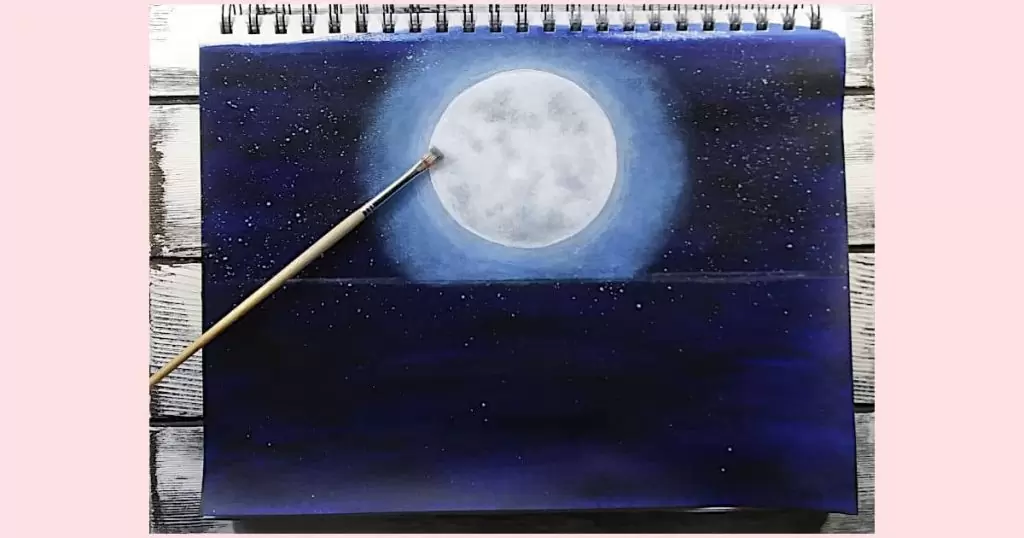
So, do you notice that lighter spot in the background near the top of the moon? This is a perfect example of what can happen when you use too much water with your paint. When you go to paint over that spot, it can lift and be an absolute bear to paint over. Give it some extra time to dry and then gently paint over it. That has always worked for me.
For this painting, I’m going to keep it really simple and paint a full moon but you can be adventurous and paint any kind of moon you want.
- First, you’ll want to figure out where your horizon line is going to be and draw a straight line with your chalk/watercolor pencil if you decide to add the ocean (for those following along, I sketched in my horizon line with chalk and a ruler just below the halfway mark of my canvas)
- Next, place your moon template (I used my gesso bottle, with a 3″ diameter, on 12″ x 9″ mixed media paper) on the dry painted surface, halfway between the horizon line and the top edge of your canvas
- Make sure it’s centered between the left and right edges of the canvas (just eyeball it)
- Trace around the outside edge of your moon template with your piece of chalk or watercolor pencil
Step Three: Add Some Sparkly Stars (Optional)
Before we start with this step, you should know that this can get messy. You’re definitely going to get it on your fingers but you could also end up getting it on your clothes, or anything else close by. I suggest you wear old clothes and clear the area before starting.
Don’t worry if you get stars in the moon area or on the water. We’re going to be painting the moon completely in another step so those will be covered and the star speckles in the water will be helpful when we start adding details to the waves.
- Once you’re set up, dip your toothbrush or nailbrush into your jar of water and give it a couple of shakes so we don’t start with too much water
- Next, dip just a few bristles into your white paint, find a clean area on your palette, and start rubbing the bristles along the surface using a circular motion. The point of this is to mix the bit of white paint you just picked up with the water as evenly as possible so you don’t end up with big gobs or drips of paint on your canvas
- Before going straight to your canvas, grab a piece of colored paper or cardboard (something you’ll be able to see the white against) to practice on. I’ve been doing this for years and I still practice!
- Angle the tip of the brush down toward the scrap paper, and using your thumb or finger, start at the bristles furthest away from the palm of your hand and gently run your finger down the bristles toward you
- Take a look at the splatter that happened. Adjust the angle if needed and, if your speckles are too big, dab your brush on a piece of paper towel to get rid of some of the water. Keep adjusting until you’re satisfied and then repeat the process on your canvas
Tips
- If you have an old cardboard box laying around that’s large enough to be able to lay your canvas down flat, that’s a really good way of containing the fun, yet messy, splatter extravaganza that’s about to ensue.
- If you find that some of your stars are too big or have a weird shape, you can just tap it with a finger, wait for it to dry, and add some of your background color over top.
- If you’d like to add some stars that are bigger than the small flecks, just take your small round brush, dip the very top of the tip into your white paint, and poke the canvas gently with the tip of the brush. Just make sure that you are holding your paintbrush up and down and not at an angle.
- If you want to give your sky extra depth, start by flicking on either mid-tone blue, or mid-tone grey, stars before going in with your bright white stars (the darker stars will look further away)
- If you find that you have an area where the stars are really concentrated you can just extend that spot to look more like a line (instant Milky Way!)
Step Four: Paint The First Layer Of The Moon
This part is easy peasy!
- Grab your angle brush, load it with a bit of Titanium White, and carefully use it to trace the template of the moon
- Still using your angle brush, fill in the moon with more Titanium White by using messy criss-cross brush strokes (the goal is to NOT make the moon a flat white color because the darker parts that show through will be perfect for helping us with our craters later on)
Tip
- We don’t want any wobbles around our moon but, don’t worry, if you keep wobbling when trying to paint the edges, just let it dry and then go in with your background color and your small angle. Eventually, if you take your time, you’ll get it.
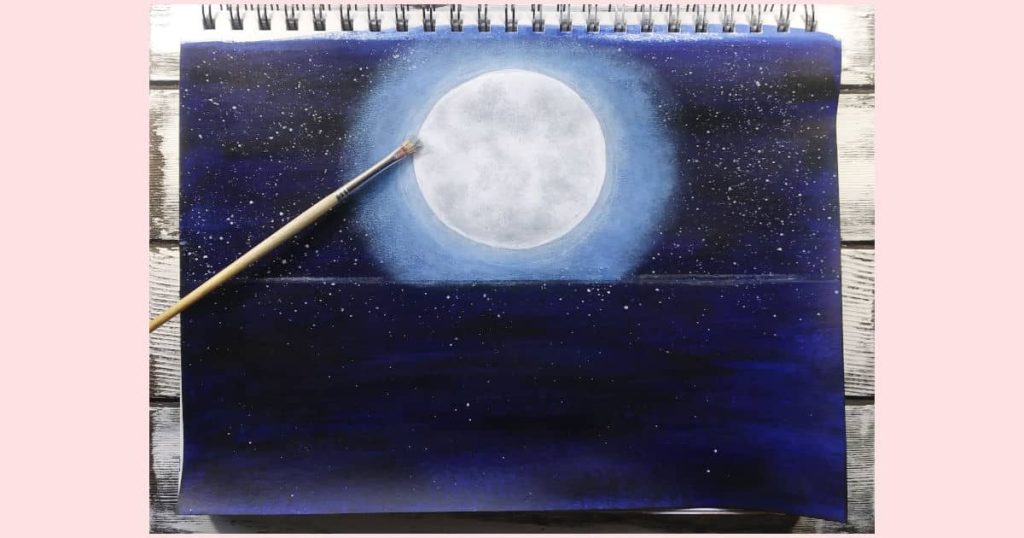
Step Five: Create The Moon Glow
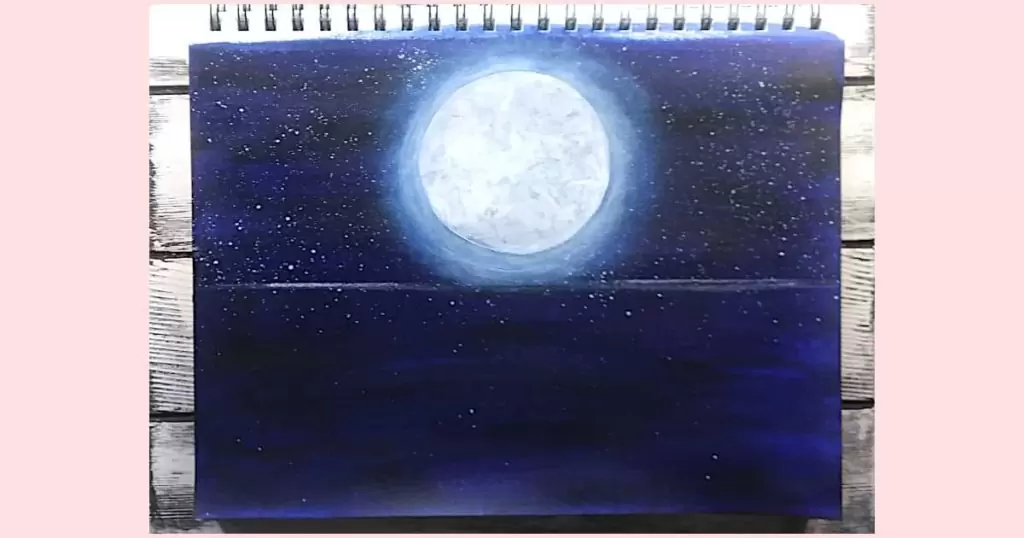
Moonglow is an important step in knowing how to paint the moon. Of course, sometimes in nature, there won’t be any moon glow at all but I find that it gives the painting more visual interest.
- Take your background color (blue or black) and mix it with Titanium White to create a very pale version of your sky color
- Using a fuzzed-out paintbrush (mine was an old small angle), load up with a bit of your pale sky color
- Swipe your brush back and forth on a piece of paper towel or rag (you want to get most of the paint off your brush before starting)
- Very gently start sweeping your brush (in an arc-like motion) around the outside of your moon (you want to go very gradual here so you don’t overdo it)
- Once the majority of your paint is used up, scumble (which is like scribbling or scrubbing) circular motion around the outside edge of your moon glow to defuse it further
- Continue loading, wiping, sweeping, and scumbling your brush on your canvas until you’ve brought your light blue/grey moon glow out as much as you want
- Next, add a small amount of Titanium White to your brush and wipe most of it off
- Follow the same instructions given above for the pale sky color but don’t pull the white moon glow out as far as the other layer (We want it to look like it’s fading as it gets further away from the moon)
- Feel free to add another white layer close to the edge of the moon to make it extra bright
- Once you’re satisfied, you can go back in with a small flat or angle brush and some Titanium White to clean up the edges of your full moon and add more messy crisscross brush strokes to the interior
- Let dry
Tips
- Beware: If you’re having an anxiety day, you can get lost in the scumbling action ’cause it feels good to get out your frustrations!
- I went over this part many times to make sure it was as even as possible in both brightness and size…plus, I kinda zoned out and just let myself enjoy the layering process
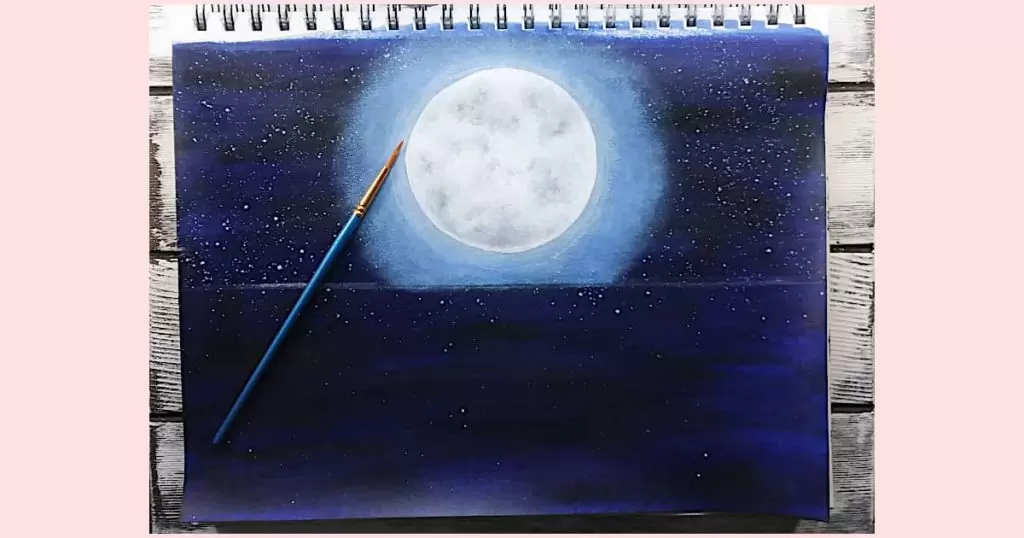
Step Six: Add Details To The Moon
This step in how to paint the moon is largely going to depend on the size of your moon. If you have a moon that’s smaller than a saucer, it would probably be easier to use a scruffy detail brush (which is what I used).
If your moon is larger than a side plate, this is where the sponge or the crumpled up piece of paper towel comes in handy.
- Mix together Mars Black and Titanium White to create a mid-tone grey color
- Pull some of that mid-tone grey to a clean area on your palette and add more Titanium White to make a pale grey
- Barely dip your scruffy brush/sponge/crumpled-up paper towel into the mid-tone grey and blot on a paper towel or rag
- Very gently dab the brush/sponge/paper towel on the surface of the moon where you want to create a crater (If you go too crazy with it, let it dry and go back in with white to erase part, or all, of it)
- Next dab your brush/sponge/paper towel into the light grey paint and blot on a rag or paper towel so you remove most of the paint
- Layer this color on top of the mid-tone grey by blotting gently, making sure to concentrate on softening the outside edges of the craters, and don’t forget to leave some of the darker grey showing
- Continue doing this wherever you want to add a crater
- Let dry
- Mix together a small amount of Cadmium Yellow Medium with a larger amount of Titanium White to create a very pale yellow (we’re talkin’, just barely yellow)
- If you’re using a small fuzzy brush, now’s the time to wash it and dry it very, very well
- Using a clean fuzzed-up brush/sponge/paper towel, pick up a tiny amount of this color and blot most of it off
- Very carefully dab just a few places of the pale yellow over the bright white areas (Not too much!)
- Let dry
- Add a teeny bit of Mars Black to your mid-tone grey paint
- Using a small detail round brush, gently add a few “pock marks” inside the craters to give even more depth (don’t go for uniform dots here, just let the brush do what it wants)
- Lastly, using your clean small round brush, add Titanium White to your brightest areas to pump up the luminosity and break up any parts where you feel you went a bit heavy-handed with the pale yellow
Tips
- Feel free to go back in and add more layers to your moon. In my experience, the more layers you add, the more realistic the moon looks
- I sort of drew squiggle shapes when adding in my Titanium White with my small round brush (I wanted the highlights to be very organic looking and less like a brush stroke)
Step Seven: Create Movement In The Water (Optional)
Before we get started on this step in the tutorial, I want to ease your mind. A lot of new artists believe that painting the ocean is extremely difficult but once you know the proper steps, you’ll see, it’s really pretty easy.
The biggest thing that set the water apart from the sky is that you basically use horizontal lines to create distance and dimension.
Water that’s far away, needs to have very small, thin lines that are closer together. As the water draws closer to the viewer, the lines become thicker, more defined, and spaced further apart. Keep in mind that the larger the lines are, the closer they are to the viewer.
The trick is to know when to start transitioning to larger lines, as well as using brushstrokes to give the illusion of either calm water or choppy water. This can be easily accomplished by using smoother brushstrokes for calm water and more angular brushstrokes for choppy water.
In other words, do you remember making upside-down “v”s to indicate waves in a drawing? Well, the more pronounced that “v” shape is, the choppier the water will feel.
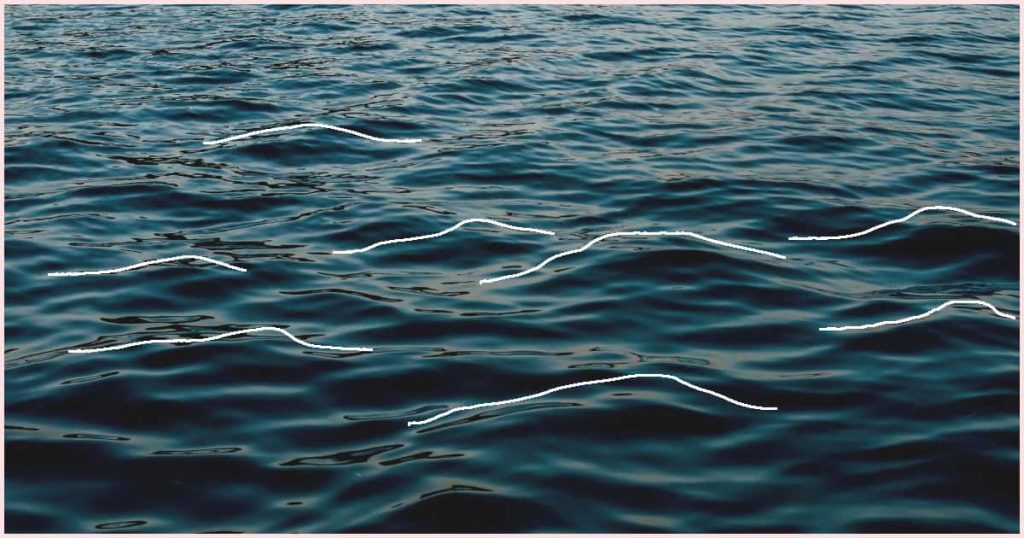
If you look at what’s underneath each of the white lines, you’ll see that they follow the shape of each ripple/wave. This is to give you an idea of what shape you’re trying to recreate with your paintbrush.
The other issue that beginners have with water is creating depth and this, really, is such a simple fix once you know what to do.
Basically, you need to make sure to include a shadow and highlight to every wave/ripple that is close to the viewer. However, when you’re painting a night scene like we are, it’s a bit different but we’ll get into that in a minute.
As you get further away, you’ll either focus on adding highlights where the sun or moon would be hitting the waves in the water or, if you were painting a foggy ocean scene, you would want your water to become more like the sky color the closer to the horizon you go. That would create the illusion that the water disappears into the distance.
For more information, take a peek at my article that goes into more detail about painting water.
Adding Life To Our Water:
To add some motion to our dark water, we’ll be focusing on creating a lot of light, through highlights, near the horizon. As we move down the canvas, toward the viewer, we’ll be adding a lighter ocean/sky color. The goal is to define the waves without making them too bright. Let’s give it a try.
- Using your smaller flat brush, slide the brush into your Titanium White and pull it out onto a clean part of your palette
- Load your brush so that the tip of the brush has a nice sharp edge and you don’t have a glob of paint on it
- Carefully drag your brush along the horizon line (you can use painter’s tape to keep your horizon level as you paint)
- Using the same brush, and loading it up the same way, start to bring small (short and thin) lines of white down the canvas, getting further apart, and longer as you make your way to about the mid-way point between the horizon and the bottom of the canvas
- Next, take some Titanium White and add some of the sky/ocean color to it to make a mid-tone blue/grey (depending on if your sky is dark blue or black)
- Using an angle brush, start adding “v” shaped lines at the mid-way point, just below the white lines (start by barely touching your canvas with the brush, add some pressure where you want the crest of the wave to be, then back off on the pressure as your brush trails away from the wave crest, gently lift the brush off the canvas
- Continue making your waves by, again, making them longer, thicker, and further apart until you reach the bottom of the canvas
- Switch back to your flat brush and add some mid-tone blue lines in with the white lines where they transition to blend the two areas
- Let dry
Tips
- You can add as many waves as you’d like to your painting
- If you feel like your water is too bright, go back in with a mix of your sky color and some black (for good coverage) and paint over a few of your waves
- It’s important to leave some of the base color showing as it acts as the shadow to our waves
- If you are really intimidated by using a paintbrush to get thin lines, try using an acrylic paint pen (By the way, I have this exact set and they’re great for signing your artwork)
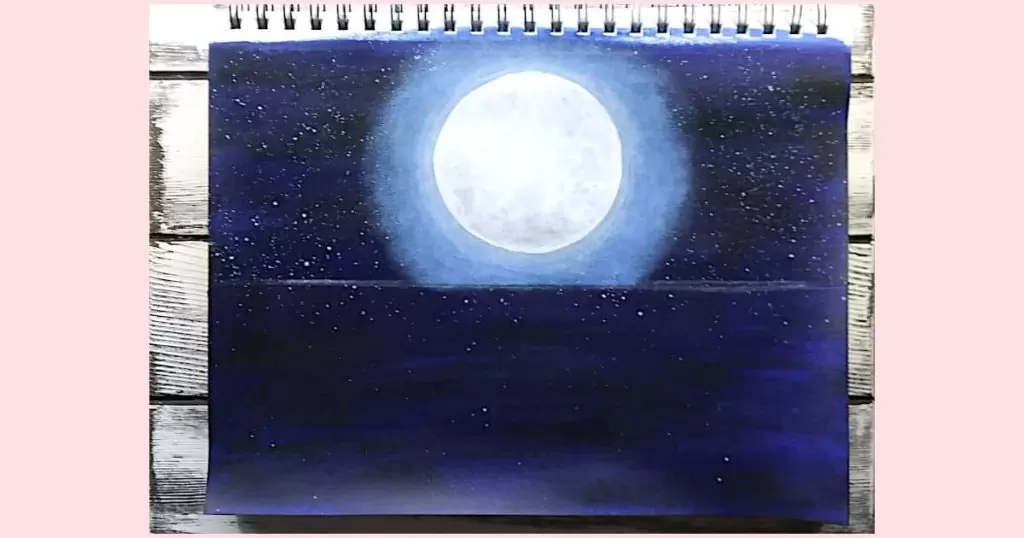
Step Eight: Add Details To The Ocean Waves (Optional)
Since we’re talking about how to paint the moon at night, we don’t want to go wild with our highlights but adding a few to our waves will really make them pop.
- Using the smaller flat brush, and loading it as we did in the previous step when painting the white thin lines, gently add a highlight to the top edge of the blue waves
- Starting with just a few, take your flat brush and gently tap it straight up and down to add sparkles to your waves where you painted the white lines (upper half of your water)
- Step back and look at the water, if needed, add more sparkles and additional coats to the highlights on the larger blue waves
Tips
- Make sure to take your time with this step by starting with just a few highlights and then going back in and adding more if you think it needs more light and sparkle
- You can also add more star dots to the water by dipping a small round brush in Titanium White and gently tapping them on your canvas
- If you feel like you’ve overdone it, let it dry and go back in with your sky color and some Mars black to take out some of the highlights
- Relax and have fun with this part, add light and remove it and add it again! Layers are your friends
Three Bonus Tutorials For Painting The Moon
If you’ve enjoyed learning how to paint the moon with my tutorial, I scoured the big world of YouTube to find some other painting tutorials that allow you to practice painting the moon differently or to help you get a better feel for painting night scenes.
How to Paint a Realistic Moon by Ashley Krieger
This is a short and simple video that gets up close and personal with the surface of the moon. In this tutorial, you’ll be focusing on how to make craters using different brushes and brush strokes.
Make sure to take a look at this quick tutorial to learn all about painting the surface of the moon and don’t forget to check out Ashley’s YouTube Channel.
Easy Moon Acrylic Painting Tutorial by JK PAINT
This painting tutorial is a little bit different because it’s all about how to paint a crescent moon over sparkling water with falling stars floating all around.
I had to include this one in my list because it’s just the perfect little painting for a child’s bedroom.
The biggest challenge with this crescent moon painting tutorial is that there aren’t any spoken words and you’ll, mostly, be going by what you see. That said, it’s a fairly easy tutorial to follow and you can always go into the gear icon and slow down the speed to make it easier to follow along.
The video itself is less than 10 minutes so make sure to check out this adorable crescent moon tutorial and stop by JK PAINT’s channel while you’re there.
Night Visit by Painting With Jane
This is my absolute favorite tutorial for you to learn how to paint the moon. In this video by Painting With Jane, she focuses more on the light and shadows cast by the moon.
It’s very important to understand how the light plays against objects at night and how to add lighter colors without losing that nighttime feel.
For example, if the sky is very dark you still need to be able to see just a hint of trees, etc., or else they become invisible to the eye. Learning how to paint moon glow on objects is the biggest objective for your moonlit night scene.
You know what else I love about this particular moonlit night scene tutorial, it uses a limited color palette, is easily adjustable to whatever colors you have, and, bonus, there’s a short story at the end of the video that goes along with the painting. BOOYAH!
Final Word On Painting A Lunar Night Scene
Learning how to paint the moon is pretty easy once you understand the process. By using a limited color palette, simple techniques, and basic shapes, you can let loose and have fun without worrying that one boo-boo will ruin the whole thing.
When embarking on this celestial journey, it’s important to remember that it’s all about light and shadow, and giving the moon the illusion of texture. You can use any tool that you feel comfortable with, use whatever colors you have on hand, and add whatever additional elements you’d like. As long as you focus on the highlights and shadows, and give your moon some interesting depth and dimension, you’ll be golden.
Ultimately, it’s about having fun while practicing different brush strokes and painting techniques. And, who knows, in the end, you may have an out-of-this-world piece of art that you can display with pride! (<– see what I did there? *wink* *wink*)