Meet the Author

Artist | Owner of Squishing Paint | Educator - Sara brings over 40 years of creative experience, a decade of specializing in acrylic painting, and a passion for guiding new artists as they embark on their own artistic journeys


Learning to paint thin tree branches can drive you bonkers but, I promise, it’s not as hard as it looks!
All around you, you see artists who seem to be able to paint thin tree branches like it’s the easiest thing in the world. Meanwhile, you’re wondering, what the heck is my problem, already?!
Every single artist has been there! Trees can be complicated little rascals. You’ve got the gnarled roots, the rough bark on the trunk, the leaves, and then there are the thinner branches and sticks. It can be totally overwhelming, I hear you, friend!
So, instead of focusing on learning how to paint an entire tree, from the trunk to the leaves, let’s zero in on what you need to do to succeed at painting twigs and thin branches.
We’ll talk about what types of tools will give you a better chance of mastering your tree branch skills, common mistakes and how to avoid them, and my personal YouTube recommendations so you can practice painting all the glorious skinny tree branches without chucking your paintbrush out the window. Don’t do that, ‘kay?
Mastering the Art of Skinny Lines
This really does come down to two simple rules; pressure and water…..and, of course, the right tools but we’ll talk about that later. It kinda sounds like a science experiment, doesn’t it? All joking aside, painting thin tree branches becomes easier once you know exactly what you need to do and practicing how to do it.
Pressure
When I mention pressure, I’m specifically talking about how much you’re pushing your paintbrush onto the canvas. To paint thin tree branches you don’t need much pressure at all and therein lies the problem.
It’s hard to hold your paintbrush loosely and to gently glide it across the canvas, am I right?
So, then, how do you hold a brush to help with how much pressure you’re applying? This is going to sound so funny but, seriously, hold your brush far back on the handle and extend your pinkie like you’re about to take a prissy sip of tea. I’m telling you, this works so well to lighten your pressure!
Just keep adjusting how far back on the handle you need to hold your paintbrush for you to get the right level of pressure. Everyone will have a different preference on this but, for me, holding my brush closer to the mid-way point is where I tend to get the best thin lines and branches.
It will probably feel uncomfortable at first because you won’t have as much control over your brush but that’s the whole point. When you look at thin tree branches in nature, they aren’t a perfect line, right? They’ve got some wobbly bits, some twists, and sharp angles. Holding your brush loosely allows you to make these types of skinny, wonky lines without putting too much thought into it.
Water
Make water your bestie when painting any skinny line, including twigs and branches. Thinning your paint out a bit will allow the paint to glide off of your brush much easier.
If you think about it, when you start running out of paint on your brush, you add pressure to deposit more paint on the canvas, right? That is the exact opposite of what we want to do here.
We need to keep our pressure super light so we don’t make the mistake of ending up with fat tree branches when we want skinny twigs.
On the other hand, you don’t want to add so much water that your paint drips down the canvas as you’re working (unless that’s what you’re going for).
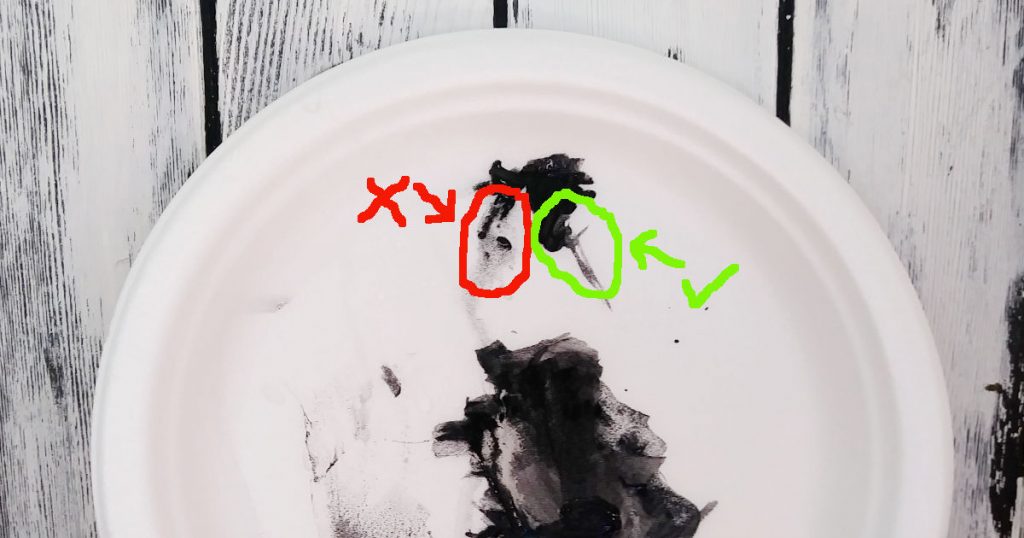
Here is my method of watering down my paint without going overboard:
- Dip your brush into your water jar but only about halfway up the bristles
- Tap the brush on the lip of the water jar a couple of times
- Grab a small amount of paint from the side of the paint blob on your palette and drag it away from the rest
- Using your wet brush, mix the small amount of paint with the water that’s on your brush
- Hold your palette vertically (up and down) and see if the thinned paint starts to drip downward
- If so, add a bit more paint
- You want your paint and water mix to look thin but not drippy
Best Brushes to Use When Painting Sticks and Thin Lines
Every artist eventually finds their favorite brush to paint thin lines when painting bare tree branches and you’ve probably heard a lot about using a round brush. However, there are other brushes you can use to paint skinny branches so you really don’t have to limit yourself to one style of paintbrush.
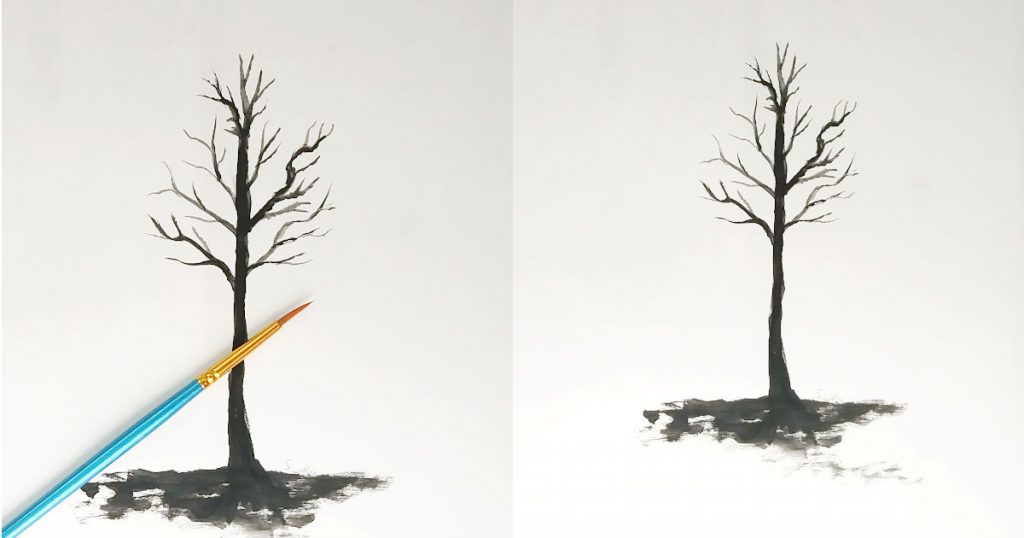
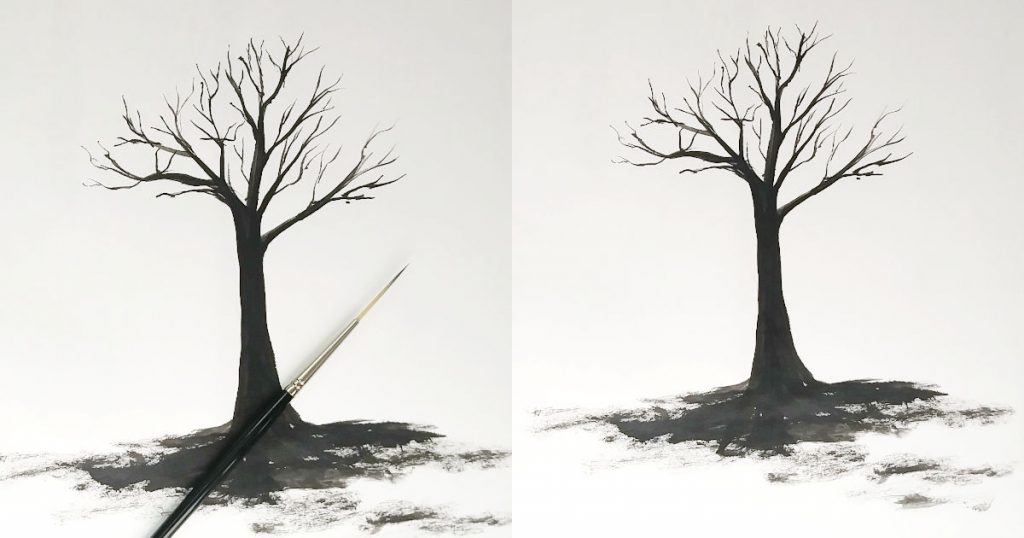
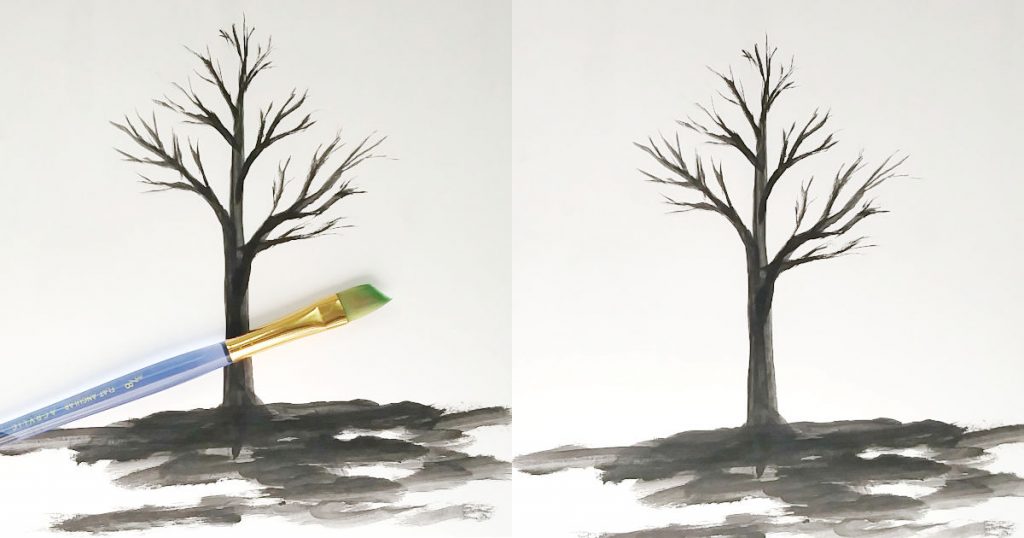
Before we get into it, you’ll probably notice that some of my limbs and branches are thicker than the one before it. I wanted you to see how your eye is drawn to it because, even subconsciously, we all notice when things are a little off. I also did it because I really want you to embrace the imperfect. Some of the best art out there is imperfect and doesn’t give two flying hoots to “the rules”. Don’t be afraid to embrace the out-of-place. It will give your art a unique look that will draw the eye.
Now, let’s take a look at some of the options you have for painting tree branches, including the round brush, and do some comparing.
Round Brush
So, let’s start with the most obvious option, the round brush. As you can see, you can make beautifully thin lines with this bad boy so it’s not surprising that it’s a popular choice when painting thin sticks and branches.
Script Brush
The script brush isn’t that different than the round brush but, you’ll notice, it does have much thinner bristles and they’re longer, as well. The script brush is fantastic to use when you want your tree limbs to be extra thin with lots of angles. It’s especially well-suited for painting spooky trees on a moonlit night! Just do yourself a favor, though, use a different brush to paint the trunk of your tree. You’ll thank me later…
Angle Brush
Lastly, we have the angle brush which, admittedly, isn’t the easiest of the three but it’s not terrible. If you use only the longest bristle of an angle brush, you can make some awesome thin tree branches. You’ll want to make sure the longest bristles are closest to you, though. Otherwise, you’ll end up crushing the longest bristles backward which will leave you with thicker branches.
Comparing the Brushes
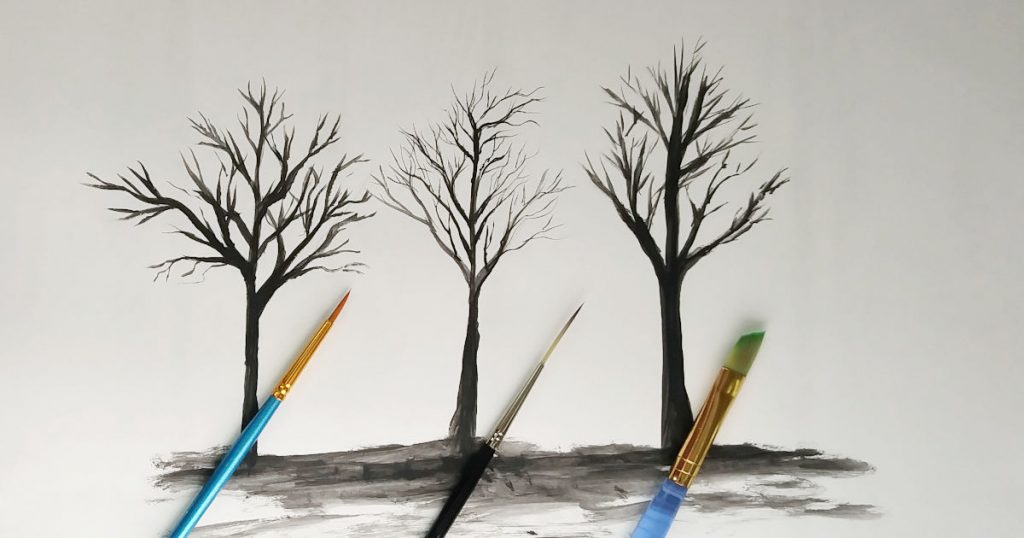
Each brush has a bit of a different twist on how the tree branches will look but all of them are great options the next time you decide you want to paint a tree.
In my opinion, the round and the script brushes are the easiest to work with. The angle brush works but you have to be able to control how straight you keep the bristles. If you even slightly tilt the brush, you’ll get a thicker line than you want.
If you have all of the brushes mentioned, it’s worth digging out a piece of scrap paper and practicing with each one so you can find which brush is going to feel most comfortable to use.
Common Tree Branch Painting Mistakes and How to Fix Them
There are some very common mistakes that all artists have made when trying to paint thin tree branches so don’t feel like you’re the only one! Remember we were all beginners at one time.
The Tree Branches Are Thicker Than The Trunk
I see this so often and it’s such a shame that it causes so many beginners to give up before they’ve even really gotten a good go on. So, here’s a very simple explanation of how a tree grows.
The trunk is the thickest part of the entire tree. Attached to the trunk you’ll have a few randomly placed branches that are a bit thinner than the trunk. Sprouting from each branch, you’ll have more branches that are thinner still and, from these branches, you’ll have even thinner branches, and so on.
That being said, go up and reread what I wrote in the above section, titled “Best Brushes…” Things don’t always have to be done within the confines of rules. Be a rebel and break a few, now and then!
However, if it’s really bugging you, and you’ve had this problem in the past, just remember that the pressure you put on your brush should continually lighten, as you move away from the larger branch, until you have complete liftoff. So, the amount of pressure you use when you start your new branch at the base, that’s the most pressure you’ll ever use on that particular branch.
Remember this little mantra: “Plant, drag, lift”
It also helps to work on tree branches in sections. After you’ve got the trunk painted, work on your largest branches, continue making thinner branches on one of your largest branches until you’re happy with the number of sticks and twigs you have. Once you’re satisfied move on to the next of your largest branches.
If you already have a WIP (work in progress) and you don’t want to start over, you have three choices:
- You can work your way backward until all of the branches you’ve already painted are thicker than the one before it (don’t forget to make the trunk thicker too!), or
- You can cut in with your background color and paint over the outside edges of the thicker branch, making it as thin as you like (but, remember, each branch that comes off of that branch has to get skinnier), or, lastly,
- You can paint over that section of the branch with lots of lovely leaves! Easy peasy and movin’ on!
The Tree Branches Don’t Look Natural
Most times, when I see this, it’s because the tree branches have all been curved and I’ve been guilty of this as well.
Don’t get me wrong, I love bright whimsical tree paintings where all of the branches curve and curl until they end in a thin point. So fun looking! In fact, I’ve got a fabulous wonky tree tutorial for you from The Art Sherpa but we’ll get to that in a bit.
If you are going for something that looks a bit more real, you’re definitely going to want to keep the curves to a minimum so you can have angles too. Most tree branches that I’ve seen in nature have sharp angles as well as a few curvy bits.
If you really study tree limbs, you’ll notice that the angles seems more pronounced on really thin tree branches and the curves are more likely to happen on the thicker branches. If you feel like you’ve got too many curves going on, don’t worry, this is an easy fix.
All you have to do is straighten out your branches wherever you see a curve that you don’t want. It’ll mean that your branches will be a bit thicker than you originally intended but that’s also an easy fix, using one of the methods I mentioned for fixing branches that are thicker than the trunk.
Another issue that will make tree branches look unnatural is if they are too symmetrical. Mother Nature knows that there is beauty in the imperfect and, so, to keep your tree branches looking natural, be random with your placement. One side may have more branches than the other because the sun only hits one side of the tree. Or maybe there are a ton of really small thin branches in one particular area of the tree. Maybe a tree branch is a lot longer than its neighbors or it is really skinny compared to the others.
All of those little imperfections are what make trees so interesting so try not to think too much about placement and keep it general. The more thought you put into your brushstrokes, the more precise it will look.
YouTube Recommendations for Painting Different Types of Trees and Branches
Of course, you could continue to practice on a piece of scrap paper but it’s so much more fun when you can practice while making a beautiful piece of artwork that you can give as a gift or display proudly in your home. Let’s look at some of my favorite YouTube tutorials that show you how to paint trees, branches, skinny twigs, and even leaves (useful for when you make a boo-boo and don’t want to paint one. more. #@%$ branch!
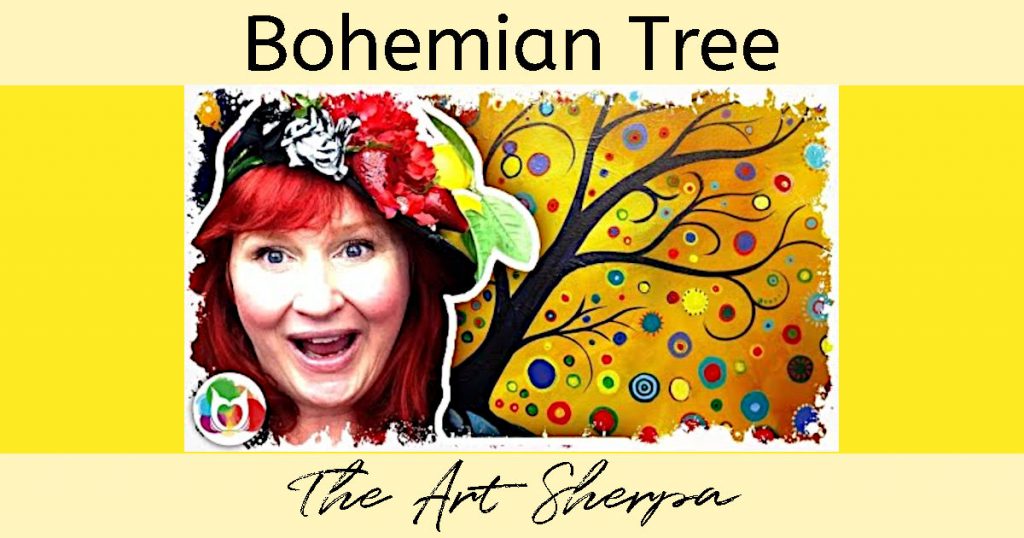
Let’s start with a really fun whimsical tree called “Abstract Bohemian Tree” by The Art Sherpa. This is a great little tutorial to get used to the proportions of thin branches, with thicker branches, and how that all relates to the tree trunk. Relax, grab a bunch of bright colors and get ready to curly-cue some tree branches!
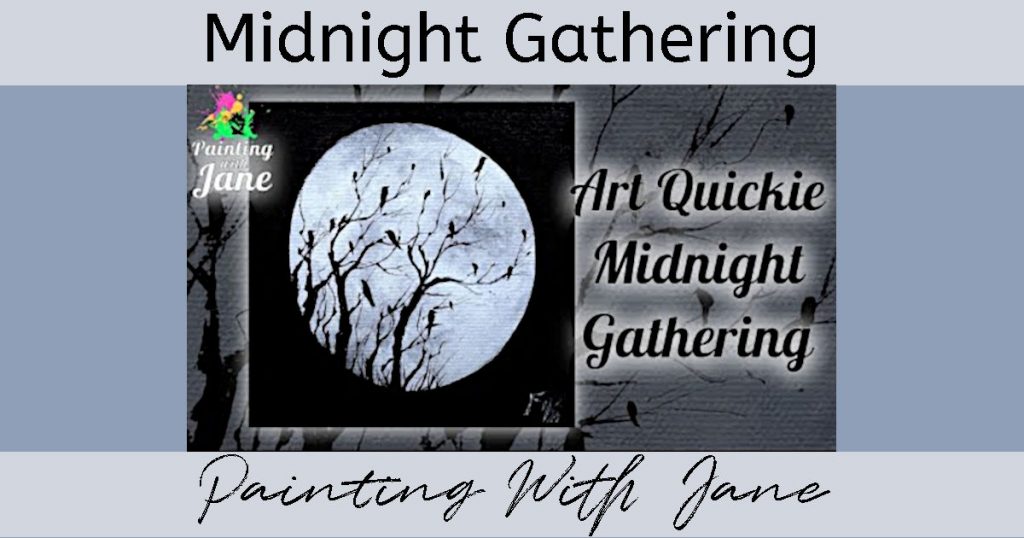
Next, we’ve got “Midnight Gathering” by Painting With Jane. If you want to practice using a script brush, this is the one for you! Not only that, this little painting has a limited color palette and the video is only 22 minutes long!
And, lastly, Joni Young is going to show you how to paint a “Colorful Tree in The City”. She uses a small filbert to paint her tree but you could use any one of the paintbrushes listed above. Joni shows you how staying loose and free with your brush strokes makes the best thin tree branches.

Final Thoughts on Painting Thin Tree Limbs
So, we’ve talked about different brushes, how to hold your brush, some common mistakes and how to fix them, why pressure matters, and why water is your BFF. All of these things will help you to up your skinny branch painting game by leaps and bounds!
In the end, it’s about practicing and becoming comfortable with your tools, as always.
What do you find most helpful to you when painting thin lines and branches? Let me know in the comments below.
Such great tips! Thanks so much for taking the time to share them with us. About to paint a tree very similar to your first photo and I’ve been very hesitant I’ve found about getting started. Now it doesn’t seem as daunting and more like something I could do and I’m actually excited to start painting.
Yay!!! That’s so awesome! You can totally do it. Just remember to be easy on yourself. Making mistakes is how we all learn and improve. You’ve got this!