Meet the Author

Artist | Owner of Squishing Paint | Educator - Sara brings over 40 years of creative experience, a decade of specializing in acrylic painting, and a passion for guiding new artists as they embark on their own artistic journeys


In this article, we’ll take a deep dive into everything vanishing point. This includes some examples of the vanishing point, how it relates to perspective, whether you can have more than one vanishing point, and more. But first, what the heck is it?
The vanishing point in art refers to the point where objects vanish into the distance along the horizon. It represents the furthest point from the viewer and is crucial to creating perspective in your paintings. The best example would be to think of a road that gets smaller as it moves off into the distance until you can’t see it anymore.
Ready to learn one of the best secrets to incredible art? Let’s do this!
Why Use A Vanishing Point In Art?
The vanishing point in art is a pretty important little guy. So much so that your paintings will look flat and boring without them.
The vanishing point may just be what you need if you’ve ever completed a painting only to find that it looked like a kid painted it.
Vanishing points are what transform a flat canvas and give it the illusion of a rich 3-dimensional scene.
That said, you can’t really talk about the vanishing point without talking about perspective.
The Connection Between The Vanishing Point And Perspective
Let’s start at the beginning. What is perspective? Perspective is when an artist uses different techniques to create depth on a flat surface.
For example, an object’s size, shape, or vibrancy can create perspective when compared to its surroundings.
Another way to give the illusion of depth is with linear perspective. This is when parallel lines get thinner and closer together until they reach the horizon line where they disappear….also known as, you guessed it, the vanishing point.
Examples Of The Vanishing Point In Images
Just to make sure you get it, let’s take a look at some photos with vanishing points.

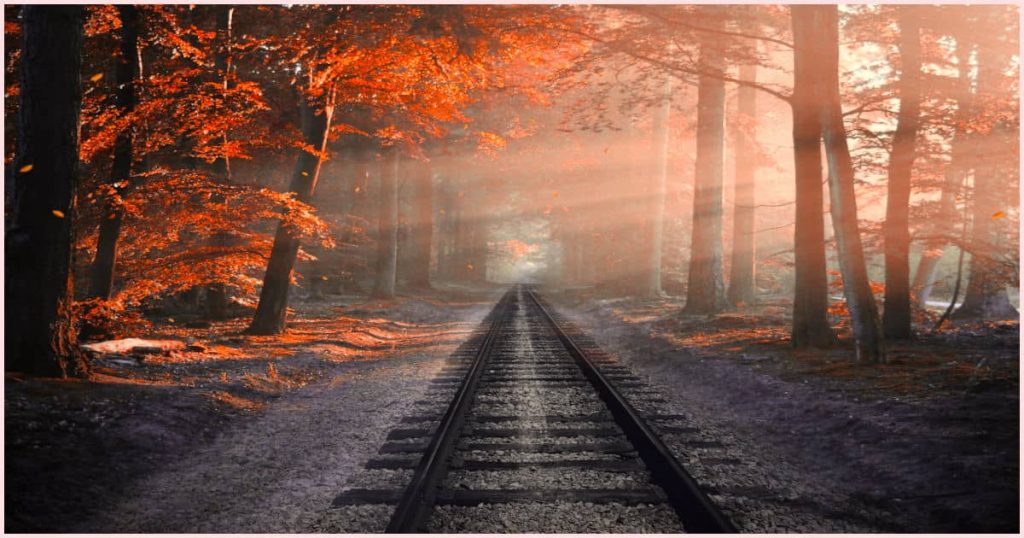
At the bottom of the photo, the snow covered path starts out wide but gets thinner as it moves up the image until it abruptly ends. As you can see, there’s a distance between where the photographer stood and where the pathway leads.
You get the illusion of depth from the narrowing path. Keeping the path the same width would make it look like it’s climbing up instead of away.

If you can tear your eyes away from that gorgeous turquoise water, you’ll notice some footprints in the sand. Do you see how they get smaller the further away they are from the photographer?
How about the beach? Notice how it gets smaller and curves around until it disappears? That’s the vanishing point!
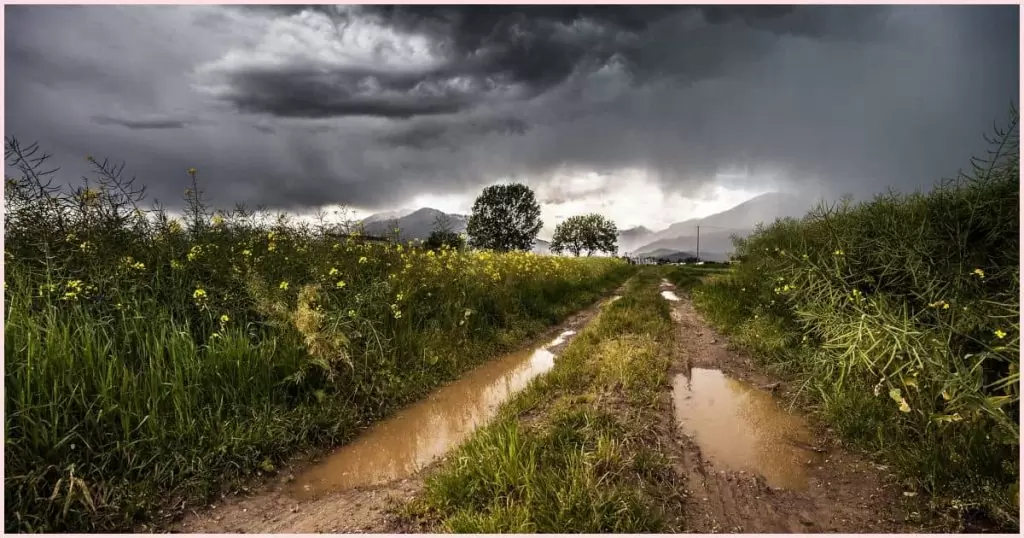
This image of an overgrown country road shows muddy ruts getting thinner and closer together until they’re mostly hidden by grass.
This is a great example of how you don’t necessarily need two stark lines converging on a well-defined horizon. You’ve got yourself some perspective with a vanishing point if you paint linear objects that get thinner and closer together until they meet a horizon, my friend!
How To Create A Vanishing Point

Painting a vanishing point is super easy when you break it down to its bare bones. It’s just a horizon line and choosing where you want your vanishing point to be. As you move away from the horizon line, make a thin line (or multiple lines) that gradually widens and thickens.
It’s really that simple. It’s a sign you’ve done it right when you can look at your painting and feel like you can walk into it and travel somewhere far away. I know it sounds weird, but it works!
It still takes a vanishing point to achieve depth with something like a winding river or curved road. You’ll start at the vanishing point with one curved line that splits in two and thickens while angling away from each other. Just make sure the curves in one line match the curves in the other. One of your lines shouldn’t be really curvy while the other is more or less straight.
Can You Have More Than One Vanishing Point?
You can absolutely have more than one vanishing point in art. There is something called one-point, two-point, and three-point perspective and the number of points are all vanishing points. So, how does it work then?
The Vanishing Point In One-Point Perspective
One-point perspective has one vanishing point where all objects become smaller and closer together until they all disappear at the same point.
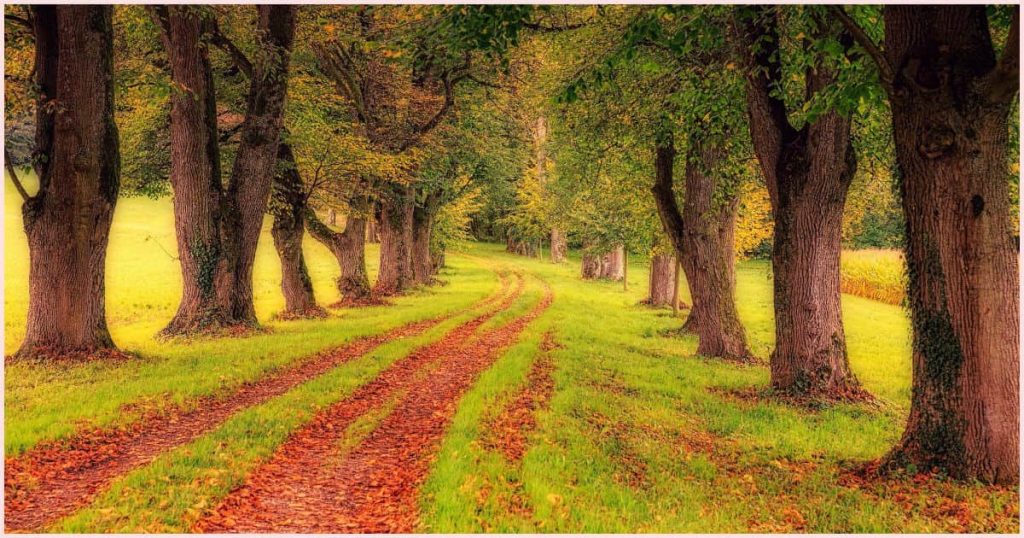
Say you’re looking at a picture that has a straight road, a fence, and trees behind the fence. When viewed from one-point perspective, all of these objects would become smaller and closer together until they disappeared on the horizon line at the vanishing point.

The Vanishing Point In Two-Point Perspective
There are two different vanishing points along the horizon line in two-point perspective. The vanishing points on your canvas can be anywhere along your horizon line. However, for the purposes of this example, the vanishing points are equal in distance from the edges of the canvas.
Let’s pretend we’re planning to paint a building with cobbled streets on either side. Since we want to show two sides of the building, we don’t want to paint it straight on.
As a result, we need to show a corner of the building as the closest part to the viewer. But, in order to appear like our house is receding down either cobblestone lane, how do we make the correct angles?
Here is how you would go about getting some epic perspective:
- Grab some chalk and a ruler.
- Start with your horizon line.
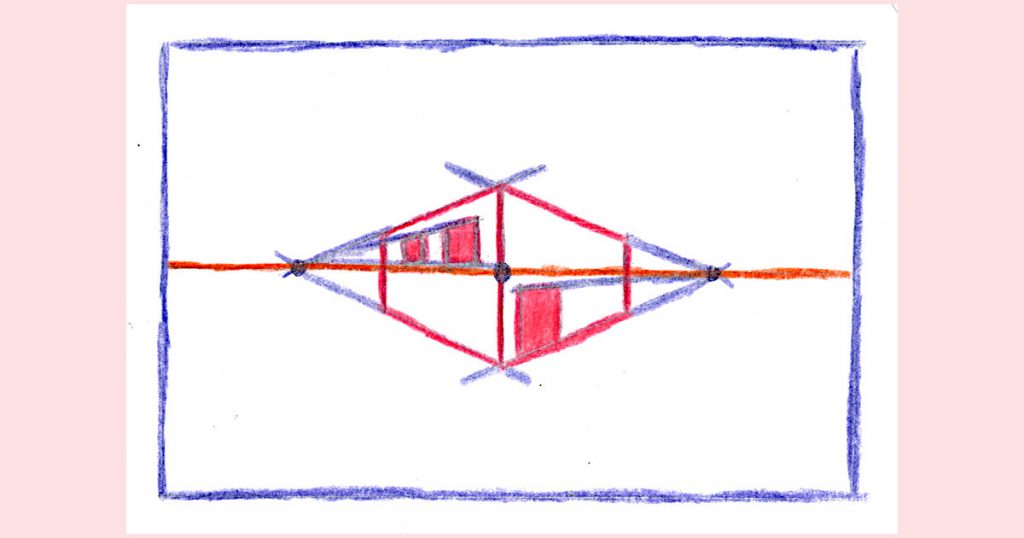
- Place a dot where you want your two vanishing points near both edges of the canvas (this can be any distance away from the edge as you want but make sure that both vanishing point dots are the same distance from both edges).
- Put another dot in the center, between the two vanishing point dots, and use your ruler to make a vertical line up and down your canvas (this will be the corner of your house and the tallest part so only make your line as tall as you want your building to be).
- Draw a line from one of your vanishing points at an upward angle until you’ve reached the point that will become the tallest part of your building.
- Draw another upward angled line from the other vanishing point on the horizon until it meets with your first line (this will be the top edge of your house).
- Now, draw another line from one of your vanishing points until it connects with the bottom of your straight line and do the same thing for the other vanishing point.
- At this point, you can decide how far back you want your building to extend by drawing a vertical line between the upper angled line (that forms the top edge of your house) and the bottom angled line (that forms the bottom edge of your house) further back toward your horizon line. Make a straight line from the top intersection (where the vertical line touches the top most angled line) and extend it across to the other upward angled line. Where these two lines meet, make a vertical line downward until it touches the bottom line of your building.
- You now have the dimensions of your building and can go ahead and erase the chalk lines that you no longer need.
- To add windows and doors, you just need to make more angled lines either upward or downward from your vanishing points (this will depend on whether your windows and doors are below the horizon line or above. Anything below the horizon line angles downward and anything above the horizon will go at an upward angle).
Extra Tips:
- Where you place the vanishing points on your horizon will determine how wide or thin your building will be. If you place your two vanishing points very far apart, the building will be quite wide and take center stage. If you decide you want a skinny house, just place the two vanishing points closer together on the horizon.
- If you want one side of your building to be shown more than the other, move your center dot closer to one of your vanishing point dots on the horizon
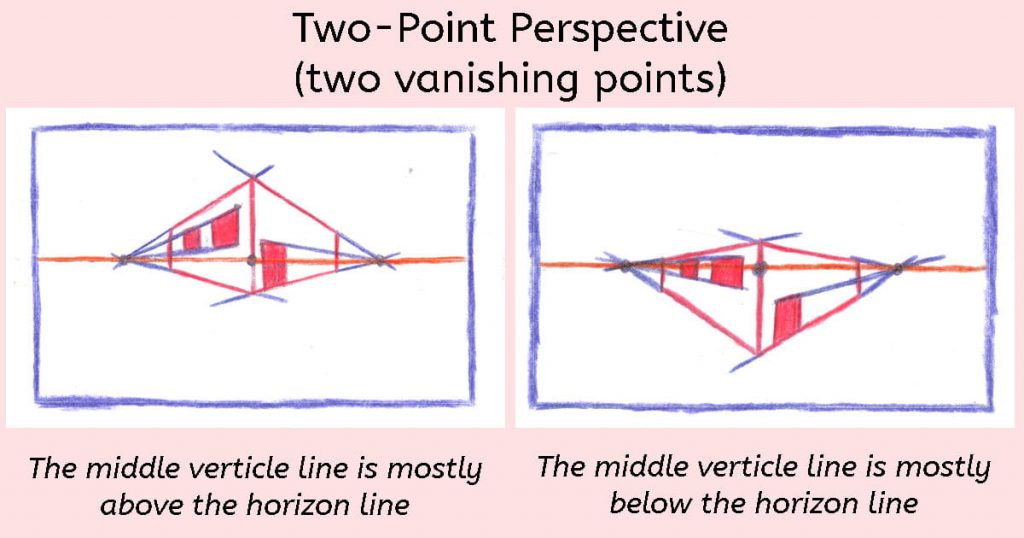
- Making the middle vertical line equal in length on either side of the horizon line will give the illusion that you are viewing the building from eye level
- Play with that middle vertical line that will make up the front corner of your building (make the line longer going up from the horizon line than the line that extends down and vice versa. This will change the perspective of the building vertically)
The Vanishing Point In Three-Point Perspective
Let me first say that three-point perspective is not used as often as the other two when it comes to painting. We trigonometry-challenged people are probably glad about this, am I right?! Let’s all take a deep breath and try to get through this without our brains exploding.
Say you’re on a balcony looking at a building that’s lower than your vantage point, and the corner of the building is facing you.
Not only would you have the sides of the building that narrow as they get further away from you but the further the building drops down, the thinner it gets, as well.
Let’s break this down into three-point perspective:
- The left side of the building narrows the closer it gets to the vanishing point on the left
- The right side of the building also becomes thinner as it gets closer to the vanishing point on the right
- The bottom of the building gets thinner as it descends to its vanishing point
Extra Tip:
- If you look at our building example, from the two-point perspective discussion, you can see that you can use the top or bottom of that middle vertical line to create a vanishing point for three-point perspective
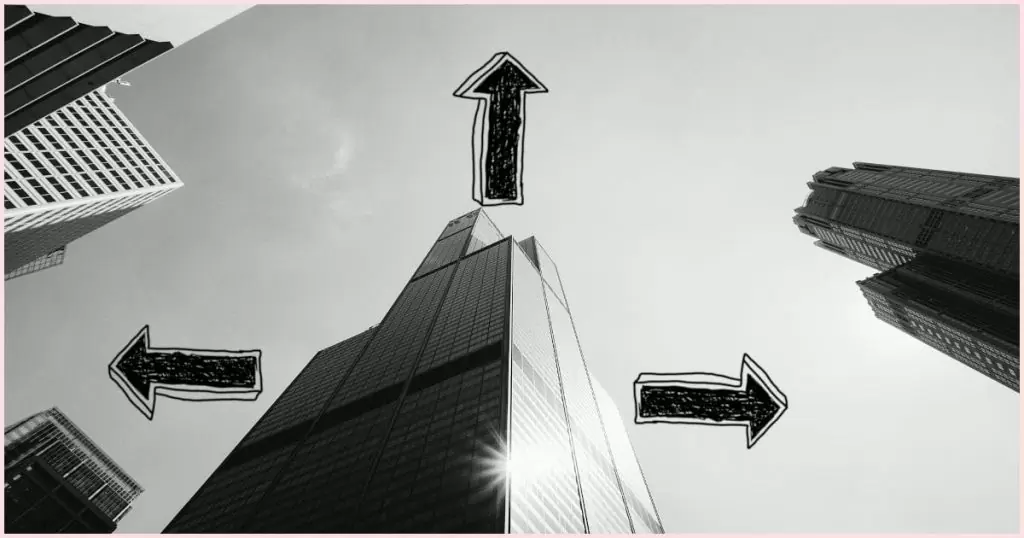
In this image, look at how the building narrows in the direction of the arrows
Final Thoughts On Creating Depth With Vanishing Points
Congrats on discovering how to incorporate a vanishing point in art! You’ve learned why it’s an important concept, how to use it to improve your future paintings, and you even learned how to use them to manipulate the different angles of perspective. That’s awesome!
Remember, you’re just connecting angled lines to dots strategically placed on a horizon line. It really is that simple, but don’t be fooled, it will take practice.
If you’ve ever wanted to paint buildings (or pretty much anything) with interesting angles, you now know how!
Let your painting buddies know how to paint perspective using vanishing points if you found this info helpful.