Meet the Author

Artist | Owner of Squishing Paint | Educator - Sara brings over 40 years of creative experience, a decade of specializing in acrylic painting, and a passion for guiding new artists as they embark on their own artistic journeys


Some of the links in this article are affiliate links which means that if you choose to click on them and make a purchase, I earn a small commission at no extra cost to you.
Also, as an Amazon Associate, I earn from qualifying Amazon purchases.
For more details, please read the full disclosure here.
Thanks so much for your support!
Hey there, future acrylic Picasso! I’m guessing you’re here because you’re curious about how to use acrylic paint. This simple guide will have you wielding that paintbrush like a pro in no time – no fancy art degrees required!
Acrylic paint is a fantastic medium. It comes in a variety of colors, dries quickly, is super versatile, and is really easy to fix if you make a mistake. And, knowing how to use acrylic paint is as easy as choosing the right supplies, making sure you have plenty of water handy, understanding the drying time, and finding good instructions to learn different techniques. The rest will come with practice.
In this article, we’ll cover the basics but I’ll hook you up with other resources that go more in-depth into all things acrylic painting. Ready to get this party started? Let’s go!
What Is Acrylic Paint?
Acrylic paint is a versatile water-based paint that artists love using for its quick drying time and easy clean-up with water.
It’s a colorful concoction of suspended pigment particles in an acrylic polymer emulsion, which makes the paint durable and flexible when dry. This is important because it means it won’t easily crack or yellow over time, ensuring your artwork lasts.
Acrylics come in tubes, bottles, jars, cans, and even pens with various colors and thicknesses to suit different techniques and budgets. You can use it on canvas, paper, wood, and more. Brushes, palette knives, and even household items, such as sponges, plastic wrap, paper towel, and toothbrushes, can create different textures and effects.
Let’s Talk Tools For Acrylic Painting
If you want to know how to use acrylic paint, you’re going to want to understand which tools will give you the best chance of success. This is because the tools you use with acrylics are just as important as the techniques you’ll learn and use.
That said, you can use just about anything as a painting surface or a brush so don’t let price be a deterrent for you. In fact, I started out with craft paint, brushes from the dollar store, and cardboard! I mean, you can even use your fingers to create a beautiful piece of art but I’m guessing you want to get your hands on some canvases and brushes, am I right?
Painting Surfaces
It’s always fun to experiment with different materials to see how they affect the final artwork. While canvases are a popular choice, you don’t necessarily need to rush out and buy anything fancy. There are many options you might already have around the house or that are budget-friendly.
For example, if you prefer a rigid surface, a thick piece of cardboard can work surprisingly well with acrylics. It offers a smooth surface and is quite durable. In fact, I use cardboard quite often in my own art practice so if you’re interested in how that works, take a peek at my article that shows you how to paint on cardboard.
If you want something a bit textured, try using watercolor paper or mixed-media paper. These surfaces can handle acrylic paints and give your artwork a unique touch. I personally love the Canson 9×12” Mixed Media Pad. I use it to save space and try new techniques before committing it to canvas.
I also use white card stock paper quite often because it’s affordable, easy to find, doesn’t take up much room, and I can punch some holes in it and add it to an ongoing artwork binder if I want. Actually, cardstock paper is what I use to make my paint chips when experimenting with mixing paint colors. There is a bit of a learning curve when learning how to use acrylic paint on paper so you’ll definitely want to check out my article that shows you how to paint on paper.
Another neat idea is to recycle old materials. I’ve had great experiences painting on wooden planks that my husband, who’s a carpenter, brings home for scrap and, also, painting on the inside part of cracker boxes.
With that said, if you have your heart, and budget, set on buying some brand new painting supplies, here are some of the best surfaces to consider:
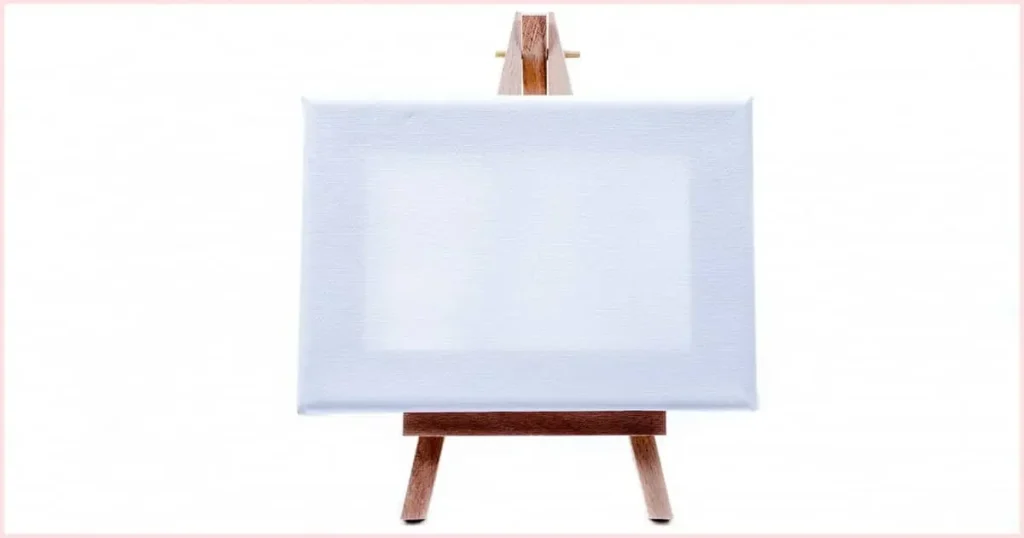
- Canvas: Stretched canvas is a classic and popular choice for acrylic painting. It comes in various sizes and provides a sturdy and flexible surface that can handle the weight of acrylic paint and different painting techniques.
- Acrylic Paper: Acrylic paper is specifically designed to withstand the moisture and thickness of acrylic paint. It has a textured surface that enhances paint adhesion.
- Wood Panels: Wooden panels offer a durable and rigid surface for acrylics, providing a stable base for your artwork.
- Mixed Media Paper: Mixed media paper is a versatile option for acrylic painting, as it can handle various techniques and mixed media applications. It’s usually thicker and can handle the wetness of acrylic paint. It’s my fav!
- Watercolor Paper: Heavier weight watercolor paper (at least 140 lb/300 gsm) can work well with acrylics, especially if you prefer a more absorbent surface that allows for blending and layering.
- Canvas Panels: Canvas panels are an affordable alternative to stretched canvas. They consist of canvas wrapped around a rigid board, providing a stable surface for your acrylic creations. And, I have actually framed them, with matting, behind glass.
- Canvas Pads: Canvas pads contain sheets of canvas “paper” bound together like a sketchbook. They are convenient for practicing, experimenting, and creating small acrylic paintings.
Each surface will behave differently so keep that in mind when choosing. If you don’t like one of the options, give another one a shot. The most important thing is to keep experimenting and playing with your paint so you can learn what works best for you.
Brushes, Palette Knives, And More
As a beginner at acrylic painting, choosing the right brushes can make your artistic journey much easier and more enjoyable. But, take my word for it, you can literally paint with your fingers and I have a whole article dedicated to some of the best finger painting tutorials for adults using acrylics if you’re interested. Also, if you want to try your hand at a palette knife painting but don’t have one, no worries, you can use any thin piece of plastic, like an old library card or credit card.
That said, learning how to use acrylic paint with paintbrushes is something you’re eventually going to want to try so I’ve got a few tips to help you make the right choice when you’re ready to level up.
- Go For Synthetic Bristles (or at least a blend of synthetic and natural) – Synthetic bristles are the best option for acrylic paint because they don’t hold as much water as natural bristles. Yes, you want to have some water in your paintbrush so your paint will glide over the surface better but you don’t want so much that it’s dripping and thinning out. If your paint is too thin, you can run into an issue with “under binding”, which is when the water breaks down the binders in the acrylic paint causing it to not cover as well as it should, lift and peel when handled, or to not adhere to the the surface well which can lead to cracking or flaking over time.
- Stiff Bristles – In most cases, not all, you’ll want your brushes to have stiff bristles but this will depend on the technique you’re hoping to accomplish. Stiff brushes can hold thicker acrylic paint better and give you more precision and control. On top of that, they allow you to lay down the paint thickly and blend them without having to overwork and potentially end up with muddy colors. On the other hand, it’s nice to have a mop brush with softer bristles for times when you want to create a soft blend, such as a gradient or an out-of-focus background. FYI: You can also use a blush or powder makeup brush instead of a mop brush and get the same effects.
- Consider Handle Length – You wouldn’t think it but the length of the handle actually matters quite a bit. Shorter handles are great when you’re trying to do fine detailed work whereas longer handles are the best for painting loosely because it allows you to stand back, and hold the brush further away from the bristles while painting. This automatically makes you paint in a looser, more freeing way which is perfect when trying impressionist or abstract styles.
- Think About Sizes – Acrylic paint brushes come in a ton of sizes for each shape so I always recommend that people choose their painting surfaces first before committing to brushes. There’s nothing worse than only having small brushes to work a large canvas. And forget about blending a large background with small brushes! Your acrylic paint will dry long before you get a chance to create a smooth blend. So, when choosing sizes, make sure you have at least one that’s big enough to cover the entire surface if needed and one that’s small enough to do any detail work. Again, it’s all going to depend on the size of the painting surface.
Finally, let’s talk about some of the best brush shapes for beginners:
- Flat Brushes: Flat brushes have a square edge, making them versatile for various painting techniques. They are excellent for broad strokes, filling in large areas, and creating straight lines if they have a sharp chiseled edge.
- Round Brushes: Round brushes have a pointed tip and are great for creating fine lines, details, and precise work. They are also useful for blending and adding intricate elements to your artwork. I actually love using round brushes to paint evergreen trees.
- Filbert Brushes: Filbert brushes have a rounded, flat shape, combining the characteristics of flat and round brushes. They work well for blending, soft edges, and creating organic shapes. I especially love using them when painting flower petals.
- Angle Brushes: Angle brushes have bristles cut at an angle, forming a slanted edge. They are perfect for controlled strokes, sharp lines, and adding details with a different angle. Just make sure they have a nice chiseled edge so you can get really thin lines.
- Detail Brushes: Detail brushes have very fine, pointed tips, ideal for intricate work, tiny highlights, and fine details. They are perfect for adding those delicate finishing touches to your painting. These are the ultra small brushes you’ll see in the art supply aisle.
As a beginner, you don’t need an extensive brush collection. Start with a few essential shapes, such as a flat brush, a round brush, and an angle brush, and gradually expand your collection as you gain confidence and experiment with different techniques.
However, if you have the funds, playing around with a mop brush is worth looking into. Mop brushes are usually soft and are great for blending a hazy background. If you can’t afford a mop brush, you can also use a fluffy blush or powder makeup brush.

Other Materials You Need For Acrylic Painting
If you’re determined enough, you won’t need much more than what we’ve already covered to learn how to use acrylic paint. However, there are a few things that will make your painting experience much more enjoyable.
- Palette: A palette is essential for mixing and blending colors. You can use a disposable paper palette pad or a reusable one made of plastic or glass. Your other option is to use an old plate that you’re okay to part with. Once you use it for painting, you shouldn’t use it for food.
- Water Container: Acrylic paints are water-based, so you’ll need a container for water to clean your brushes during the painting process. I really like using mason jars because I can put the lids on in between painting sessions.
- Easel (optional): While not essential, an easel can help you maintain good posture while painting. It also allows you to work with the canvas at an appropriate angle. That said, you can definitely paint flat like you would if you were coloring.
- Rags or Paper Towels: These are handy for cleaning brushes, wiping off excess paint, and correcting mistakes. I always have a few old facecloths strewn about my art desk.
- Palette Knife: A palette knife is useful for mixing paints and applying thick textures to your artwork. Again, if you don’t have one you can always use a thin piece of plastic.
Acrylic Paint Dries Fast
The fact that acrylic paint dries fast is a blessing and a curse, depending on what you’re trying to achieve. Let’s take a quick looks at some of the pros and cons.
| Pros | Cons |
| Efficient Workflow: Quick drying allows for faster completion of artwork. | Limited Blending Time: Less time to blend and work with wet paint on the canvas. |
| Layering: Multiple layers can be added in a single session without waiting long. | Texture Buildup: Rapid drying can lead to unintended texture buildup on the canvas. |
| Varnishing Sooner: Artwork can be varnished or sealed relatively quickly. | Limited Wet-in-Wet: Wet-in-wet blending techniques are more challenging due to fast drying. |
| Reduced Smudging: Lesser chance of accidentally smudging the painting while working. | Lifting: Paint can lift off canvas from overworking an area that has already started to dry. |
| Quick Turnaround: Suitable for artists who need to create and deliver artwork promptly. | Difficulty with Large Works: Rapid drying can be challenging when working on larger pieces. |
| Easy Storage: Artwork dries faster, allowing for easier storage or transportation. | Palette Cleanup: Paint can dry on the palette quickly, making cleanup during a painting session important. |
Water
Water is commonly used with acrylic paint. Acrylic paint is water-based, which means it can be thinned and cleaned up with water. Here are two primary ways water is used with acrylic paint:
- Thinning: Acrylic paint can be thinned with water to achieve different effects. Adding water to acrylic paint makes it more translucent, allowing you to create washes, glazes, and subtle color variations. Thinning the paint also helps with smoother brushwork and blending.
- Cleaning Brushes: After painting, you can clean your brushes by rinsing them with water. Acrylic paint dries quickly, so it’s essential to clean the brushes promptly to prevent the paint from hardening on the bristles. You can learn more by reading my article which teaches you how to clean your paint brushes properly.
Acrylic Mediums
While water is the most common medium for acrylics, there are other mediums available that can alter the paint’s properties. For instance, acrylic medium or retarder can extend the drying time.
My favorite medium is Golden’s Liquid Glazing Medium. It comes in both a glossy and satin sheen. I’m most familiar with the glossy glazing medium, and although it will most likely be glossier than the paint you use, I always varnish my finished paintings so that the sheen is cohesive throughout.
Bonus Trick
Got a hair dryer? Use it on the lowest heat setting to dry the paint on your canvas faster. Just remember to keep it moving all over the canvas. You can burn acrylic paint if you aren’t careful.
Get more information about working with the dry times of acrylic paint in my article that goes into how to speed it up, slow it down, and everything else I know.
Acrylic Paint Consistencies
Acrylic paint comes in various consistencies, each designed to serve different artistic techniques and purposes. The main consistencies of acrylic paint are:
- Heavy Body: Also known as “thick” or “buttery” acrylics, heavy body paints have a dense, high-viscosity consistency. They hold their shape well when applied with a brush or palette knife and are ideal for creating impasto (thickly textured) effects and retaining brushstrokes.
- Soft Body: Soft body acrylics have a lower viscosity compared to heavy body paints. They are creamy and smooth, making them suitable for a wide range of painting styles, from fine details to more fluid and flowing techniques. Soft body acrylics can be thinned easily to achieve washes and glazes.
- Fluid: Fluid acrylics have the thinnest consistency among acrylic paints. They are highly liquid and can be poured or dripped onto the canvas. Fluid acrylics are commonly used for pouring techniques.
- Acrylic Ink: Acrylic ink is the most fluid and transparent form of acrylic paint. It resembles traditional ink but is water-resistant when dry. Acrylic inks are commonly used for drawing, calligraphy, airbrushing, and various mixed-media techniques.
- Open Acrylics: Open acrylics are a specific type of acrylic paint formulated to have a longer drying time than standard acrylics. They combine characteristics of heavy body and soft body paints, allowing for more extended working time and easier blending.
- Acrylic Spray Paint: Acrylic paint is also available in aerosol spray cans. Acrylic spray paint is convenient for covering large areas quickly and is commonly used in street art, graffiti, and for creating backgrounds.
Each consistency of acrylic paint offers unique properties, allowing artists to experiment with different techniques and achieve various artistic effects. Choosing the right consistency depends on your preferred painting style and the specific results you want to achieve in your artwork.
As a beginner, I highly recommend starting with heavy body or soft body acrylic paints. It’s the most popular and the majority of YouTube tutorials will work well with either option.
How To Use Acrylic Paint: Grades/Levels
Acrylic paint comes in different grades, which generally reflect the quality and price of the paint. The two main grades of acrylic paint are:
- Artist Quality (Professional Grade): Also known as “artist grade” or “professional grade,” this is the highest quality acrylic paint. It contains a higher concentration of pigment, resulting in richer, more vibrant colors and better coverage. Artist quality acrylics can also have a higher lightfastness, meaning the colors will resist fading over time. These paints are designed for professional artists and serious hobbyists who want top-notch performance and longevity in their artworks. My favorite professional grade acrylic paint is made by Golden Artist Colors.
- Student Quality (Student Grade): Also referred to as “student grade” or “economy grade,” this type of acrylic paint is more affordable and suitable for beginners, art students, and artists on a budget. Student quality acrylics contain a lower pigment load, making them less intense and slightly less opaque than artist quality paints. While they are still of decent quality, student-grade paints may have lower lightfastness and not hold up as well over time compared to artist-grade paints. You really can’t go wrong with either Liquitex Basics or Arteza Premium. Both have great pigment load and are super easy to work with. There are some colors that you’ll have to re-coat to get the deepest coverage but the same can be said if you water down a professional paint, at least in my experience.
It’s important to note that while there is a distinction between artist quality and student quality acrylics, some manufacturers offer a wide range of options within each grade. These may include specialty lines like “professional quality acrylics” or “economy acrylics.” Additionally, some brands offer a mid-range or “intermediate” quality that bridges the gap between artist and student grades.
Be aware, when buying acrylic paint, you may notice that prices vary widely within the same brand. This is due to the pigments used. Specifically, how easy they are to obtain and the cost associated with manufacturing.
A Word About Acrylic Craft Paint
Acrylic craft paint is not typically considered a specific “grade” in the same way as artist quality or student quality acrylic paint. Instead, it is generally categorized as a separate type of acrylic paint intended for crafting and hobby purposes.
Acrylic craft paint is often more affordable than artist or student quality paints, and it is widely available in craft stores and hobby shops. Craft paints often have a lower pigment concentration, which can result in less vibrant colors and lower coverage compared to artist quality acrylics.
They can also have different properties, such as being washable or having a glossy finish, to cater to specific crafting needs. They’re super popular among hobbyists, DIY enthusiasts, and young artists due to their ease of use, lower cost, and availability. In fact, it’s what I started with and what I suggest when budget is an issue. My favorite brand is DecoArt in both the Americana line and the Dazzling Metallics.
If you want to see a few different types of acrylic paint go head-to-head, check out my acrylic paint types article.

Learning Painting Skills And Techniques
The best place to learn how to paint with acrylics can vary based on individual preferences, learning style, and access to resources. Here are some popular options to consider:
- Art Classes or Workshops: Look for local art studios, community centers, or art schools that offer acrylic painting classes or workshops. In-person classes provide hands-on instruction, immediate feedback, and the opportunity to interact with fellow artists. In my area, the local art center has a variety of scheduled classes you can sign up for all year long.
- Online Art Courses: Numerous online platforms offer comprehensive acrylic painting courses. Websites like Udemy, Skillshare, and Coursera have a wide range of courses taught by experienced artists that you can access from the comfort of your home.
- YouTube Tutorials: YouTube is a vast resource for free acrylic painting tutorials. Many skilled artists share their techniques and tips through video tutorials, allowing you to learn at your own pace. My favorite beginner friendly art instructors with channels are Painting With Jane, The Art Sherpa, and Michelle The Painter.
- Books and Instructional DVDs: Consider purchasing books or instructional DVDs specifically focused on acrylic painting. These resources often include step-by-step instructions, tips, and examples of various acrylic painting techniques. I do suggest you start small with books that teach one specific thing. One of my favorite books is “101 Textures in Oil & Acrylic” by Mia Tavonatti. It concentrates on creating a variety of textures from fur and feathers to metals and fabrics. It’s a fantastic book!
- Art Forums and Social Media: Engage with the online art community through forums like Reddit’s r/learnart or various art-related groups on social media platforms. You can ask questions, share your progress, and receive feedback from fellow artists. Make sure to search for Face Book groups geared toward beginners in acrylic painting. You’re more likely to find a supportive group who are more than willing to help you along your art journey.
- Practice and Experimentation: Alongside formal instruction, remember that practice and experimentation are crucial in improving your skills. Set aside time to paint regularly, try out different techniques, and don’t be afraid to make mistakes—learning from your experiences is part of the process. This is where an art journal or a binder filled with card stock comes in handy. This is where you can free yourself to just play with your paint and let go of perfectionism. No one needs to see your practice pieces unless you want them to. Plus, it’s just paint! If you really don’t like your finished project, paint over it and try again or move on.
FYI: The most challenging things to paint for beginners are clouds, water, and blended backgrounds. Don’t get me wrong, you can totally learn how to do all of these things but, time and time again, these seem to be the biggest frustration points for beginners. If you want to learn how to blend acrylic paint, I’ve got an article that will show you different ways to achieve amazing blends.
Final Thoughts About Using Acrylic Paint For The First Time
In conclusion, learning how to use acrylic paint can open up a world of creativity and artistic expression, not to mention a bit of relaxation every day.
All you need to get started are acrylic paints, brushes, and a surface to paint on. Also, don’t forget a palette and water container for mixing and cleaning. If you’re unsure about techniques, there are plenty of resources available, from in-person classes and online courses to YouTube tutorials and art forums or groups.
As you dive into the world of acrylics, you’ll discover new ways to blend colors, build layers, and create stunning effects. Whether you’re aiming to capture realistic landscapes or exploring abstract forms, acrylics offer endless possibilities for every artistic vision.
Remember, the key to mastering acrylic painting is practice and experimentation. Don’t be afraid to try different styles, play with textures, and explore various consistencies of paint. Embrace the journey and have fun with the process—making mistakes is part of the learning experience!
This article was so helpful, I have honestly been searching & searching for information about painting & when I found your website I was extremely excited words can’t explain how I felt after days & days of research! So far I have learned more on one of your articles that I had to piece together off of like four other websites!
So helpful & so thankful!
Cannot wait to read more of your articles & use your awesome tips & tricks!
Thank you so much!
Woohoo! You’ve just made my whole month! My goal is to make it super easy for my painting pals to get to the fun stuff. Basically, I’m the one who gets the best info under one roof and you get to just relax and paint. So glad you dropped by!